Studio One может сразу открываться в студии, готовой к записи — с помеченными вокальными дорожками, вокальным шиной, отфильтрованными FX-возвратами и cue-миксами, которые естественно звучат в наушниках. В этом руководстве показано, как правильно устанавливать шаблоны, где они хранятся и как создавать чистую, повторяемую раскладку для вокала. Вы узнаете о шаблонах песен и пресетах дорожек, мониторинге с низкой задержкой с помощью Green Z/cue-сендов, двухдорожечной вариации бита и быстрых исправлениях, когда что-то идет не так.
1) Менталитет шаблона в Studio One (то, что вы действительно сохраняете)
Шаблон — это ярлык для проверенной настройки. В Studio One есть два основных варианта:
- Шаблон песни — полноценная основа проекта. Появляется на Стартовой странице в разделе Новая песня. Включает дорожки, шины, FX-каналы, цвета, настройки клика, маркеры и cue-миксы.
- Пресеты дорожек/каналов — пресеты на уровне дорожек для быстрой вставки в любую песню. Отлично подходят для «Lead Vox», «Doubles Tight», «Ad-libs Phone» или полного «Vocal Stack», сохранённого как Multi Instrument/FX цепочка.
Держите один-два шаблона песен (вокал поверх 2-треков, полные стемы) и небольшую библиотеку пресетов дорожек по ролям. Вы будете работать быстрее, не привязываясь к одной раскладке.
2) Где хранятся шаблоны (чтобы не гадать с путями)
Вам не нужно искать системные папки. Используйте встроенные команды и позвольте Studio One управлять расположением:
- Сохранить как шаблон из любой открытой песни; он появится в Стартовая страница → Новая песня → Пользователь.
- Пресеты дорожек/каналов сохраняются и загружаются из раздела Presets браузера. Щёлкните правой кнопкой по каналу, чтобы сохранить или загрузить.
- Общие копии — это просто файлы .song и пресеты. Заархивируйте папку шаблона с любыми пользовательскими IR или сэмплами в соседней папке «Template Assets», и вы сможете переносить их.
3) Установите маршрут A — Сохраните песню как шаблон (ежедневный путь)
- Откройте чистую песню и создайте нужную вам раскладку (см. разделы 6–7 для подключения и цепочек).
- Перейдите в Файл → Сохранить как шаблон…. Назовите его понятно, например, Vocal_Record_48k или Dubs_2Track_48k.
- При желании добавьте изображение и описание, чтобы быстро находить его на стартовой странице.
- В следующий раз выберите Новая песня → Пользователь и выберите ваш шаблон. Сразу Сохраните как… новую папку с именем
Artist_Song_YYYY-MM, чтобы мастер оставался нетронутым.
Почему это работает: Стартовая страница становится вашим «выбором шаблона», и вы никогда не трогаете системные пути.
4) Установите маршрут B — Пресеты дорожек/каналов для быстрого добавления (дорожки по требованию)
Иногда вы уже в сессии клиента и вам нужны только вокальные дорожки. Используйте пресеты дорожек/каналов:
- В вашей лучшей вокальной сессии выберите ведущую дорожку (или суммированный/шиновый канал, если используете). Щёлкните правой кнопкой по заголовку канала → Сохранить пресет. Назовите его LeadVox_StockClean или LeadVox_Punch.
- Сделайте то же самое для Doubles Tight, Ad-libs Phone и вашего Vocal Bus.
- В любой песне перетащите их из раздела Presets браузера на существующие дорожки или щёлкните правой кнопкой по каналу и загрузите.
Полезный совет: Сохраните «Vocal Stack» как пресет папки/шины, если предпочитаете загружать весь комплект сразу.
5) Установите маршрут C — Общая «мастер-копия» (перетащите, дублируйте, используйте)
Команды часто хранят простой master .song в общей папке:
- Создайте Template — Vocal Record — 48k.song с вашими дорожками и маршрутизацией.
- Дублируйте этот файл для каждого нового проекта на уровне ОС, переименуйте, затем откройте. Это не так элегантно, как Стартовая страница, но универсально и удобно для архивации/обмена.
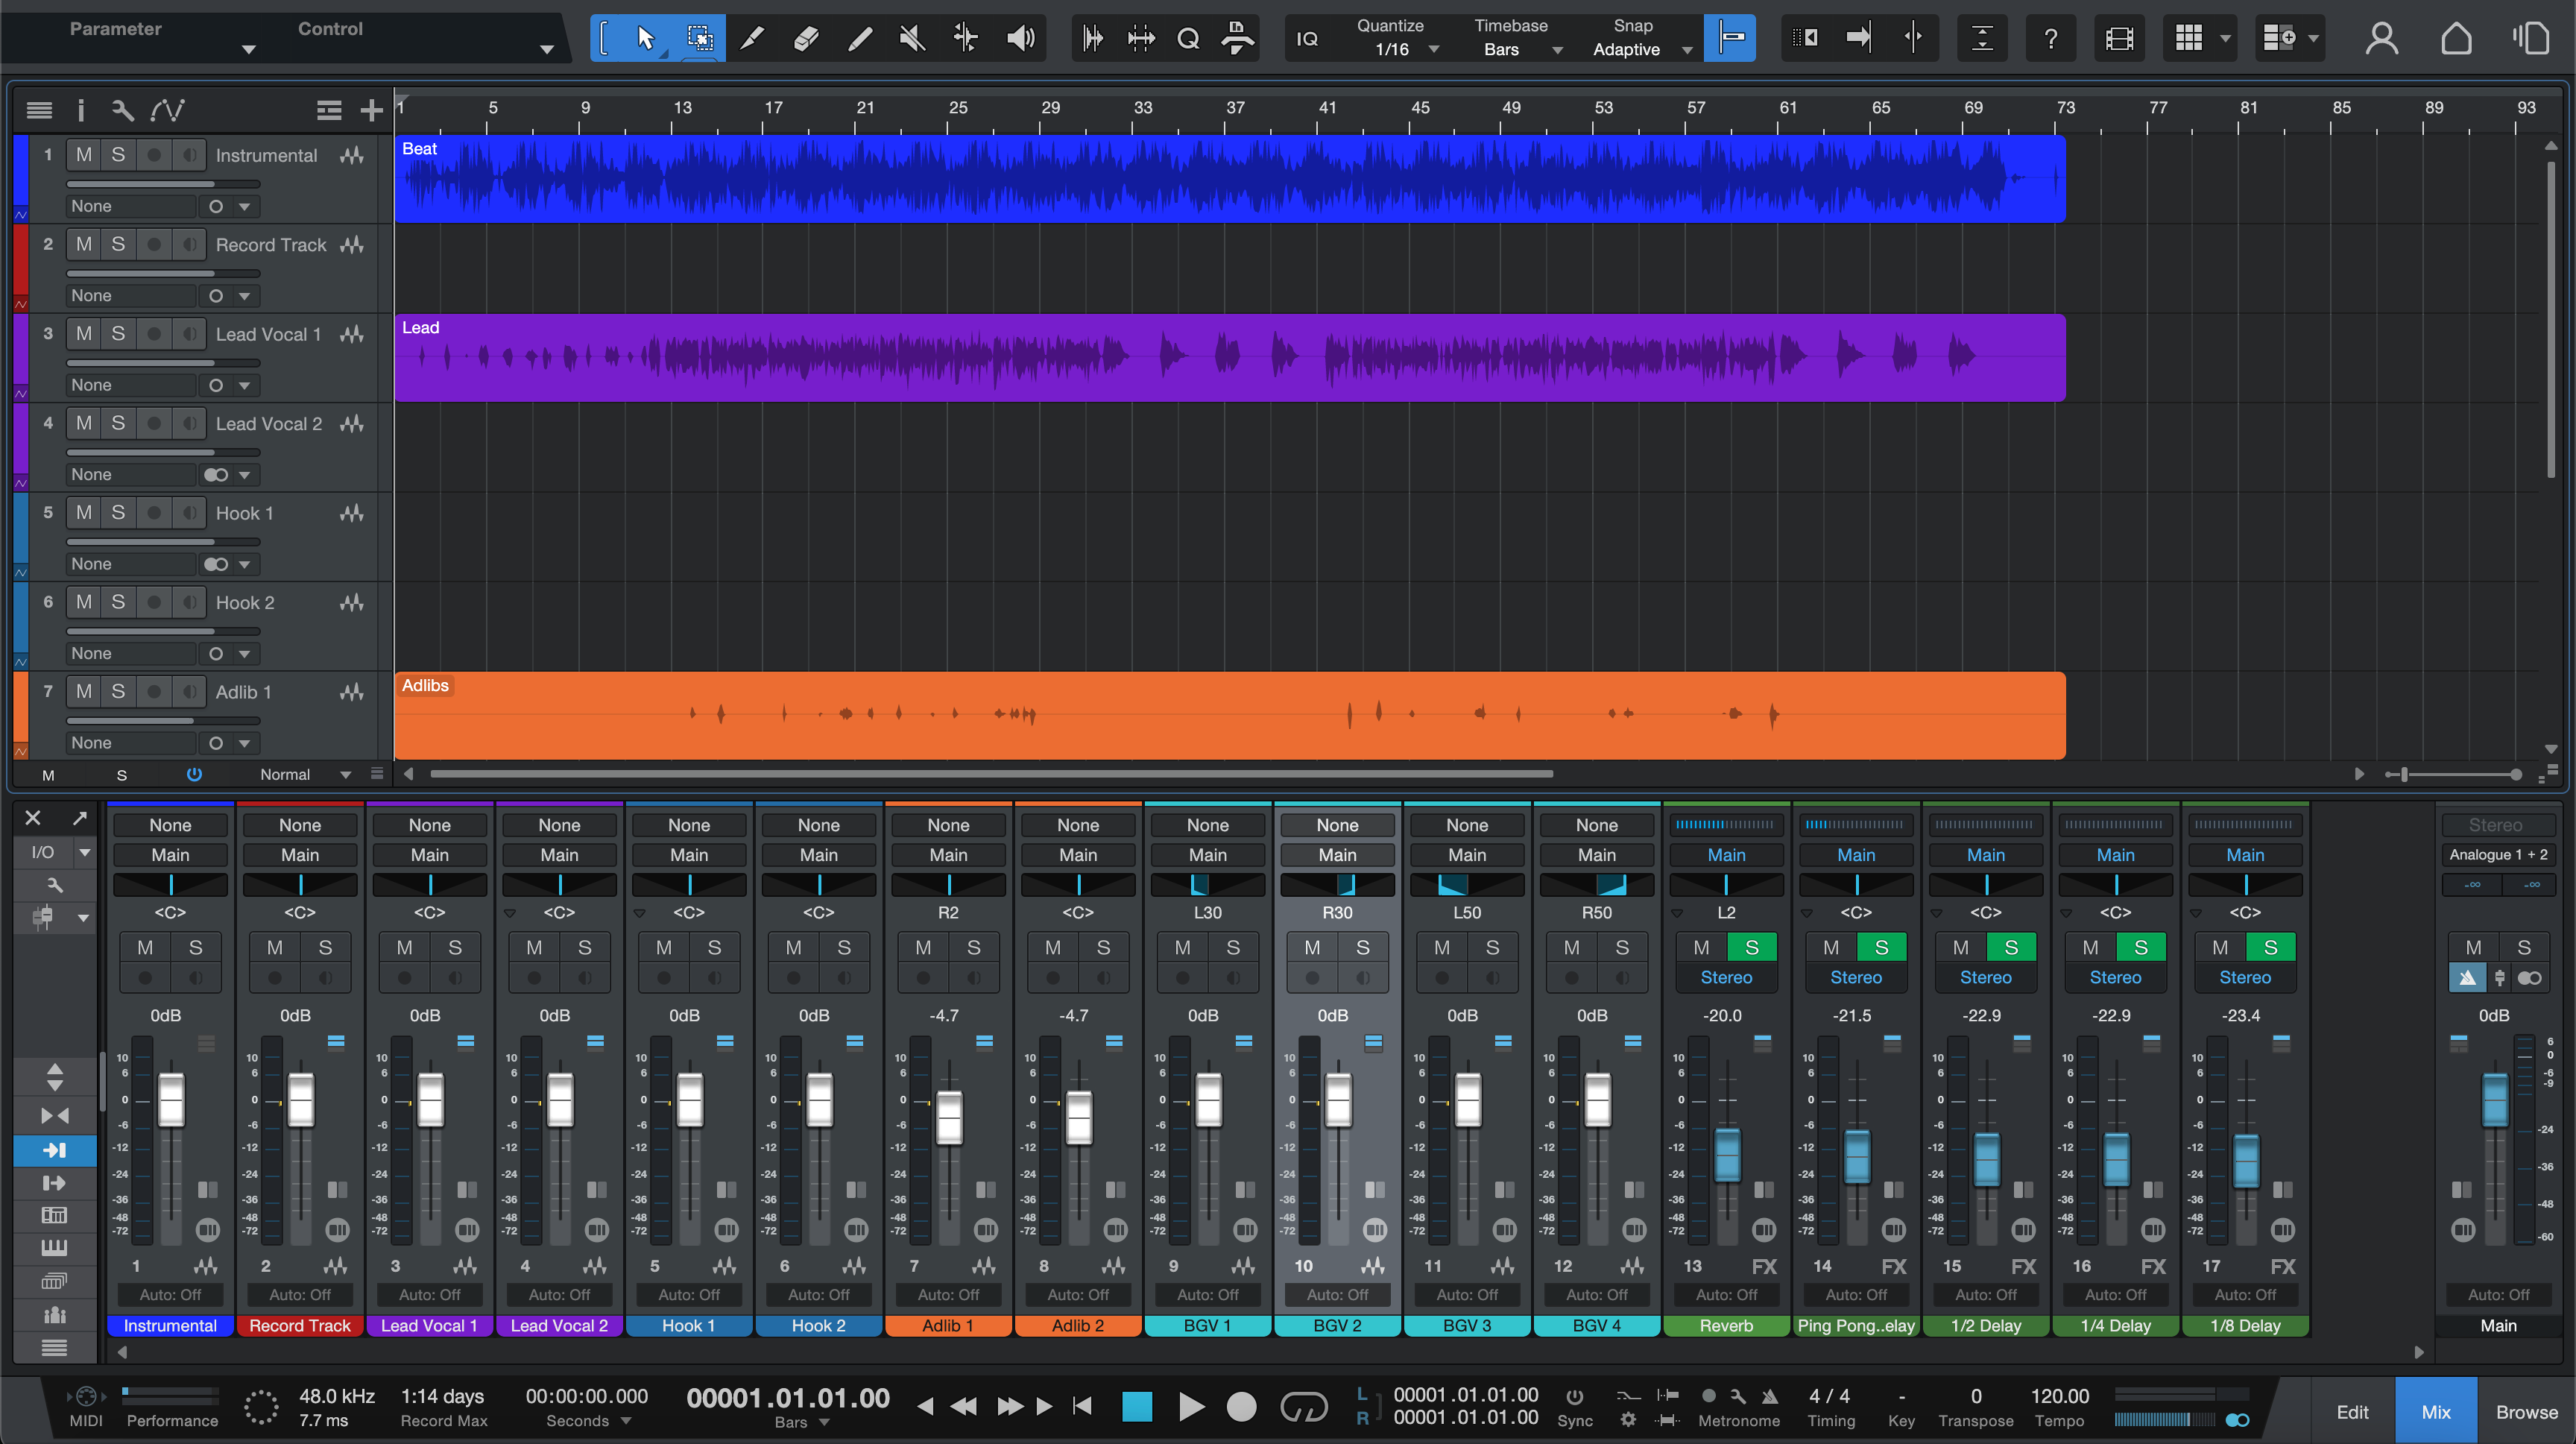
6) Вокальная проводка: шины, FX-каналы и запоминающиеся имена
Структура убирает догадки. Постройте вокальный каркас, которому можно доверять:
- Дорожки по ролям: Lead (моно), Boost Lines (моно — акцент на словах), Ad-libs (моно, панорамирование по секциям), Harmonies (стерео или двойное моно).
- Вокальный шина (Bus Channel): направляйте сюда все вокальные дорожки. Мягкое склеивание и широкое финальное уменьшение сибилянтов живут на этой шине; оставьте Main чистым во время записи.
- FX-каналы: Room (0.4–0.8 с), Slap (моно 90–120 мс) и Tempo Echo (1/8 или точечная восьмая, низкая обратная связь). Фильтры на возвратах: HPF ~150 Гц, LPF ~6–7 кГц, чтобы наушники звучали чисто, без шипения.
- Даккинг на задержках: если вы управляете компрессором на Slap от Lead, повторы появляются в паузах, а не накладываются на слова.
- Маркеры: Куплет / Пре / Припев / Бридж, плюс 1 такт для быстрого входа.
7) Цепочка записи, которая не мешает (и в ритме)
Сохраняйте ощущение певца; тяжелую полировку оставьте на время микса. Надежный трек выглядит так:
- Вставки Lead: HPF (80–100 Гц) → Comp A (2:1–3:1; атака 10–30 мс; релиз 80–160 мс; 3–5 дБ на фразах) → De-esser (широкополосный) → (опционально легкий колорит) → Comp B (1–2 дБ пиков) → небольшой подъём присутствия только если дикция скрыта.
- Усиление: немного выше HPF, чуть больше уменьшения сибилянтов, заглушено на −6 до −9 дБ под Lead.
- Ad-libs: с ограничением полосы (HPF ~200 Гц, LPF ~8–10 кГц) с чуть большим Slap; панорамирование смещено по секциям.
- Вокальный шина: мягкое склеивание и широкое финальное уменьшение сибилянтов; без brickwall лимитирования во время записи.
8) Уверенность с низкой задержкой (Green Z, Cue-миксы и честные наушники)
Задержка убивает выступления. Используйте опции мониторинга Studio One, чтобы сохранить точность времени:
- Green Z / Мониторинг с низкой задержкой: включайте, когда доступно (особенно с совместимыми интерфейсами PreSonus), чтобы обойти тяжелый look-ahead при записи.
- Буферы: 64–128 сэмплов во время записи; увеличьте для микширования. Если слышите фленжер/удвоение, вы мониторите через аппаратное и программное обеспечение одновременно — отключите один из путей.
- Кью-миксы: создавайте посылы на наушники с Vocal Bus или Lead. Держите возвраты скромными (маленькая Room + Slap), чтобы высота и ритм звучали естественно.
- Цели по уровню: сырые пики на входе около −12 до −8 дБFS; после вставок пики около −6 до −3 дБFS. Оставьте громкость для мастеринга.
9) Макет двухдорожечного бита (вокал поверх стереоинструмента)
Когда у вас только стерео-бит, важнее ясность, чем размер. Держите отдельный вариант шаблона:
- Дорожки: BEAT (стерео), Lead, Boost, Ad-libs, Harmonies, Vocal Bus, FX Channels.
- Контроль бита: регулируйте интро/припевы с помощью усиления события или предусиления на канале BEAT, чтобы потом не давить Главный канал.
- Стратегия пространства: меньшая комната и меньшие посылы эффектов, чем со стемами; более сухие куплеты читаются лучше. Лёгкий реверб на последний такт каждого припева создаёт ощущение размера без размазывания.
10) Браузер, цвета и заметки (мелочи, которые экономят часы)
Сделайте сессию понятной без объяснений:
- Палитра: Lead = золотой, Boost = оранжевый, Ad-libs = синий, Harmonies = бирюзовый, Vocal Bus = тёмно-золотой, Returns = фиолетовый.
- Названия: “Lead Vox,” “Boost Lines,” “Ad-libs,” “Harmonies,” “Vocal Bus,” “Room,” “Slap,” “Tempo Echo.” Избегайте непонятных кодов.
- Заметки: закрепите текстовое событие на такте 1 с расстоянием до микрофона, целевым буфером и стандартными значениями посылов. Все записывают быстрее, когда инструкции видны.
11) Журнал устранения неполадок (один симптом → одно действие)
- Шаблон не отображается на стартовой странице: пересохраните через Файл → Сохранить как шаблон… (вкладка Пользователь). Добавьте описание и изображение; перезапустите при необходимости.
- Слышите удвоенный голос: отключите аппаратный мониторинг или уменьшите программный. Записывайте с Green Z/низкой задержкой и минимальной цепочкой.
- Задержка эффектов при записи: отключите анализаторы с предсказанием и длинные реверберации; записывайте только с компрессором и деэссером; добавьте полировку на миксе.
- Слэп ложится на слова: добавьте лёгкое приглушение — сайдчейн компрессора на Slap от Lead, спад 2–3 дБ, быстрое восстановление.
- Сибилянты в наушниках: расширьте диапазон деэссера; уменьшите воздушный эквалайзер на 0,5 дБ; задержка с низкочастотным фильтром возвращается к ~6–7 кГц.
- При моно-сведении припев теряет объём: держите Lead в центре и суше; расширяйте ширину за счёт дублей/адлибов, а не основной дорожки.
- Бит заглушает голос (двухдорожечный): уменьшите BEAT на −1 до −2 дБ и поднимайте Lead на +0,5 дБ вместо сильной компрессии.
12) Десятиминутная сборка (скопируйте это в свой первый шаблон)
- Создайте песню: «Template — Vocal Record — 48k». При необходимости установите BPM/тональность.
- Добавьте дорожки: Lead (моно), Boost (моно), Ad-libs (моно), Harmonies (стерео). Окрасьте и упорядочьте их.
- Создайте Vocal Bus (шина) и направьте на него все вокальные дорожки.
- Добавьте FX-каналы: Room (0,4–0,8 с), Slap (90–120 мс моно), Tempo Echo (1/8 или точечная восьмая). Фильтруйте возвраты (HPF/LPF).
- Настройки отправки по умолчанию: Lead — мало Room + Slap; Boost — чуть больше Slap; Ad-libs — больше Room и иногда Echo.
- Цепочка Lead: HPF → Comp A → De-ess → (опциональный колорит) → Comp B → небольшой подъём присутствия при необходимости.
- Маркеры: Куплет / Пре / Припев / Бридж + 1 такт отсчёта.
- Сохраните как шаблон и добавьте короткое описание, чтобы вы (и коллеги) знали, что внутри.
13) Запись и передача (чисто с первого раза)
Перед экспортом обрежьте начала и концы, оставьте естественные хвосты реверберации. Записывайте Main, Instrumental и A Cappella с одинаковыми началами и концами, чтобы версии совпадали в любой DAW. Делайте дезеринг только при создании 16-битного файла. Если будете отправлять стемы, сейчас упорядочьте маршрутизацию — сгруппируйте вокал на Vocal Bus, музыку на отдельные шины — затем следуйте подробной инструкции по экспорту стемов из Studio One, чтобы они сразу попадали в микс-сессию.
14) Где структура встречается со звуком (добавьте цепочку один раз)
Шаблон Studio One Recording может упростить подключение и ускорить работу; тон задаёт цепочка эффектов. Если хотите готовую отправную точку, которая загружается одним кликом, добавьте подобранные пресеты вокала Studio One в дорожки Lead/Boost/Ad-lib, настройте пороги под свой голос и сохраните шаблон заново. Вы начнёте каждую сессию ближе к «готовому» результату, оставляя место для вкуса и исполнения.
15) FAQ (быстрые ответы, которые вы будете использовать повторно)
Нужны ли сторонние плагины?
Нет. Сначала создайте базовый шаблон. Если добавляете премиум-инструменты, сохраняйте «базовый» вариант для коллег.
Можно ли хранить несколько шаблонов?
Да — один для двухдорожечного вокала, один для сессий со стемами и один для подкастов/озвучки — отличный старт.
А как насчёт частоты дискретизации?
Сохраняйте версии с частотой 44,1 кГц и 48 кГц с пометкой в названии. Не полагайтесь на пересэмплирование в последний момент.
Насколько громко записывать?
Сырые пики около −12 до −8 дБFS. После вставок оставляйте запас по уровню; громкость достигается на мастеринге.
16) Итоги
Установите шаблон песни Studio One, чтобы стартовая страница открывалась в студии, которая уже знает вас. Сохраняйте пресеты дорожек/каналов для ролей, которые вы используете повторно. Направляйте вокал на шину, фильтруйте возвраты и записывайте с минимальной цепочкой, чтобы тайминг оставался точным. С такой структурой и пресетами дорожек, которым вы доверяете, вы начнете запись быстрее и получите более чистые миксы с меньшим количеством правок.