Шаблоны записи позволяют открыть Adobe Audition в готовой к записи среде — дорожки, цвета, возвраты, маршрутизация и базовые цепочки уже загружены. Это руководство показывает, как установить файлы шаблонов, организовать их для быстрого доступа, установить сессию по умолчанию и избежать распространённых ошибок. В итоге у вас будет надёжная библиотека шаблонов, которая ускоряет каждую сессию и обеспечивает стабильность ваших проектов.
Как установить шаблоны записи в Adobe Audition (пошагово)
I. Что означает «шаблон записи» в Audition
В Adobe Audition шаблон записи — это просто многодорожечная сессия (.sesx), которую вы настроили один раз и используете повторно. Она может включать:
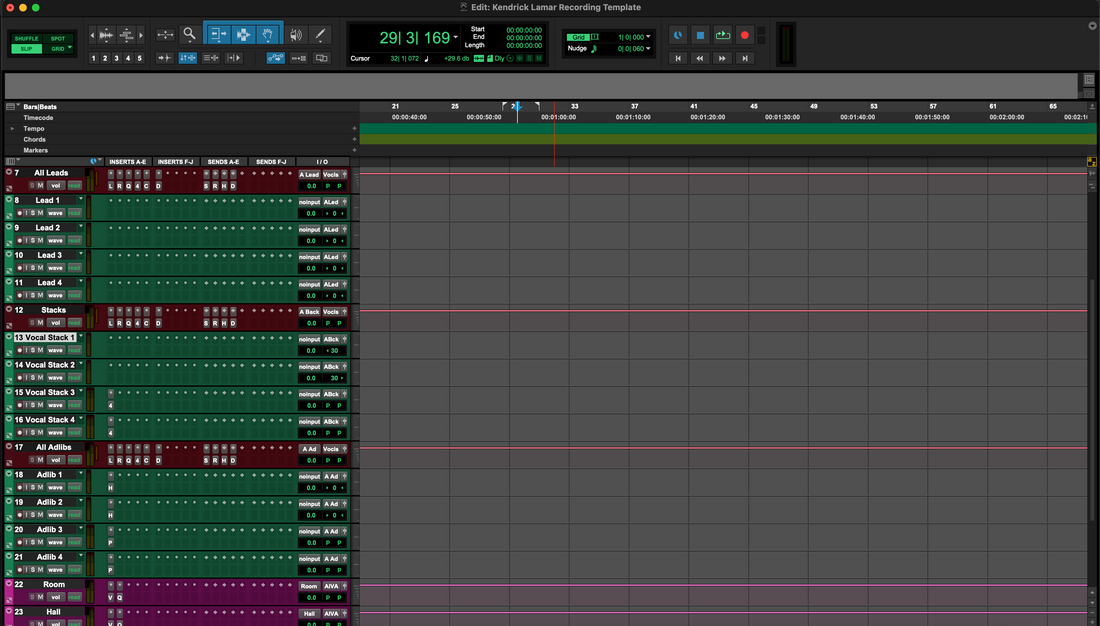
- Расположение дорожек: Ведущий вокал, дубли, гармонии, адлибы, разговорная связь, гитары, клавиши.
- Шины/возвраты: Slap delay, короткий ревербератор, телефонный полосовой фильтр, параллельная компрессия.
- Маршрутизация: Входы для каждой дорожки, посылы на возвраты, шина вокальной группы и контролируемый мастер.
- Маркеры: Куплет, пре, припев, бридж — чтобы быстро делать подхваты и зацикленные дубли.
- Визуальные элементы: Постоянные цвета и порядок дорожек, чтобы глаза мгновенно находили части.
Шаблоны не убирают решения; они убирают повторения. Вы всё равно будете настраивать усиление, деэссинг и формировать тон, чтобы соответствовать голосу. Но вы начинаете с такта 1 с полностью настроенной студией.
II. Типы файлов, которые вы увидите (и что с ними делать)
- .sesx — файл многодорожечной сессии. Дважды щелкните для открытия. Если это шаблон, который вы хотите использовать повторно, сразу «Сохраните как…» в папку шаблонов и сохраните оригинал как мастер-копию.
- .zip (или папка) — шаблон вместе с его ресурсами. Распакуйте в папку музыкальных проектов или «Templates». Откройте файл .sesx внутри. Если медиафайлы находятся вне папки, используйте Файл → Сохранить как… и включите копирование ссылочных медиа, чтобы шаблон стал переносимым.
- Наборы пресетов — пресеты эффектов (.fxp/.xml в зависимости от источника). Они сами по себе не являются шаблонами, но часто включаются. Загрузите их на вокальные дорожки внутри вашего шаблона и сохраните заново.
III. Контрольный список перед установкой (быстрый)
- Обновите Audition и драйвер аудиоинтерфейса.
- Знайте названия устройств в Настройки → Аудиооборудование (входы/выходы, которые вы планируете использовать).
- Убедитесь, что сторонние плагины, используемые в шаблоне, установлены и просканированы.
- Выберите место для шаблонов (например, Документы/Аудио/Шаблоны или выделенный диск). Делайте резервные копии.
- Определитесь с частотой дискретизации по умолчанию для музыкальных проектов (44,1 кГц для большинства песен; 48 кГц для видео рабочих процессов).
IV. Три надежных способа «установить» шаблон
Audition не требует специального установщика. Вы просто указываете Audition, где находится ваш .sesx и, при желании, продвигаете его в значение по умолчанию. Выбирайте любой метод — или комбинируйте их.
Метод A — Открыть и Сохранить как шаблон (универсальный путь)
- Распакуйте/скачайте ваш шаблон в папку, которой вы управляете.
- Дважды щелкните .sesx (или Файл → Открыть).
- Сразу выберите Файл → Сохранить как… и поместите его в вашу личную папку «Шаблоны». Включите опции копирования связанных медиа в сессию, чтобы она была переносимой.
- Закройте и снова откройте Audition; убедитесь, что можете получить доступ к файлу в папке шаблонов.
Почему это здорово: Вы сами решаете, где хранятся шаблоны, и можете безопасно их версионировать.
Метод B — Добавьте папку Шаблоны в Избранное Обозревателя медиа
- Откройте панель Обозреватель медиа (Окно → Обозреватель медиа).
- Перейдите в папку Шаблоны. Щелкните правой кнопкой и выберите Добавить в Избранное (или перетащите в Избранное).
- Теперь ваши шаблоны доступны одним кликом в каждой сессии — без поиска в системных диалогах.
- Дважды щелкните шаблон, чтобы начать новый проект на его основе; сразу Сохраните как… новую песню, чтобы никогда не перезаписывать шаблон.
Почему это здорово: Никакой навигации по ОС, и вы можете хранить разные папки (например, «Rap_Dry_Punch», «R&B_Airy_Plate», «Podcast_DualMic»).
Метод C — Продвиньте шаблон в ваш рабочий процесс «Новая сессия»
- Откройте предпочитаемый шаблон, проверьте маршрутизацию, возвраты и цвета.
- Сохраните его с понятным именем, например Vocal_Record_48k.sesx.
- При начале работы перейдите в Файл → Новый → Многодорожечная сессия и выберите файл шаблона из вашей организованной папки или Избранного. (Если в вашей версии Audition отображается список шаблонов, добавьте свой в ту же папку, что и все шаблоны, чтобы он отображался постоянно.)
- Переименуйте и сразу сохраните в новую папку проекта для песни.
Совет: Храните по две копии на каждую частоту дискретизации (например, 44.1k и 48k), чтобы избежать неожиданных пересэмплирований.
V. Что включает отличный шаблон для записи вокала
Используйте этот чеклист при оценке любого установленного шаблона:
- Ведущая дорожка: названа «Lead Vox», готова к записи, с базовыми заполнителями цепочки.
- Дорожки по ролям: Doubles L/R, Harmonies, Ad-libs — каждая с соответствующим высокочастотным фильтром, уровнем де-эсса и цветом.
- Возвраты: Slap (моно 80–120 мс, фильтрованный), Plate (0.7–1.0 с, 20–50 мс предзадержка), опциональный полосовой фильтр «Phone».
- Сайдчейн дакинг: шина Slap, ключевая от Lead, чтобы эхо звучало в паузах, а не на слогах.
- Шина вокальной группы: мягкая склейка и финальный широкий де-эсс; мастер остаётся чистым и с запасом по уровню.
- Маркеры: Куплет, Пре, Хук, Бридж — плюс область отсчёта для быстрых панчей.
- Печать дорожки: дорожка Resample/Bus для черновиков (названная ясно, чтобы вы никогда случайно не сделали bounce).
- Клип с заметками: текстовая заметка с расстоянием до микрофона, целями буфера и начальными точками посылов.
VI. Первоначальное руководство (5-минутная настройка с нуля)
- Откройте шаблон. Немедленно Сохраните как… новую папку проекта (Artist_Song).
- Аудио оборудование. Настройки → Аудио оборудование → выберите ваш интерфейс; установите буфер 64–128 для записи (позже увеличьте для микширования).
- Входы. Для Lead Vox выберите правильный входной канал; установите режим мониторинга по своему усмотрению и убедитесь, что не слышите двойной сигнал (аппаратный + программный одновременно).
- Уровень. Старайтесь, чтобы пиковые значения сырого входа были около −12 до −8 дБFS. Используйте Clip Gain, чтобы смягчить громкие слова перед последующей компрессией.
- Микс для наушников. Добавьте немного Slap и немного Plate. Отфильтруйте возвраты (HPF ~150 Гц, LPF ~6–7 кГц), чтобы певец слышал четкость, а не мутность.
- Маркеры и лупы. Установите точки лупа вокруг фразы, протестируйте панчи и подтвердите, что логика записи с армированием работает.
VII. Организуйте шаблонный портфель (по микрофону, жанру и типу сессии)
Один мегашаблон заманчив, но небольшая библиотека остаётся быстрее и чище.
- По микрофону: варианты SM7B и яркого конденсаторного с разными точками начала высоких частот и де-эссинга.
- По жанру: «Rap_Dry_Punch», «R&B_Airy_Plate», «Pop_Stack_Wide».
- По вокалисту: инициалы + тег (например, «AR_bright_sop», «JT_dark_bar»).
- По типу сессии: «Podcast_DualMic_Gate», «Dubs_2-Track_BeatDuck», «Songwriting_ScratchVox».
Соблюдайте строгие правила именования. Включайте частоту дискретизации в имена файлов (например, Vocal_Record_48k.sesx). Будущий вы — и ваши коллеги — найдут нужный файл, не открывая сначала три неправильных.
VIII. Использование шаблонов с цепочками Effects Rack
Шаблоны — это «комната и проводка». Пресеты Effects Rack — это «оборудование на тележке». Совместное использование даёт повторяемые результаты. Вы можете создавать цепочки сами или начать с подобранных вариантов и адаптировать на слух. Для скорости и стабильности на вокалах изучите пресеты вокала Adobe Audition, а затем тонко настройте пороги, диапазоны де-эссинга и уровни посылов на голос и комнату.
IX. Портативность, резервное копирование, готовность к будущему
Шаблоны полезны только если они открываются везде, где вы работаете.
- Держите ресурсы под рукой. При сохранении шаблона включайте копирование связанных медиа, чтобы папка сессии была автономной.
- Резервные копии. Еженедельно зеркально копируйте папку Templates и настройки Audition в облако или на внешний носитель.
-
Версионирование. Добавляйте к обновлениям суффикс с маленькой семантической версией:
Vocal_Record_48k_v1.2(журнал изменений в вашем клипе Notes). - Сторонние плагины. Если у коллеги нет нужного плагина, замените его стандартным устройством, сохраните шаблон как «стандартный» вариант и сохраните оба.
X. Устранение неполадок (симптом → целенаправленное действие)
- Шаблон открывается с неправильными входами. Названия входов/выходов вашего интерфейса изменились. Переназначьте входы, Сохраните как… новый шаблон и установите его по умолчанию на этой установке.
- Двойной мониторинг (флэм/задержка). Вы слышите одновременно аппаратное и программное обеспечение. Либо отключите мониторинг интерфейса, либо установите трек в режим без мониторинга во время записи.
- «Плагин не найден.» Повторно просканируйте плагины в Менеджере аудиоплагинов Audition. Если плагин по-прежнему отсутствует, переключитесь на стандартное устройство и сохраните вариант шаблона заново.
- Клики при начале записи. Добавьте 1 такт отсчёта; немного увеличьте буфер для тяжёлых сессий; отключите анализаторы с предсказанием во время записи.
- При экспорте слышен клик. Направьте метроном только в Cue; убедитесь, что трек «Click Print» не подаёт сигнал на Master.
- Сессия открывается с неправильной частотой дискретизации. Проверьте, что панель управления интерфейсом и частота проекта Audition совпадают с меткой шаблона (44.1k против 48k).
- Медиа оффлайн после перемещения дисков. Используйте Media Browser для повторной привязки или пересохранения с копированием ассетов. Храните «Собранный» мастер каждого шаблона.
XI. Дополнения для эффективности (улучшение удобства)
- Избранное. Создайте Избранное для «Нормализации клипа до здорового уровня записи», «Обрезки начала с затуханием 5 мс» и «Применения полосового ограничения для телефонных эффектов». Эти операции можно запускать до цепочки без открытия меню.
- FX на клипе vs. FX на треке. Исправляйте эквалайзер и де-эссинг на проблемном клипе; сохраняйте тон/эффекты на треке для глобального управления.
- Сцено-ориентированные дубли. В Multitrack установите маркеры для Verse/Hook/Bridge и включите циклическую запись для быстрой компиляции.
- Дорожка ресемплинга. Добавьте трек «PRINT», который записывает Master или Vocal Group для мгновенных черновиков — диалог экспорта не нужен.
- Управление Talkback. Направляйте Talkback только в Cue, с лёгким гейтом, исключая его из Master/экспорта через группы.
XII. Создание гибридного шаблона певца-рэпера (пример для адаптации)
- Lead Vox (mono) — HPF ~90 Гц; лёгкая компрессия; широкий де-эссинг. Отправляет на Slap/Plate return треки.
- Boost Lines (mono) — немного выше HPF; больше де-эссинга; уровень на −6 до −9 дБ ниже; иногда ширина.
- Ad-libs (mono) — ограничение полосы (HPF ~200 Гц, LPF ~8–10 кГц); панорамирование в сторону; короткие вставки на переходах.
- Harmonies (stereo or dual mono) — более тёмный эквалайзер; шире панорама; лёгкая модуляция по желанию.
- Vocal Group bus — мягкий клей; финальный де-эссинг; лимитер выключен во время записи.
- Beat Bus — опциональный динамический эквалайзер с приглушением в диапазоне 2–4 кГц, управляемый Vocal Group, чтобы согласные были слышны без ослабления ритма.
- Returns — Room/Slap/Plate/Phone; все с фильтрацией; Slap приглушён относительно Lead.
- Print — запись Master или Vocal Group для эталонных миксов.
XIII. Гигиена шаблона (как поддерживать порядок со временем)
- Одна задача на дорожку. Лид, дубли, гармонии, адлибсы — каждая дорожка с собственными эффектами и уровнем деэссинга. Так вы будете микшировать быстрее и избежите чрезмерной обработки центра.
- Фильтруйте возвраты. HPF около 150 Гц и LPF около 6–7 кГц на Slap/Plate, чтобы реверберация не превращалась в шипение в наушниках.
- Сначала небольшие изменения. Устраняйте гулкость и сибилянты с помощью маленьких, широких форм до добавления «воздуха». Воздух после деэссинга сохраняет яркость мягкой.
- Записывайте сухой сигнал, слушайте обработанный. Мониторьте через Rack, но записывайте чистый вход. Если нужен эффект, создайте запасной трек «Lead_Wet».
- Сохраняйте варианты. Когда шаблон развивается, сохраняйте новую версию, не перезаписывайте старую. Храните v1 для возврата; v2 и далее — для улучшений.
XIV. Часто задаваемые вопросы
Нужны ли мне именно те плагины, которые указаны в шаблоне?
Нет. Замените сторонние плагины на стандартные инструменты, затем сохраните «стандартный» вариант. Структура (дорожки, маршрутизация, возвраты) — вот настоящая ценность.
Где должны храниться шаблоны?
В любом месте, где вы управляете и делаете резервные копии. Добавьте эту папку в Избранное в Media Browser, чтобы она была доступна в один клик. Многие пользователи хранят корневую папку «Templates» с подпапками по DAW, частоте дискретизации и жанру.
Могу ли я хранить несколько «дефолтных» сессий?
Да — храните их в папке Templates и выбирайте нужный через Избранное или диалог Новая многодорожечная сессия. Четко маркируйте по частоте дискретизации и назначению.
Как поделиться шаблоном?
Заархивируйте папку с сессией после использования «Сохранить как…» с копированием медиафайлов. Получатель распаковывает архив, добавляет папку в Избранное, открывает .sesx и сохраняет локально.
Как шаблоны взаимодействуют с моими вокальными цепочками?
Шаблоны содержат дорожки и маршрутизацию; цепочка эффектов формирует тон. Начинайте с подобранных цепочек, которые легко настраивать, например, вокальные пресеты Adobe Audition, упомянутые выше, затем сохраняйте персонализированные пресеты Rack для каждой дорожки внутри вашего шаблона.
XV. Продолжайте обучение (следующий логичный шаг)
Если вы установили шаблоны и хотите получить подробное руководство по загрузке, установке уровней и адаптации цепочек эффектов внутри Rack, этот пошаговый материал будет полезным дополнением: Использование вокальных пресетов в Adobe Audition. Прочитайте его, чтобы завершить настройку пресетов дорожек и сохранить версии по ролям, соответствующие вашему новому шаблону.
XVI. Заключение
Установка шаблона записи Adobe Audition сводится к трем вещам: чистая папка, которой вы доверяете, ярлык в Избранном для быстрого доступа и несколько специализированных вариантов шаблонов для голосов и жанров, которые вы записываете чаще всего. Как только ваши дорожки, возвраты и маршрутизация настроены, сессии запускаются быстро, артисты чувствуют себя комфортно, а миксы звучат более последовательно. Сочетайте свои шаблоны с надежными вокальными пресетами Adobe Audition, делайте небольшие и музыкальные изменения, и ваши сессии будут казаться организованными еще до нажатия кнопки записи.