Ozone 12: Полное руководство (рабочий процесс, модули и реальные настройки)
Ozone 12 — это набор для мастеринга, созданный, чтобы финальные миксы звучали хорошо на любых системах — телефонах, наушниках, клубных установках и радио. Это руководство представляет собой практический пошаговый рабочий процесс, который вы можете использовать повторно: подготовка премастера, выбор нужных модулей, формирование тона и динамики с помощью небольших корректировок, управление басом, исправление перегруженных миксов и создание безопасных версий для релиза. Оно читается быстро, без излишнего пафоса и предлагает настройки, которые легко адаптировать.
I. Что значит «готово» на практике
Готовый мастер выдерживает низкие и высокие уровни воспроизведения. Тон сбалансирован, вокал остаётся разборчивым в машине или телефоне, саб имеет вес без грязи, а громкость конкурентоспособна без искажений или качания. Вы будете использовать модули Ozone 12 для решения проблем в таком порядке: подготовка → прослушивание → исправление → улучшение → лимитирование → запись. Тот же порядок работает во всех жанрах.
II. Подготовка премастера перед открытием Ozone
Вы будете мастеринговаться быстрее, если исходник будет чистым и организованным.
- Запас по уровню: Запишите стереомикс без brickwall лимитера. Стремитесь к пикам микса около −6 до −3 дБFS. Не гоняйтесь здесь за LUFS.
- Частота дискретизации и битность: Используйте частоту сессии; экспортируйте 24-битный WAV. Дизеринг применяйте только при финальном экспорте мастера, если снижаете битность.
- Шумы и щелчки: Исправляйте щелчки на этапе микса. Добавьте 5–20 мс затухания ко всем монтажам.
- Альтернативы: Подготовьте инструментал и акапеллу, если нужно. Сохраняйте все записи с такта 1 с хвостами.
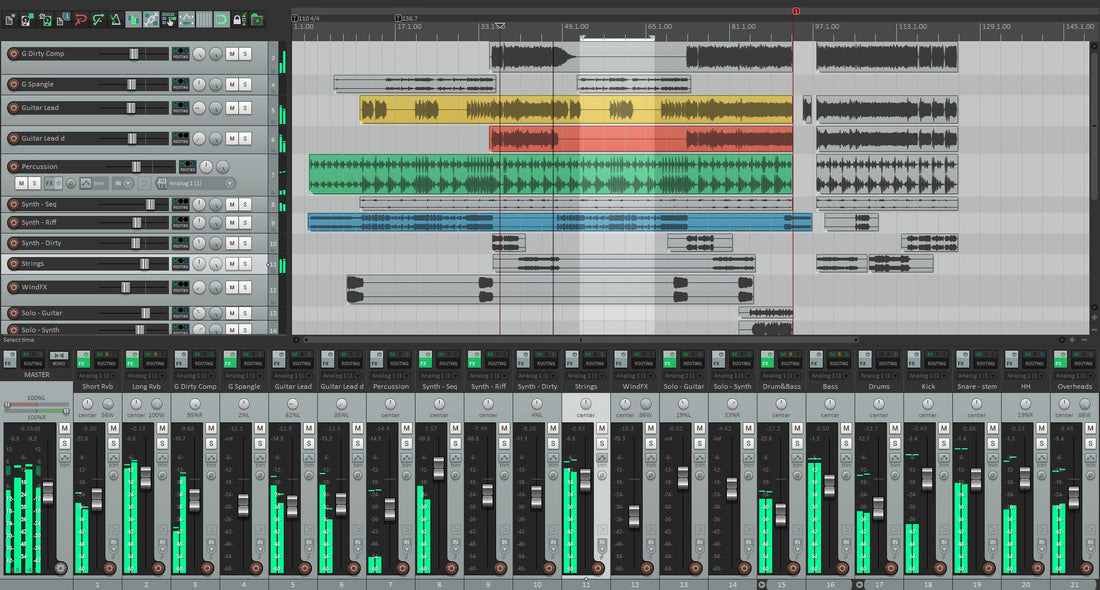
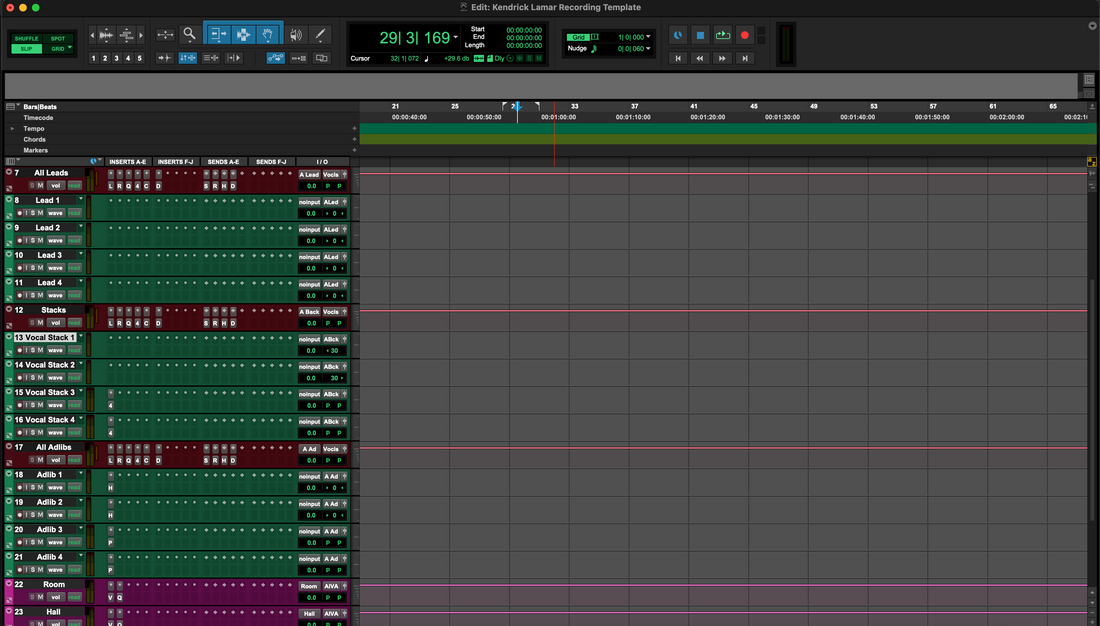
Если хотите повторяемую схему захвата для каждой песни и вокалиста, создайте (или скачайте) шаблоны DAW, которые маршрутизируют возвраты, маркируют дорожки и выравнивают дорожки печати. Курируемый набор шаблонов записи устраняет сложности настройки, чтобы премастер всегда чисто попадал в Ozone.
III. Первый прослушивание: референсы, проверка громкости и простой план
Референсные треки: Загрузите одну или две песни в похожем стиле, которым вы доверяете. Сравните уровни с вашим премастером; не судите по «громче».
Реальность комнаты: Сначала проверьте на умеренной громкости, затем тихо на тех же мониторах; закончите с наушниками или маленькой колонкой. Если при низком уровне пропадает дикция, исправьте это в первую очередь.
План: Запишите двухстрочную цель перед тем, как трогать регуляторы. Пример: «Усмирить коробочный звук 250–350 Гц, добавить 0,5 дБ присутствия около 3–4 кГц, очистить саб-блюм, стремиться к чистой громкости.» Теперь выполняйте только эти действия.
IV. Быстрый путь Ozone 12 (12 шагов, которые можно повторять)
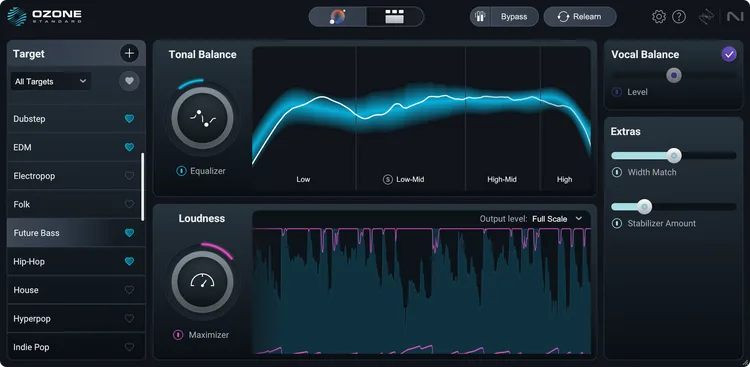
- Открыть вид помощника (пользовательский поток). Позвольте Ozone проанализировать громкий участок. Выберите модули, которые планируете использовать. Рассматривайте это как отправную точку, а не окончательное решение.
- Эквалайзер (сначала хирургический, затем широкий). Высокий фильтр только если есть настоящий DC/гул. Если в кабинете или миксе появляется «коробочный» звук, рассмотрите широкий спад −1 до −2 дБ в районе 250–350 Гц. Если пропадает разборчивость вокала, небольшое широкое повышение +0,5–1 дБ около 3–4 кГц поможет после успокоения сибилянтов.
- Динамический эквалайзер (только при необходимости). Используйте мягкие, ключевые по частоте понижения, которые срабатывают только при появлении проблемы — например, резкий звук тарелки, коробочный резонанс гитары или редкий носовой гласный.
- Управление басом. Формируйте сабы так, чтобы ударные и басы не мешали друг другу. Маленькие, учитывающие ширину полосы движения лучше, чем глобальный срез. Сдерживайте 120–180 Гц от гудения, сохраняя при этом вес саба ниже.
- Решения по транзиентам и сустейну. Если атаки кажутся тусклыми, восстановите немного энергии транзиентов; если хвосты размываются, успокойте сустейн. Делайте меньше, чем думаете — мастера преувеличивают небольшие изменения.
- Имиджинг, аккуратно. Сохраняйте честность середины (центра). Расширяйте стороны только выше диапазона разборчивости вокала. Избегайте расширения области бочки или ведущего вокала.
- Экспайтер/окраска (низкий микс). Добавьте мягкий драйв там, где тон кажется плоским. Сохраняйте общий прирост яркости небольшим; слишком яркие мастера быстро утомляют.
- Усмирение сибилянтов. Если в мастере свистят «с», используйте тонкий широкополосный де-эссер. Это дополняет, а не заменяет вокальный де-эссинг в миксе.
- Максимайзер (финальная громкость). Цель — чистая громкость. Добавляйте усиление медленно, контролируя истинный пик. Остановитесь, когда ухудшается грув или удар низких частот.
- Сравнения. Сравнивайте обход цепочки и ваши эталоны по уровню. Если цепочка звучит лучше только из-за громкости, уменьшите уровень.
- Обрезка начала и конца. Уплотните начала и окончания. Оставьте небольшой запас тишины в начале для плееров с предварительной загрузкой.
- Экспорт. 24-битный WAV с частотой сессии для дистрибутивных мастеров; MP3/AAC только для промо. Применяйте дезеринг при снижении битовой глубины.
V. Использование основных инструментов Ozone 12 (где они особенно эффективны)
Пользовательский поток помощника. Проанализируйте громкий участок, выберите модули, установите целевую громкость и выберите стартовую кривую. Примите черновик, затем доработайте на слух. Отлично для скорости, лучше для повторного использования между песнями на EP.
Эквалайзер стемов. Когда клиент предоставляет только стерео-батч, изолируйте вокал, бас, ударные или инструменты и аккуратно исправляйте конкретные проблемы, не разрушая остальное. Идеально для арендованных битов или срочного улучшения вокальной ясности — например, +0.5–1 дБ присутствия на вокальном стеме при лёгком смягчении резкой группы тарелок.
Управление басом. Уплотните низкие частоты без глобальных изменений тона. Попробуйте небольшие ограниченные по диапазону ослабления в области 120–180 Гц, чтобы убрать «шерсть», сохраняя настоящий саб ниже 60–80 Гц.
Unlimiter. Если «мастеринг» приходит с избыточным лимитированием, используйте Unlimiter для мягкого восстановления транзиентов и запаса громкости. После восстановления аккуратно примените лимитер (см. заметки по Максимайзеру ниже). Ожидания должны быть реалистичными; сильное клиппирование полностью не исправить.
Максимайзер (режимы IRC, включая IRC 5). Используйте самый чистый режим, который сохраняет удар. Добавляйте усиление шагами по 0.5 дБ. Следите за истинным пиком и безопасностью интерсемплов. Если бочки теряют удар или хай-хэты размываются, уменьшите усиление или замедлите релиз.
VI. Рецепты, адаптированные под жанр (отправные точки, а не правила)
Используйте эти диапазоны как мягкие ориентиры и слушайте компромиссы. Все усиления/ослабления предполагают широкое Q, если не указано иное.
Рэп / Трэп
- Эквалайзер: −1 до −2 дБ в районе 250–300 Гц, если звучит гулко; +0.5–1 дБ около 3–3.5 кГц, если дикция теряется; небольшой воздушный подъём только после де-эссинга.
- Управление басом: слегка уменьшите 120–160 Гц, если 808 заглушает слова; оставьте настоящий саб ниже 60 Гц.
- Stem EQ: слегка поднимите вокальный стем на +0.5 дБ в области присутствия; смягчите барабанный стем около 9–10 кГц, если звучит резковато.
- Максимайзер: увеличивайте громкость до тех пор, пока грув не притупится, затем уменьшите на 0.5 дБ. Отдавайте приоритет ударности, а не показателям на измерителе.
R&B / Соул
- Эквалайзер: сохраняйте тёплый средний диапазон; избегайте чрезмерно яркой верхушки. Если микс звучит затуманенно, небольшой подъём на 5 кГц (а не 10–12 кГц) часто звучит более естественно.
- Экзайтер: добавляйте мягкие гармоники в верхние средние частоты, а не только в верхние. Контролируйте сибилянты перед любыми воздушными подъёмами.
- Stem EQ: сглаживайте диапазоны тарелок; снижение на 0.5–1 дБ около 7–9 кГц может уменьшить блеск.
- Максимайзер: более медленные релизы сохраняют естественный поток на легато-фразах.
Поп
- Эквалайзер: стремитесь к чистому среднему окну и контролируемым 80–120 Гц. Используйте широкие формы; небольшие изменения.
- Имиджинг: расширяйте только высокочастотные стороны; защищайте мононизированный низ и центральный вокал.
- Максимайзер: добавляйте громкость до тех пор, пока щелчок малого барабана или присутствие вокала не притупятся. Отступите на 0.3–0.5 дБ.
Афробит / Афро-фьюжн
- Эквалайзер: сохраняйте ясность элементов грува; успокаивайте 2–3 кГц только если гитары/клавиши мешают лидеру.
- Контроль баса: управляйте перекрытием 120–180 Гц; избегайте чрезмерного сжатия ощущения лог-драм или бас-гитары.
- Удары и воздушность: защищайте естественную верхушку; длинные яркие подъёмы могут утомлять грув.
VII. Когда у вас есть только стерео-батч (без стемов)
Здесь Ozone 12 проявляет себя. Используйте Stem EQ, чтобы повысить чёткость вокала без усиления резкости тарелок. Если хэты на 2-треке яркие, рассмотрите возможность бокового снижения около 9–10 кГц, чтобы центральный вокал сохранил воздушность. Для столкновений с 808 сохраняйте зону разборчивости вокала, слегка снижая 2–4 кГц в музыке, пока вокал звучит. Делайте небольшие динамические изменения — ваша цель тонкое разделение, а не ремикс.
VIII. Спасение с помощью Unlimiter (что делать и чего не делать)
- Используйте Unlimiter на переограниченных записях, где транзиенты сглажены, но не уничтожены.
- Не ждите чудес от клиппированных, искажённых миксов; восстановление ограничено тем, что уже потеряно.
- После этого аккуратно повторно ограничьте; стремитесь к ударности и безопасности, а не к максимальному уровню LUFS.
- Не накладывайте агрессивные усилители транзиентов после восстановления; они могут усилить артефакты.
IX. Дисциплина максимайзера (чистая громкость без искажений)
Добавляйте усиление малыми шагами, следя за true peak. Если удар бас-бочки становится мягче или стереообраз рушится, вы превысили оптимум. Используйте более медленный релиз или менее агрессивный характер, прежде чем жертвовать запасом по уровню. Громкость, которая кажется естественной, всегда лучше громкости, которая звучит «перекачанной».
X. Распространённые ошибки и быстрые исправления
- Резкие «с» на маленьких колонках. Смягчите воздушный срез на 0,5 дБ; расширьте диапазон деэссинга; примените низкочастотную задержку около 6–7 кГц.
- Коробочный центр. Попробуйте широкое снижение на −1 дБ около 250–300 Гц или динамический эквалайзер, управляемый пиками вокала; избегайте «пустоты» в миксе.
- Туман в сабе. Немного подрежьте 120–180 Гц (Bass Control) и сохраните настоящий саб; проверьте бас-бочки в моно.
- Широкий, но слабый. Верните часть энергии в середину/центр; расширяйте только выше диапазона вокала.
- Звук ассистента «обычный». Сохраните кривую, но измените тембр с шагом 0,5 дБ; поменяйте порядок модулей; обновите время релиза.
XI. Мастеринг с ИИ — как оставаться в контроле
Функции ассистента полезны для скорости и запоминания, но лучшие результаты достигаются, когда человек определяет цель и принимает последние 10% решений. Для реальных сценариев, когда стоит полагаться на алгоритмы или обратиться к инженеру, эта практическая статья сравнивает оба пути: AI vs human mastering. Сохраняйте такой подход в Ozone 12: пусть анализ предлагает, а ваши уши выбирают.
XII. Проверьте свою работу (тихие тесты важнее индикаторов)
- Проверка на низком уровне: уменьшите громкость мониторов до минимума. Если соотношение вокала и бас-бочки всё ещё кажется правильным, а согласные слышны, вы близки к цели.
- Наушники и телефон: слушайте на предмет хрупких верхов и исчезновения саба. Сначала отрегулируйте средний диапазон; верх и низ часто следуют за ним.
- Моно: свести и проверить разборчивость текста; исправить конфликты центра перед восстановлением ширины.
XIII. Спецификации экспорта и именование файлов (сохраните себя в будущем)
- Мастера: WAV, 24-бит с частотой дискретизации сессии. Безопасно для true-peak. Оставьте чистые начало и конец.
- Альтернативы: инструментал, акапелла и чистая/радио-версия при необходимости — с выравниванием начала и конца.
- Дизер: применять только при снижении битовой глубины (например, с 24-бит до 16-бит для CD).
-
Имена для сортировки:
Artist_Song_Main.wav,Artist_Song_Instrumental.wav,Artist_Song_Acapella.wav,Artist_Song_Clean.wav.
XIV. Многоразовый чек-лист мастеринга (распечатайте или сохраните)
- Премастер пики на −6 до −3 дБFS; без мастер-лимитера.
- Два эталона с выровненными уровнями; плановая проверка на тихом мониторе.
- Проход ассистента для стартовой кривой; уточняйте на слух.
- Хирургический эквалайзер → широкий эквалайзер → динамический эквалайзер (только при необходимости).
- Контроль баса для упорядочивания перекрытия 120–180 Гц; сохранение настоящего саба.
- Эквалайзер стема для ясности вокала или комфорта тарелок при необходимости.
- Экзайтер/окраска небольшие; имиджинг осторожный; центр защищён.
- Де-эссинг широкополосный, если свисты S; затем лёгкая полировка воздуха.
- Максимайзер для чистой громкости; следите за истинным пиком; остановитесь до того, как удар потеряет силу.
- Финальные подрезки; экспорт 24-битного WAV; печать выровненных альтернатив.
XV. Создание личной стартовой библиотеки
Сохраняйте небольшие, сфокусированные пресеты для распространённых проблем: «Снижение коробчатости −1 дБ @ 280 Гц», «Присутствие вокала +0.5 дБ @ 3.2 кГц», «Де-хэш боковой @ 9.5 кГц». Делайте варианты по жанрам. Маркируйте по намерению, а не только по модулю. Со временем вы будете работать быстрее, потому что каждое действие имеет чёткую задачу.
XVI. Для более быстрых вокально-ориентированных мастеров
Чистые цепочки исходных данных делают мастеринг простым. Если вы хотите проверенную базу для записи, которая хорошо сочетается с этим руководством, изучите студийные вокальные пресеты для вашей DAW и стиля, затем точно настройте пороги, полосы де-эссинга и уровни посылов на ваш голос и комнату. Последовательный захват означает меньше исправлений в конце — и больше времени для творческого тона.
XVII. Финальный угол: делайте меньше, слышьте больше
Ozone 12 предоставляет вам точные инструменты. Используйте их аккуратно. Широкий спад на −1 дБ может изменить запись более музыкально, чем узкий спад на −3 дБ. Восстановите запас по уровню перед погоней за громкостью. Если действие заставляет вас добавить ещё три, отмените его и послушайте снова. Лучшие мастера звучат неизбежно — как будто микс всегда хотел звучать именно так.