В GarageBand вокальный пресет — это сохранённый Патч, который загружает эквалайзер, компрессию, де-эссинг, тональный окрас и пространство одним действием. В этом руководстве показано, как загружать и настраивать патчи, устанавливать правильный уровень усиления, направлять эхо/реверберацию как посылы, автоматизировать сцены и сохранять версии для ведущего вокала, дублирования, гармоний и ад-либов — чтобы ваши вокалы звучали на телефонах, наушниках и больших колонках.
I. Что такое «вокальный пресет» в GarageBand
GarageBand организует звуки как Патчи. Вокальный патч — это просто цепочка эффектов вашего трека (Channel EQ, Compressor, DeEsser, Noise Gate, Modulation, Delay, Reverb, плюс AU-плагины при включении), сохранённая для мгновенного вызова в разделе Пользовательские патчи. Использование пресета — это не просто его загрузка: вы адаптируете усиление, де-эссинг, присутствие, Air и баланс эффектов под ваш голос и песню.
II. Предварительная подготовка (чтобы пресет работал корректно)
- Устройство/задержка: Настройки → Аудио/MIDI → выберите ваш интерфейс; используйте меньший буфер при записи и увеличьте его позже для микширования.
- Включить Audio Units (Mac): Настройки → Аудио/MIDI → отметьте Включить Audio Units, если ваш пресет использует AU-плагины.
- Частота сессии: 44,1 кГц для музыки (48 кГц при доставке видео).
- Уровень входа: пойте на уровне исполнения; стремитесь к сырым пикам около −12 до −8 дБFS до любых эффектов.
- Разметка дорожки: начните с одной аудиодорожки Lead Vox; держите бит тише, пока настраиваете тон.
III. Загрузка пресета (три надежных способа)
1) Из User Patches (самый быстрый способ)
- Создайте/выберите аудиодорожку → нажмите Y, чтобы открыть Библиотеку.
- Выберите User Patches → Audio → выберите ваш вокальный патч.
- Включите запись и говорите. Цепочка (EQ → Comp → DeEsser → FX) активна.
2) Продвиньте цепочку «стартового проекта» в пользовательский патч
- Откройте .band стартовый проект с настроенной вокальной дорожкой (или демо-сессию от поставщика).
- Выберите вокальную дорожку → в панели Библиотеки нажмите Сохранить (внизу) → дайте понятное имя, например, Lead — Clean Pop (GB).
- Теперь он находится в User Patches для всех проектов.
3) Пресеты AU-плагинов → затем сохраните патч
- Загрузите AU-плагины (например, любимый компрессор или де-эссер) на дорожку.
- Выберите пресет каждого плагина из его внутреннего меню; слегка подкорректируйте.
- Нажмите Сохранить в Библиотеке, чтобы сохранить всю цепочку как пользовательский патч.
Где находятся патчи на диске? GarageBand использует пользовательскую библиотеку Logic: ~/Music/Audio Music Apps/Patches/Audio/. Любой патч там появляется в разделе User Patches.
IV. Gain staging: решающий этап
Пресеты предполагают здоровый запас по уровню. Держите просто:
- Сначала предусилитель микрофона: настройте интерфейс так, чтобы необработанные пики были в диапазоне −12 до −8 дБFS.
- Цель компрессора A: в пресете стремитесь к ~3–5 дБ снижения усиления на фразах (коэффициент 2:1–3:1; атака 10–30 мс; релиз 80–160 мс). Не давите постоянно на 10–12 дБ.
- После рэйка: пики дорожки около −6 до −3 дБFS; оставьте громкость для мастеринга.
- Согласование уровней при A/B-сравнении: согласуйте уровни выходного сигнала перед выбором между патчами — громче побеждает несправедливо.
V. Smart Controls: регуляторы «канальной полосы»
Smart Controls отображают важные параметры, чтобы не открывать каждое окно плагина. Типичные роли:
- Де-эссинг (6–8 кГц): крутите, пока наушники не перестанут жаловаться; остановитесь до размытия согласных.
- Тело (120–200 Гц): добавьте тепла, если звук тонкий; если появляется «коробка» в кабинете, вычитайте 250–350 Гц.
- Присутствие (3–4 кГц): небольшой широкий подъём только если дикция скрыта. Если хай-хэты яркие, вырезайте бит, а не усиливайте голос.
- Воздух (10–12 кГц): микрошельф только после успокоения сибилянтов.
- Echo & Reverb: они работают как посылы к Master Echo/Reverb; держите куплеты суше и открывайте припев.
VI. Создавайте «семью», а не клоны (Lead, Doubles, Harmonies, Ad-libs)
Копирование одного патча на все дорожки размывает микс. Используйте версии, настроенные под роль:
- Лид: моно, плотный центр; минимальные расширители; управление громкостью ведёт рассказ вперёд.
- Дубли L/R: выше HPF, чем у лидирующего; чуть больше де-эссинга; заглубляйте на −6 до −9 дБ; микро-панорамирование L/R; избегайте хорус-расширителей, которые сжимаются в моно.
- Гармонии: темнее, чем дубли; шире; опционально +0.5–1 дБ на 5 кГц для блеска, если нужно.
- Ad-libs: узкая полоса (HPF ~200 Гц, LPF 8–10 кГц), панорамирование в стороны, короткие эхо на переходах.
Сохраните каждый как отдельный User Patch: Lead — Clean, Double — Tight, Harmony — Wide, Ad-Lib — Phone.
VII. Время и пространство: эхо/реверб как посылы
Патчи библиотеки GarageBand часто используют Master Echo и Master Reverb. Рассматривайте регуляторы Echo/Reverb дорожки как уровни посылов:
- Настройка мастер-эффектов: выберите яркий короткий пластинчатый реверб для Master Reverb и слэп или задержку 1/8 для Master Echo; фильтруйте возвраты внутри плагинов (HPF ~150 Гц, LPF ~6–7 кГц).
- Альтернатива эффектам дорожки: предпочитайте плагин Echo/Verb на каждой дорожке, когда хотите уникальные пространства. Держите уровни микса низкими — перевод > «большой».
- Автоматизация посылов: увеличьте Echo/Reverb на 1–2 дБ в припевы; уменьшайте для скороговорок.
VIII. Стандартная «безопасная цепочка» (восстанавливаемая в любом месте)
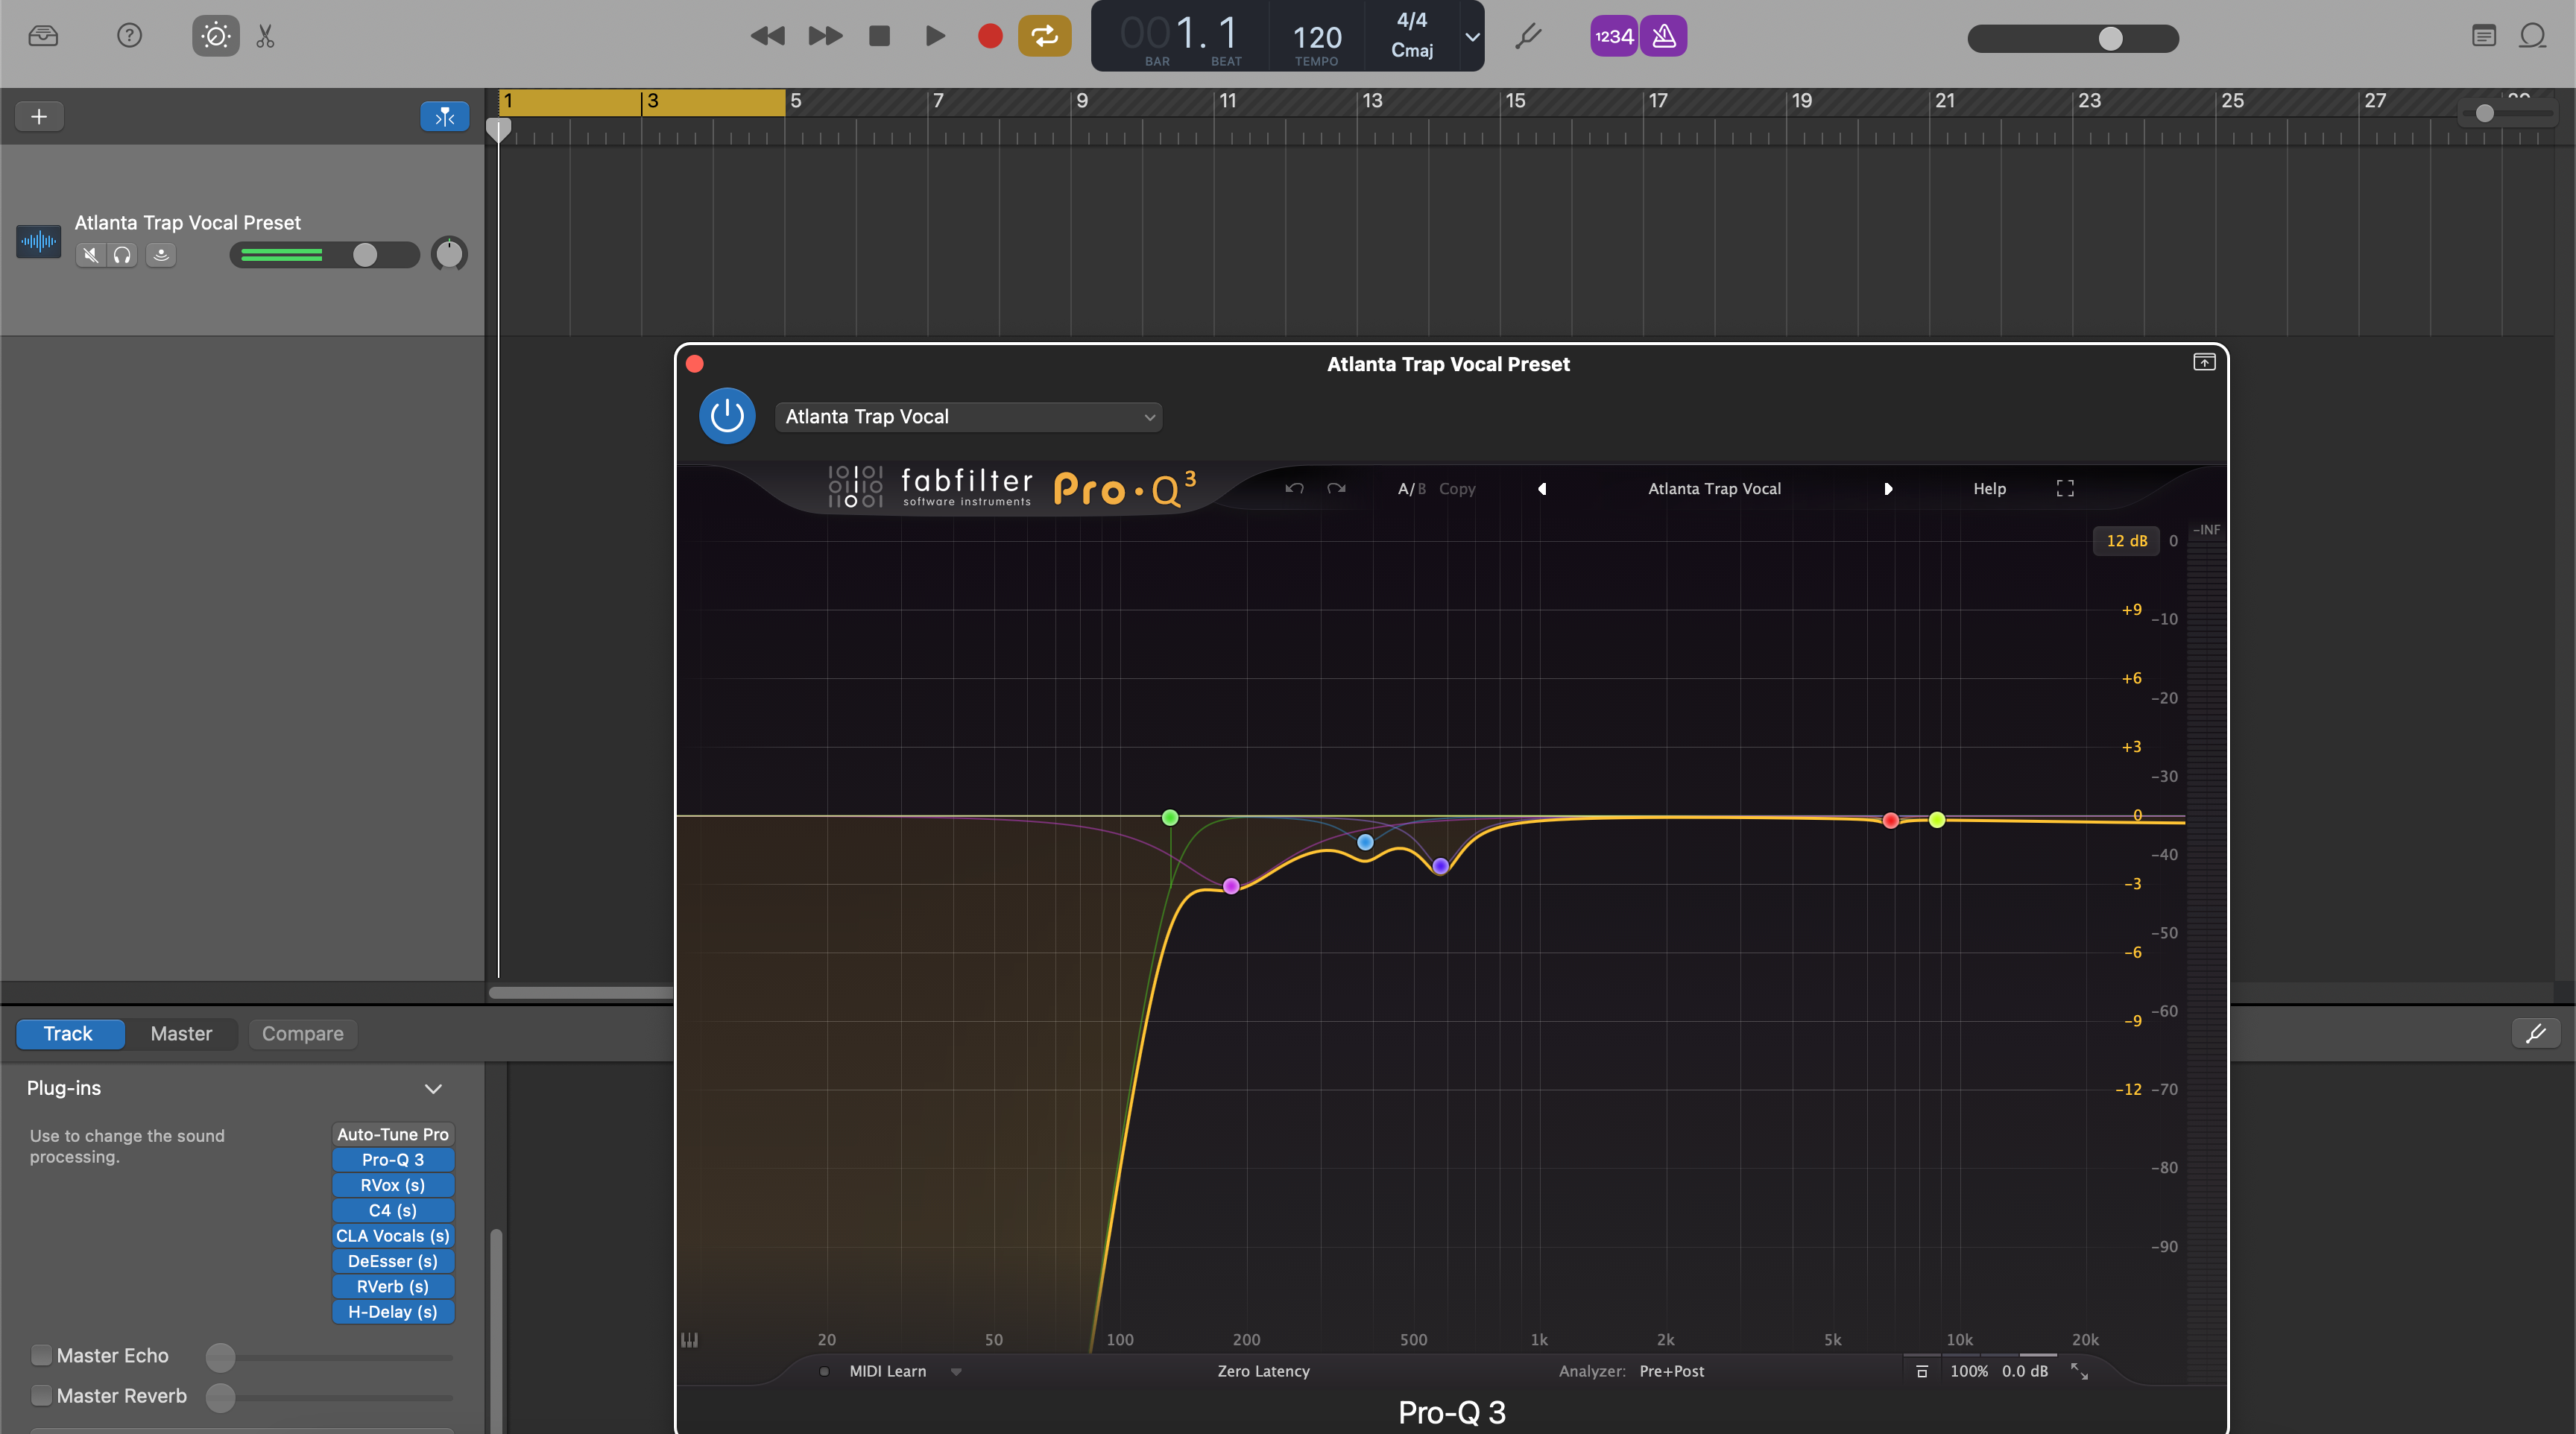
- Эквалайзер канала (первый): HPF 80–100 Гц; широкий спад −1 до −2 дБ на 250–350 Гц, если звучит гулко; узкий notch около 1 кГц, если носовой звук.
- Компрессор A (форма): коэффициент 2:1–3:1; атака 10–30 мс; релиз 80–160 мс; цель ~3–5 дБ на фразах.
- DeEsser: центр ~6–8 кГц; уменьшайте, пока S/T/SH не станут комфортными в наушниках.
- Компрессор B (ловец): более быстрый GR 1–2 дБ для стабилизации уровней посылов и пиков.
- Цвет (опционально): тонкий трубочный/аналоговый этап для плотности; выход согласован, чтобы «громче» не вводило в заблуждение.
- Channel EQ (полировка): +0.5–1 дБ широкополосно на 3–4 кГц только если дикция теряется; в конце небольшой air shelf.
- Delay & Reverb: slapback 90–110 мс; яркий короткий plate 0.7–1.0 с; фильтруйте возвраты, чтобы избежать шипения.
Сохраните как Lead — Stock Clean (GB), затем создайте более легкие/тяжелые варианты для каждой песни.
IX. Рабочий процесс iOS (iPhone/iPad)
На мобильных устройствах GarageBand не имеет центрального браузера User Patch, как на Mac. Используйте стартовую песню с вашей любимой цепочкой:
- Создайте песню с вашим настроенным вокальным треком (и выбором FX) и назовите её «Starter — Vocals (iOS)».
- Для каждого нового проекта Дублируйте стартовый файл в My Songs и записывайте.
- Опционально: используйте AUv3 плагины там, где полезно; слегка настраивайте Smart Controls и пересохраняйте стартовый файл, если новые настройки лучше передаются.
Совет: Используйте цепочку с меньшей задержкой, если растет латентность. Добавляйте полировку после записи.
X. Выживание двухдорожечного бита (яркие хэты, тяжёлые сабы)
Когда инструментал — стереофайл, уменьшайте столкновения вместо «больше яркости» на вокале:
- Контроль сплэша: держите Air shelf консервативным; низкочастотный фильтр Echo/Reverb возвращается около 6–7 кГц, если хай-хэты звучат ледяными.
- Сосуществование саба: если слоги теряются под хвостами 808, держите куплеты суше и предпочитайте небольшой подъём Presence вместо сильной компрессии.
- Проверка моно: ваш лид должен звучать на динамике телефона; ширина должна быть в даблах и ревербах, а не в центральном вставке.
XI. Автоматизация, которая продает партию (микро, не макро)
- Регулировка громкости: +0,5–1 дБ на сильных долях; −0,5 дБ в плотных согласных.
- Порог де-эссинга: задавайте чуть более жесткое значение на ярких фразах; ослабляйте на темных участках.
- Хореография FX: поднимайте Echo/Plate в хуки; оттягивайте в куплетах; держите хвосты отфильтрованными для ясности.
XII. Быстрый прослушивание нескольких патчей
- Закладка 2–4 избранных в User Patches с понятными названиями (например, Lead — Clean, Lead — Air+, Lead — Warm).
- Сравнивайте уровни с финальным усилением перед оценкой; «громче побеждает» — ловушка.
- Удаляйте патчи, которыми не пользуетесь — меньше вариантов = быстрее работа.
XIII. Устранение неполадок (проблема → целенаправленное действие)
- Резкие «С» после добавления Air: немного повысите DeEsser; уменьшите Air примерно на 0,5 дБ; примените низкочастотный фильтр к возвратам около 6–7 кГц.
- Вокал тонет под 808: делайте куплеты суше; добавьте небольшой подъём Presence; уменьшите обратную связь задержки; проверьте, что не наложили две реверберации.
- Пресет звучит иначе при экспорте: проверьте качество/режимы задержки плагинов; не допускайте клиппинга мастера; рендерьте с частотой сессии.
- Задержка при записи: укоротите реверберации; отключите тяжелые анализаторы; уменьшите буфер; включите прямой мониторинг на интерфейсе, если есть.
- Патч кажется «мертвым» на вашем микрофоне: ослабьте де-эссер; уменьшите вырезы в низких средних; небольшой подъём 150–180 Гц восстановит грудь без грязи.
- Несовпадение мобильного и Mac: проверьте усиление входа и громкость наушников; избегайте включения системной обработки на iOS.
XIV. Организация и восстановление (минуты сейчас, часы экономии потом)
-
Имена для сортировки:
Лид — Чистый,Лид — Air+,Рэп — Панч,Гармония — Широкая,Ad-Lib — Телефон. - Один патч на роль: отдельные патчи для Lead/Doubles/Harmonies предотвращают чрезмерный де-эссинг или излишнее осветление центра.
-
Резервные копии: скопируйте
~/Music/Audio Music Apps/Patches/в облако/внешнее хранилище, чтобы настройки всегда были с вами.
XV. FAQ (быстрые ответы)
Где должна располагаться коррекция тона?
Первым или почти в начале (после любой регулировки входа), чтобы последующая компрессия и де-эссинг видели стабильный сигнал.
Один компрессор или два?
Два компрессора звучат мягче: компрессор A формирует фразы (3–5 дБ GR); компрессор B ловит пики (1–2 дБ GR). Это лучше, чем один тяжелый компрессор.
Насколько громким должен быть вокал при микшировании?
Держите пики после эффектов около −6 до −3 дБFS; оставьте запас по истинному пику и громкость для мастеринга.
Нужен ли микрофон, указанный в пресете?
Нет. Пресеты — это отправные точки. Адаптируйте Trim, De-Ess, Body, Presence и FX под свой голос и микрофон.
XVI. Быстрый план действий (копируемый)
- Загрузите пользовательский патч; установите вход так, чтобы сырые пики были в диапазоне −12 до −8 дБFS; компрессор A сжимает на 3–5 дБ.
- Применяйте De-Ess до «мягко-яркого» звучания, добавляйте крошечный Presence только если дикция скрывается; держите Air сдержанным.
- Обрабатывайте Echo/Reverb как посылы; фильтруйте возвраты; автоматизируйте их в припеве.
- Сохраняйте патчи по ролям (Lead, Doubles, Harmonies, Ad-libs) и имейте стартовый набор для Mac/iOS.
- Рендерьте черновики с запасом по уровню; не допускайте клиппинга мастера; громкость оставьте для мастеринга.
При правильном использовании вокальные пресеты — это надежные ярлыки, а не костыли. Сохраняйте запас по уровню, делайте небольшие изменения, автоматизируйте важное, и ваш голос будет звучать впереди без резкости — песня за песней. Если хотите начать с патчей, уже настроенных для современного попа, рэпа и R&B в GarageBand, возьмите подобранные вокальные пресеты GarageBand и закрепите свои «лучшие» версии для быстрых и стабильных сессий.