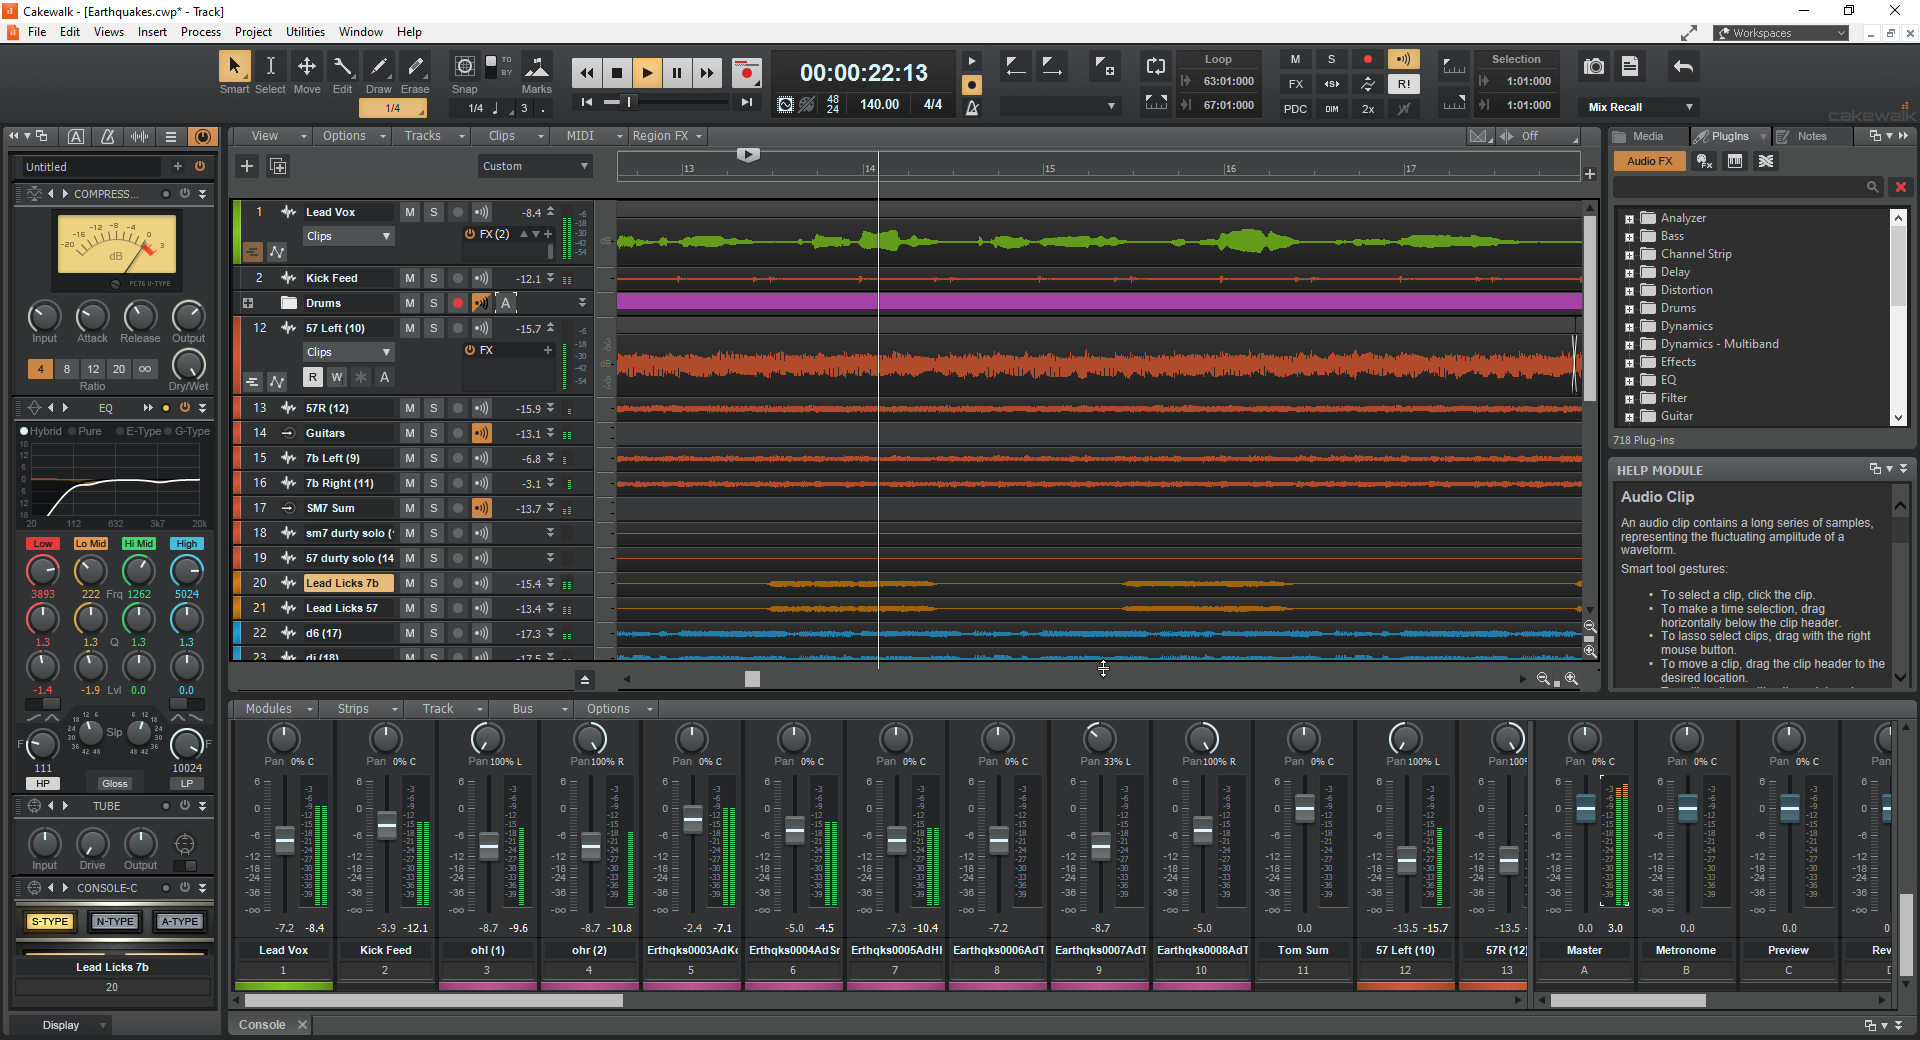
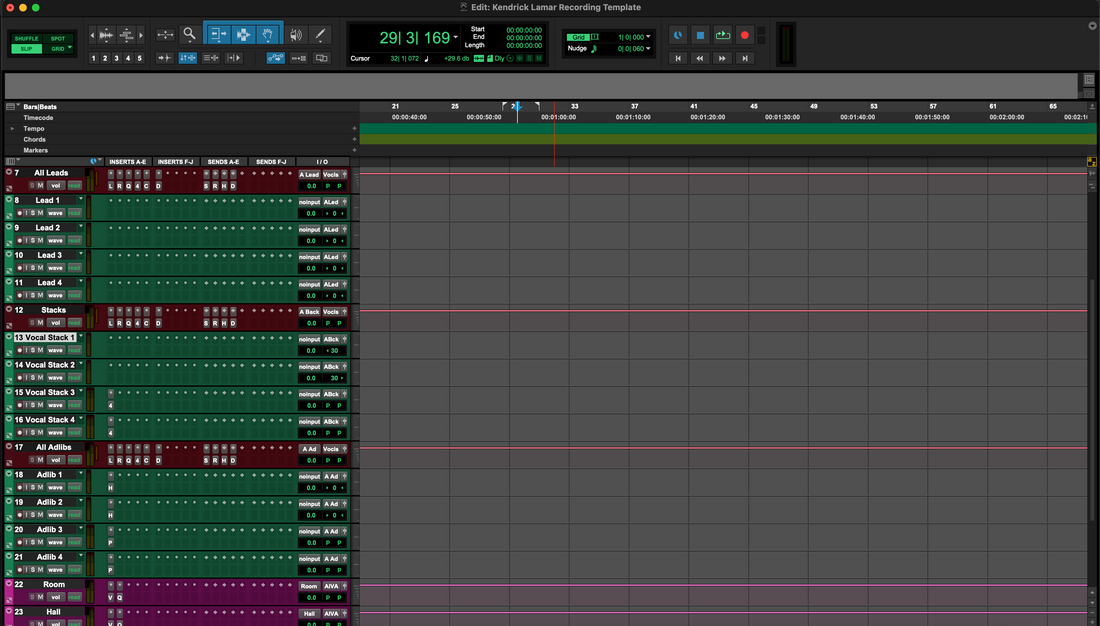
Cakewalk vokal presetleri, EQ, kompresyon, de-essing, renk ve zaman tabanlı FX dahil tam vokal zincirlerini tek seferde yükler—böylece kayıt ilk andan itibaren profesyonelce hissedilir. Bu rehber, bugün çalışan tüm kurulum yollarını (FX Zincirleri, Parça Şablonları, ProChannel presetleri) açıklar, dosyaların disk üzerindeki yerini gösterir ve yönlendirme, kazanç ayarı ve hızlı çözümler konusunda sizi adım adım yönlendirir.
I. “Cakewalk vokal presetleri” aslında nedir
Cakewalk by BandLab (Windows) içinde, “vokal preset” birkaç değiştirilebilir şeyden biri olabilir:
- FX Zinciri preset — makro kontrolleri (Trim, De-Ess, Body, Presence, Air, FX) olan tek bir cihaz içine sarılmış insert zinciri.
- Parça Şablonu — FX insert zinciri, ProChannel durumu, Giriş/Çıkış, renk ve gönderimleriyle kaydedilmiş bir ses parçası.
- ProChannel preset — modül başına ayarları hatırlayan ProChannel modüllerinin (EQ, kompresör, de-esser, tüp doygunluğu) kaydedilmiş durumu.
- Proje Şablonu — Lead, Doubles, Harmonies, Ad-libs ve iki dönüş (Slap, Plate) için kanallar içeren tam bir “başlangıç” oturumu.
İyi preset paketleri genellikle birden fazla format içerir, böylece tercih ettiğiniz şekilde kurabilir ve aynı sesi elde edebilirsiniz.
II. Ön kurulum kontrol listesi (bunu bir kez yapın)
- Cakewalk'u en son sürüme kurun veya güncelleyin.
- Ses sürücünüzün ayarlandığını (ASIO önerilir) ve kullanacağınız mikrofon girişini onaylayın.
- Paketiniz üçüncü taraf eklentilere referans veriyorsa, önce onları kurup lisanslayın.
- Tercihler → Dosya → VST Ayarları menüsünde, VST3 klasörlerini doğrulayın ve Tara düğmesine tıklayın.
- Tercihler → Dosya → Klasör Konumlarında Track Templates, Project Templates ve Audio FX Chain Presets yollarını not edin.
III. Cakewalk vokal ön ayarlarını yüklemenin üç yolu
A) FX Zinciri ön ayarı (çoğu kullanıcı için en hızlı)
- İndirilen dosyanızı açın. “FX Chains”, “Cakewalk FX” veya benzeri isimde bir klasör arayın.
- Cakewalk'u ve test projenizi açın.
- FX Zinciri dosyasını vokal kanalınızın FX kutusuna sürükleyip bırakın. Zincir anında yüklenir; makro düğmeleri görünür.
- Zinciri kütüphanenize kaydedin tekrar kullanmak için: FX Zinciri başlığına sağ tıklayın → FX Zinciri Ön Ayarını Kaydet… ve net bir isim seçin (örneğin, “Lead — Clean Pop (CW)”).
Neden kullanılır: tek dosya, anında geri çağırma, herhangi bir oturuma taşınabilir, hızlı ayarlamalar için makro dostu.
B) Track Şablonu (yönlendirme, gönderimler ve renkleri de ekler)
- Track Şablonları yolunuzu bulun. Tercihler → Dosya → Klasör Konumlarında “Track Templates”i not edin.
- Paketten sağlanan Track Şablon dosyalarını o klasöre kopyalayın (düzenli kategoriler için alt klasörleri koruyun).
- Herhangi bir projeye ekleyin: Track View'da sağ tıklayın → Track Şablonundan Ekle → yeni vokal şablonunuzu seçin.
Neden kullanılır: tüm kanalı tek seferde yükler—FX, ProChannel, Giriş/Çıkış, gönderimler (örneğin, Slap/Plate) ve hatta renk.
C) ProChannel ön ayarı (paket PC modül durumlarını içeriyorsa)
- ProChannel'ı açın vokal kanalınızda (Inspector'da kanalın “PC” alanına tıklayın).
- Ön ayar dosyasını yükleyin veya kopyalayın ProChannel ön ayar klasörünüze (tam yollar için Bölüm IV'e bakın) veya ProChannel ön ayar menüsünü kullanarak Yükle.
- Ayarladığınız durumu daha sonra kullanmak üzere isimlendirilmiş bir ön ayar olarak kaydedin: ProChannel menüsü → Ön Ayarı Kaydet.
Neden kullanılır: sıfır üçüncü taraf eklentisi, düşük CPU kullanımı ve Cakewalk’un kanal şeridi ile sıkı entegrasyon.
IV. Dosyaların bulunduğu yer (böylece kurulumlar güncellemelerden etkilenmez)
Tam klasörler özelleştirilebilir, bu yüzden güvenilir yöntem Tercihler → Dosya → Klasör Konumları kısmını kontrol etmektir. Tipik varsayılanlar aşağıdadır (sizinkiler farklı olabilir):
| Öğe | Tipik Windows Yolu | Notlar |
|---|---|---|
| Parça Şablonları | C:\Cakewalk Content\Cakewalk Core\Track Templates\ |
Alt klasörler ekleme sırasında kategori olarak görünür. |
| Proje Şablonları | C:\Cakewalk Content\Cakewalk Core\Project Templates\ |
File → New menüsünden seçin. |
| Audio FX Zinciri Ön Ayarları | C:\Cakewalk Content\Cakewalk Core\FX Chain Presets\ |
Kaydettiğiniz veya yüklediğiniz FX Zinciri ön ayarları. |
| ProChannel Ön Ayarları | C:\Cakewalk Content\Cakewalk Core\ProChannel Presets\ |
Tam PC durumları (modül ayarları). |
| VST3 Plug-in'leri | C:\Program Files\Common Files\VST3\ |
Zincirin başvurabileceği üçüncü taraf VST3'ler. |
İpucu: Emin değilseniz, Preferences → File → Folder Locations bölümünü referans alın ve dosyaları oraya yerleştirin. Ön ayarları birden fazla sürücüye dağıtmak yerine belgeleyin.
V. Temiz kayıtlar için yükleme, yönlendirme ve kazanç aşaması
- Mikrofonu yönlendirin. Vokal kanalınızda, Input değerini mikrofonunuza sinyal gönderen arayüz kanalına ayarlayın. Zincir üzerinden izlemek istiyorsanız Input Echo özelliğini etkinleştirin.
- Giriş seviyesini ayarlayın. Performans ses seviyesinde şarkı söyleyin ve işleme başlamadan önce ham zirveleri −12 ile −8 dBFS arasında tutmaya çalışın.
- Preseti yükle. FX Zinciri, Parça Şablonu veya ProChannel presetini ekle. Makro kontrollerin (Trim, De-Ess, Body, Presence, Air, FX) görünür olduğunu doğrula.
- 10–20 saniyelik bir kayıt yap. Zincirin sertlik olmadan netlik ve parlaklık kattığını doğrulamak için bypass/etkinleştir.
VI. Preseti kendin yap (çeviriye uygun makro hareketler)
- Trim: kompresörün ideal aralıkta çalışması için girişi normalize et; aşırı sıkıştırmaktan kaçın.
- De-Ess: donuk değil, “yumuşak-parlak” için ayarla. Ölçü aletlerinden çok kulaklıklarla ayarla.
- Body: 120–200 Hz civarında sıcaklık ekle; 250–350 Hz kutu sesine dikkat et.
- Presence: diksiyon gizleniyorsa 3–4 kHz civarında küçük, geniş bir itme; şapka veya alkış kalabalık yaparsa geri çek.
- Air: sibilans sakinleştikten sonra sadece 10–12 kHz'de mikro-kaldırma.
- FX Blend: tavır için 90–120 ms slap; 20–50 ms pre-delay ile parlak kısa plate 0.7–1.0 s kaldırma için. Kıta kısımlarını daha kuru tut; nakaratı aç.
VII. Role dayalı kurulum (Lead, Doubles, Harmonies, Ad-libs)
Presets en iyi aile olarak çalışır. Aşırı işleme önlemek için her rol için bir tane kaydedin.
- Lead: mono-sağlam merkez; minimal genişleticiler; öncelik rides ve diksiyon.
- Doubles: daha yüksek high-pass; biraz daha de-ess; 6–9 dB altta sakla; mikro-pan L/R.
- Harmonies: doubles'tan daha karanlık ve geniş; düşük-orta frekansları daha agresif filtrele; parlaklığı ölçülü tut.
- Ad-libs: dar bant genişliği (HPF ~200 Hz, LPF ~8–10 kHz), yanlara panlanmış, geçişlerde kısa atışlar.
VIII. Güvenilir sadece stock zinciri (Cakewalk içinde yeniden kur)
Paketi sadece stock ise veya kendin yap zinciri istiyorsan, bu sinyal yolu güvenli ve çeviri dostudur. Ölçülü ayarlar kullan ve sık sık A/B yap.
- EQ (stock / ProChannel EQ): HPF 80–100 Hz; kutu gibi ise 250–350 Hz arasında geniş −1 ila −2 dB; burunlu ise isteğe bağlı 1 kHz civarında dar çöküş.
- Compressor A: oran 2:1–3:1; attack 10–30 ms; release 80–160 ms; ünlüler nefes alsın diye cümlelerde 3–5 dB kazanç azaltımı hedefleyin.
- De-esser: 6–8 kHz civarında geniş bant; kulaklıklar şikayet etmeyi bırakana kadar azaltın.
- Komprösör B (yakalama): zirveleri yakalamak için daha hızlı (1–2 dB GR) ve gönderimleri stabilize etmek için.
- Doygunluk (PC tüp/konsol veya hafif bant): yoğunluk için düşük karışım; seviye sizi yanıltmasın diye çıkışı eşleştirin.
- Presence cilası (EQ): sadece gerekirse 3–4 kHz civarında +0.5–1 dB geniş bant; de-ess sonrası mikro hava yükseltmesi.
- FX (gönderimler): mono slap 90–110 ms, filtrelenmiş 150 Hz–6 kHz; kısa plate 0.7–1.0 s ile 20–50 ms ön gecikme; tıslamayı önlemek için dönüşleri filtreleyin.
IX. Kitaplığınızı düzenleyin, böylece çağırma anında olsun
-
Ön ayarları rol + atmosfer olarak adlandırın:
Lead — Temiz Pop,Rap — Vuruş,Harmony — Geniş Yumuşak,Ad-Lib — Telefon. - “Başlangıç Projesi” şablonu tutun: Lead, Doubles L/R, Harmoniler, Ad-libs; gönderimler A=Slap, B=Plate; Verse/Pre/Hook için işaretçiler.
-
Sürüm etiketleri: sık sık mikrofon değiştiriyorsanız bir mikrofon etiketi ekleyin (
(SM7B),(NT1)).
X. Dışa Aktarım & teslim (her seferinde temiz teslimatlar)
Zinciriniz kurulduktan sonra, oturumları veya stemleri paylaşacaksınız. Düzenli bir stem dışa aktarımı işbirliklerini basit tutar ve “eklenti eksik” sürprizlerini önler.
XI. Sorun Giderme (sorun → odaklanmış hareket)
- Ön ayar yükleniyor ama eksik ses çıkıyor. Bir eklenti eksik veya devre dışı. Tam VST3'ü kurun ve yeniden tarayın (Tercihler → Dosya → VST Ayarları → Tara), sonra tekrar yükleyin.
- Dosyaların nereye kopyalanacağını bulamıyorum. Tercihler → Dosya → Klasör Konumlarınu kullanın ve dosyaları Cakewalk'un gösterdiği yollara yerleştirin, tahminlerine değil.
- Makrolar çalışmıyor. FX Chain cihazı yerine bireysel eklentiler eklemiş olabilirsiniz veya zincirin kontrolleri eşlenmemiş olabilir. FX Chain dosyasını yükleyin ve makro eşlemelerini kontrol edin; tekrar kaydedin.
- Kayıt sırasında gecikme. Daha hafif bir “Tracking” ön ayarı kullanın (uzun reverb ve look-ahead dinamiklerini devre dışı bırakın). Kayıt yaparken sürücü panelinizde buffer'ı düşürün; miks yaparken yükseltin.
- Parlaklaştırmadan sonra sert S sesleri. De-ess'i nazikçe artırın; hava rafını yaklaşık 0.5 dB azaltın; gecikme/plate dönüşlerini ~6–7 kHz'de düşük geçişli yapın.
- Vokal 808 veya basın altında kaybolur. Yoğun pasajlarda ön vokali kuru tutun; Presence'i hafifçe yükseltin; stem miksliyorsanız, vokal konuşurken enstrümantalde 2–4 kHz aralığını azaltın.
- Ön ayarlar arasında seviye atlamaları. A/B yaparken seviyeleri eşleştirin. Adil karşılaştırma için son bir kırpma/yardımcı araç kullanın.
- Güncellemeden sonra, ön ayarlar “kaybolur.” Klasör yolu değişmiş olabilir. Klasör Konumlarını içerik sürücünüze yeniden yönlendirin veya ön ayarları mevcut yollara kopyalayın.
XII. Göç & yedekleme (kurulumunuzu geleceğe hazırlayın)
- Şimdi yedekleyin: Cakewalk Content\Cakewalk Core alt klasörlerinizi FX Chain Presets, ProChannel Presets, Track Templates ve Project Templates için buluta veya harici sürücüye kopyalayın.
- Yeni PC: önce Cakewalk ve eklentileri kurun; sonra bu klasörleri eşleşen konumlara yapıştırın; Folder Locations içinde doğrulayın.
- Bir iş arkadaşıyla paylaşın: FX Zinciri ön ayarını gönderin ve üçüncü taraf eklentileri listeleyin veya sadece stok varyantı ekleyin.
XIII. SSS (hızlı cevaplar)
Bir ön ayar reklamında listelenen tam mikrofona ihtiyacım var mı?
Hayır. Ön ayarlar başlangıç noktalarıdır. Sesinize ve mikrofonunuza uyacak şekilde Trim, De-Ess, Body ve Presence ayarlarını yapın.
ProChannel modülleri gerekli mi?
Hayır. Birçok zincir standart VST'ler kullanır. Bir ProChannel modülü eksikse, en yakın stok veya üçüncü taraf eşdeğerini kullanın ve ön ayarınızı yeniden kaydedin.
VST2 destekleniyor mu?
Bazı eski eklentiler hala çalışıyor, ancak kararlılık ve gelecekte uyumluluk için VST3 önerilir.
Ön ayar üzerinden kayıt yapmalı mıyım?
Üzerinden dinlemek sorun değil, ancak temiz bir kayıt veya paralel bir “güvenlik” parçası yazdırmayı düşünün. Kayıt sırasında ağır sınırlama sorunları gizleyebilir.
Şablonlarım neden 48 kHz ile 44.1 kHz arasında farklı mı ses veriyor?
Zamana bağlı FX ve bazı kompresörler örnekleme hızıyla davranış değiştirir. Mümkün olduğunda oturum hızını projeler arasında tutarlı tutun.
XIV. Kopyalanabilir hızlı kurulum özeti
- Paketi açın.
- FX Zinciri yolu: FX Zinciri dosyasını vokal parçanıza sürükleyin → sağ tıklayın → Save FX Chain Preset…
- Parça Şablonu yolu: şablonları Track Templates klasörüne kopyalayın → Insert from Track Template.
- ProChannel yolu: PC ön ayarlarını ProChannel Presets klasörüne kopyalayın → ProChannel'da yükleyin.
- Ham zirveleri yaklaşık −12 ile −8 dBFS arasında ayarlayın, makroları hafifçe ayarlayın ve “Lead — YourName” olarak yeniden kaydedin.
- Lead/Doubles/Harmonies/Ad-libs ve iki dönüş (Slap, Plate) içeren bir Başlangıç Projesi şablonu oluşturun.
Tek bir temiz kurulum, temiz klasör yolları ve basit bir şablonla, Cakewalk hızlı ve tekrarlanabilir bir vokal iş akışına dönüşür. Zincirleri aramak için daha az, her hoparlörde iyi çalan kayıtlar yapmak için daha fazla zaman harcayacaksınız.


