В FL Studio «вокальный пресет» — это повторно используемая цепочка в микшере — эквалайзер, компрессия, де-эссинг, окраска и пространство — которую можно применить к треку одним движением. В этом руководстве показано, как загружать пресеты, устанавливать оптимальный уровень усиления, адаптировать тон к вашему микрофону, направлять посылы, автоматизировать сцены и сохранять версии для отдельных дорожек для лид-вокала, дублей, гармоний и ад-либов. Если вы хотите использовать проверенные отправные точки, которые уже следуют этим практикам, изучите специально созданные вокальные пресеты FL Studio, а затем точно настройте пороги и посылы под ваш голос.
I. Что такое вокальный пресет в FL Studio
FL Studio поддерживает несколько предустановленных «контейнеров», которые упрощают загрузку и повторное использование вокальных цепочек:
- Состояние микшерного трека (.fst) — сохраняет весь вставленный эффект: порядок плагинов, настройки и параметры микшера для одного трека.
- Пресет Patcher — оборачивает всю цепочку в одно устройство с макроконтролями для быстрых настроек.
- Индивидуальные пресеты плагинов — настройки EQ/Comp/Delay/Reverb, которые можно микшировать внутри цепочки.
Использование пресета — это больше, чем просто загрузка. Вы адаптируете усиление, де-эссинг, присутствие, баланс эффектов и маршрутизацию шины под песню и голос. Нижеописанные шаги делают эту адаптацию быстрой и предсказуемой.
II. Предварительная подготовка (чтобы пресет работал корректно)
- Аудиоустройство настроено; буфер 64–128 сэмплов для записи (позже увеличьте для микширования).
- Частота проекта: 44,1 кГц для музыки (48 кГц при сдаче видео).
- Создайте дорожку микшера с именем Lead Vox; установите её фейдер на 0 dB (единица).
- Пойте на реальной концертной громкости и стремитесь к сырым пикам входа около −12 до −8 dBFS до любых эффектов.
- Используйте поп-фильтр; держите постоянное расстояние до микрофона (10–20 см) для стабилизации тембра.
III. Где живут пресеты (и быстрые способы их загрузки)
-
Загрузить состояние микшера: перетащите файл
.fstиз браузера на нужную вставку микшера (или кликните правой кнопкой по вставке → иконка Файл → Открыть состояние…). - Загрузить Patcher: вставьте Patcher в слот 1 → кликните имя пресета сверху → выберите сохранённый рэк.
- Сохранить для повторного использования: меню вставки микшера (стрелка) → Сохранить состояние дорожки микшера как… (назовите понятно, например, Lead — Clean (FL)). Для Patcher нажмите иконку диска → сохраните в Effects, чтобы оно появилось в браузере.
Профессиональный совет: держите папку «_Presets/Vocals» в браузере. Перетаскивайте туда любимые состояния микшера или рэки Patcher для быстрого доступа одним перетаскиванием.
IV. Быстрый прослушивание (без обмана ушей)
- Зациклите фразу длиной 10–20 секунд с тихими и громкими словами.
- Сравнивайте уровни перед оценкой: добавьте финальный Fruity Balance в конце цепочки и выровняйте выходы, чтобы «громче» не выигрывал несправедливо.
- Переключайте пресеты и слушайте на наушниках и маленьких колонках. Выбирайте тот, который хорошо транслируется, а не просто самый яркий.
V. Настройка усиления: решающий этап
Пресеты предполагают здоровый запас по уровню. Держите просто:
- Сначала тримминг: добавьте Fruity Balance в слот 1 (предобработка) или используйте ручку Pre Gain трека (в новых версиях FL). Настройте так, чтобы Comp A «касался» 3–5 dB GR на фразах, а не постоянно 10–12 dB.
- Дисциплина Unity: держите фейдер микшера около 0 dB, пока формируете динамику; регулируйте усиление цепочки внутри пресета.
- После рэкa: пики около −6 до −3 dBFS вполне достаточно. Оставьте громкость для мастеринга.
VI. Надёжная стандартная цепочка (можно собрать за несколько минут)
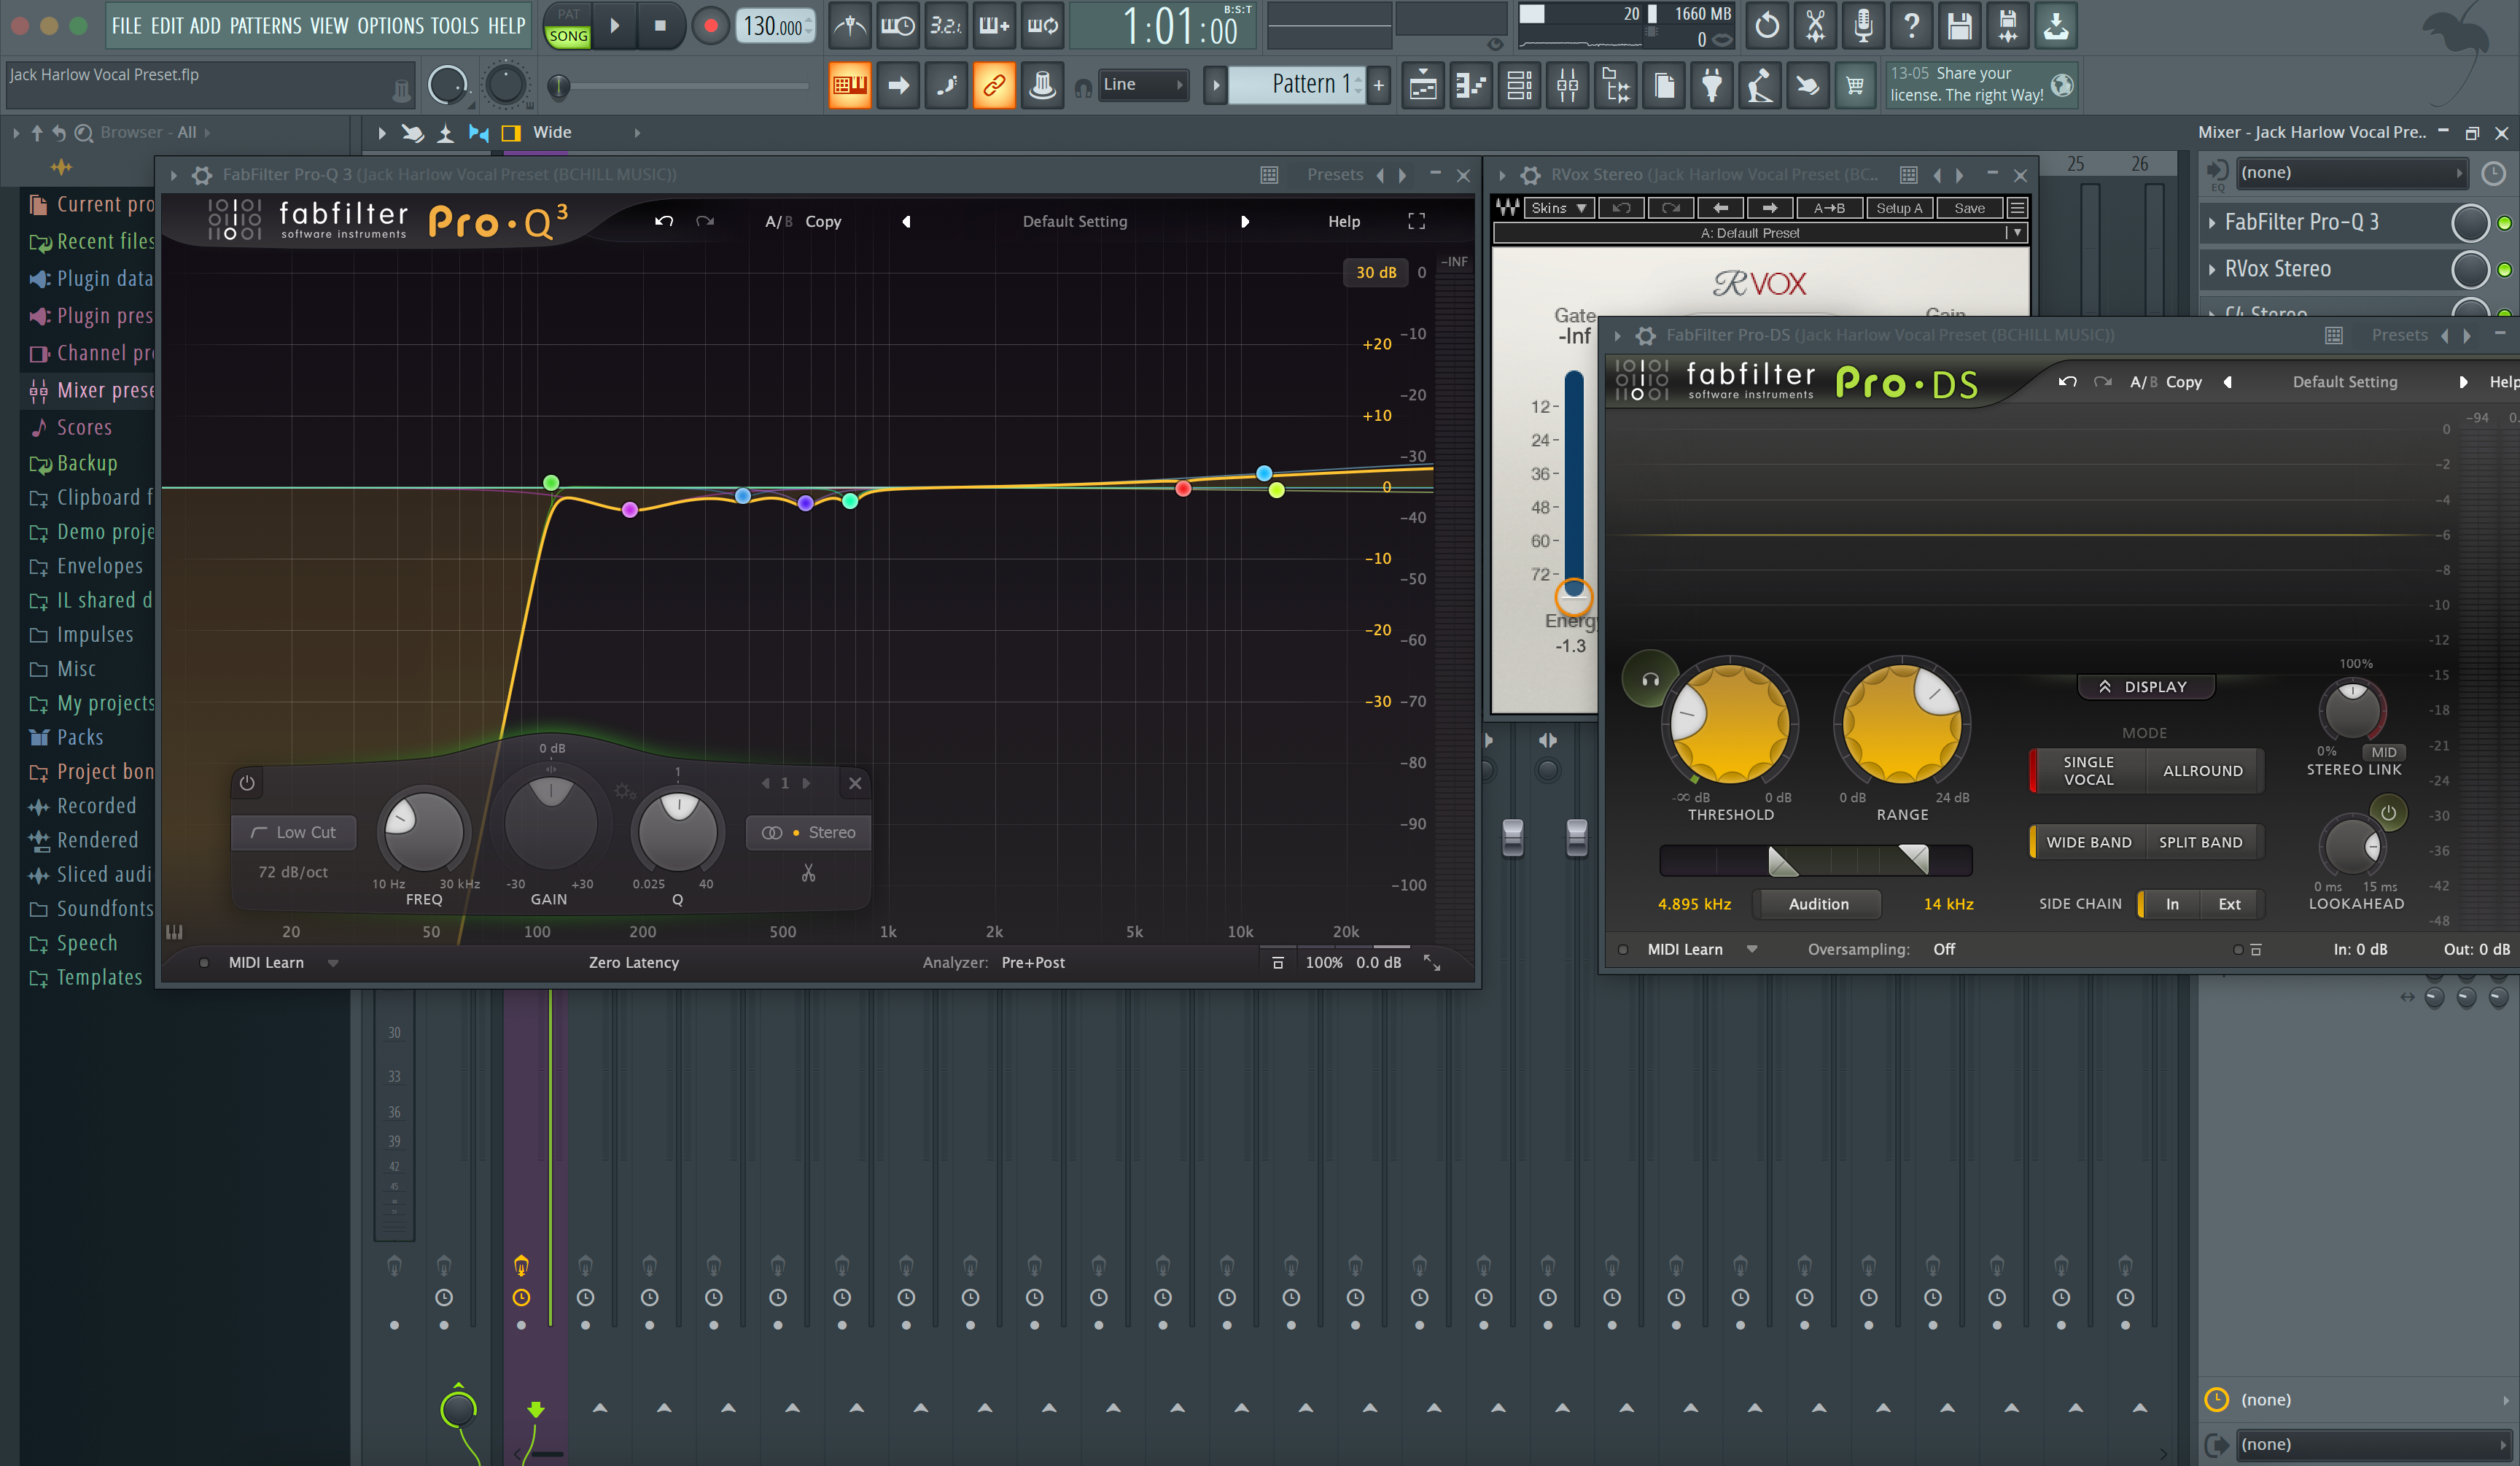
- Fruity Parametric EQ 2 (первый): HPF 80–100 Гц; широкое снижение −1 до −2 дБ на 250–350 Гц, если звучит гулко; опционально узкий notch около 1 кГц, если носовой звук.
- Fruity Compressor (Comp A, форма): коэффициент 2:1–3:1; атака 10–30 мс; релиз 80–160 мс; цель ~3–5 дБ на фразах, чтобы согласные дышали.
-
Де-эссер (два стандартных варианта):
- Maximus как де-эссер: соло высокочастотной полосы, установите порог для мягкого сжатия на S-звуках (6–8 кГц), затем отключите соло; сохраняйте выход на уровне 0 дБ.
- Fruity Limiter в режиме COMP: сайдчейн узкой полосы эквалайзера (см. раздел XI для метода Peak Controller) или используйте высокочастотный shelf с мягкой компрессией.
- Fruity Limiter (Comp B, ловец): очень быстрое срабатывание, чтобы ловить пики 1–2 дБ; высокий потолок (не ограничение), просто стабилизация посылов.
- Сатурация (опционально): Fruity Blood Overdrive с очень низким предусилением/миксом или Fruity Waveshaper с мягкой кривой; подгоняйте выход, чтобы «громче» не вводило в заблуждение.
- Fruity Parametric EQ 2 (полировка): +0.5–1 дБ широкополосно на 3–4 кГц только если дикция скрыта; крошечный shelf 10–12 кГц в конце, после де-эссинга.
Обверните цепочку в Patcher, если хотите запоминание одного устройства и макро-регуляторы для Trim/De-Ess/Body/Presence/Air/FX.
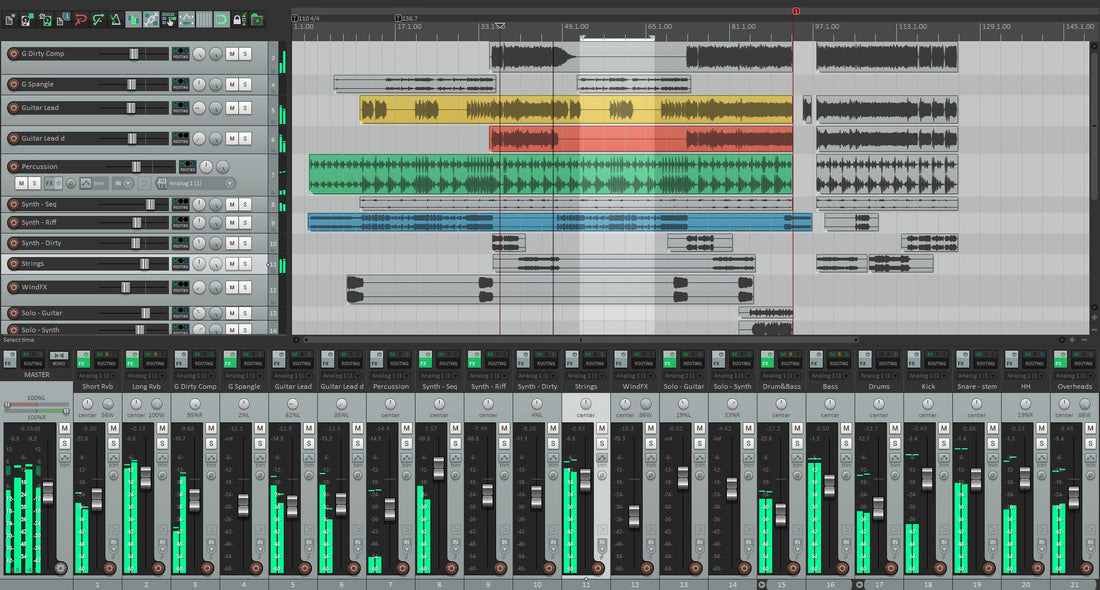
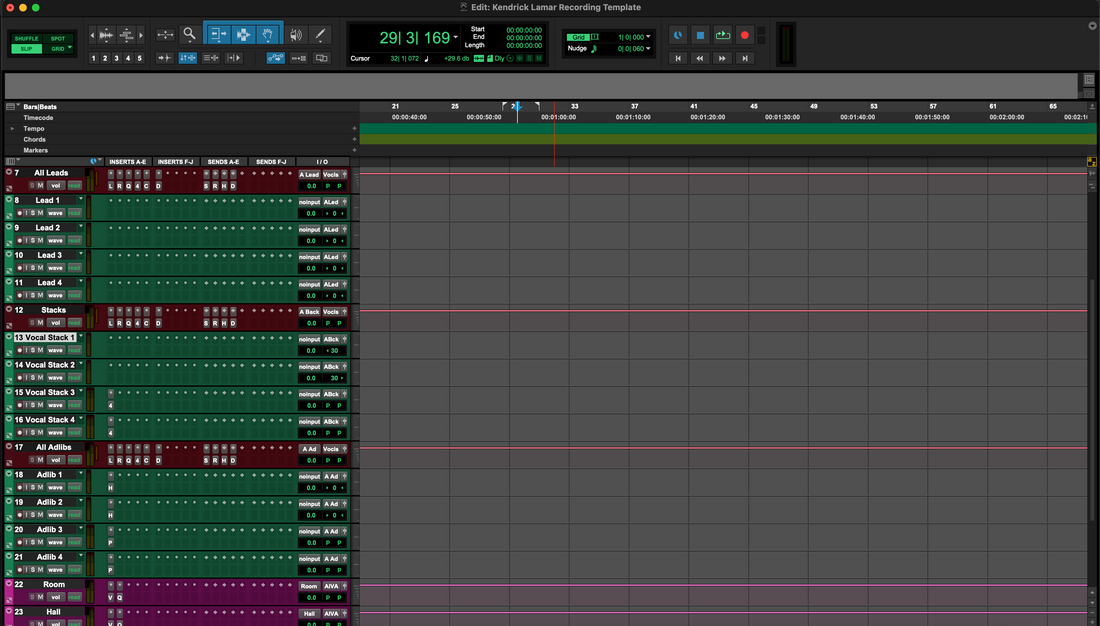
VII. Lead против стэков: создавайте «семью», а не клоны
- Lead: моно-центр; минимальные расширители; регулируйте громкость, чтобы поддерживать развитие истории.
- Дубли (L/R): выше HPF, чем у лидирующего голоса; чуть больше де-эссинга; заглушить на −6 до −9 дБ; микро-панорамирование влево/вправо; избегайте хорусных расширителей, которые сжимаются в моно.
- Гармонии: более тёмный эквалайзер; шире, чем дубли; опционально +0.5–1 дБ на 5 кГц для блеска, если нужно.
- Ad-libs: узкая полоса пропускания (HPF ~200 Гц, LPF ~8–10 кГц); панорамирование в стороны; короткие эхо-повторы на переходах.
Сохраните один пресет на роль — Lead — Clean, Double — Tight, Harmony — Wide — чтобы вызов был мгновенным и последовательным.
VIII. Время и пространство: настройте посылы FX один раз
- Создайте две дорожки микшера: FX A = Slap и FX B = Plate. Покрасьте их.
- Направьте Lead на A и B (щелкните правой кнопкой мыши по маленькой стрелке маршрутизации внизу дорожки Lead → Маршрут только на эту дорожку для групп или оставьте маршрутизацию Master плюс посылы).
- Fruity Delay 3 на FX A: время ~90–110 мс; HP/LP фильтр обратной связи ~150 Гц–6 кГц; низкая обратная связь.
- Fruity Reeverb 2 (или Fruity Convolver) на FX B: время затухания 0.7–1.0 с; предзадержка 20–50 мс; примените HP/LP к возврату.
- Уменьшите Slap: поставьте Fruity Limiter в режим COMP на FX A; сайдчейн с Lead; быстрое атака/релиз, чтобы эхо расцветало между слогами.
Автоматизируйте уровни посылов: +1–2 дБ на хуке, снижайте в плотных куплетах. Фильтруйте возвраты, чтобы хвосты не добавляли шипения в наушниках.
IX. Макросы Patcher (превратите цепочку в «канальную полосу»)
- Вставьте Patcher в слот 1; перетащите ваши устройства внутрь на вкладке Map.
- Добавьте Control Surface; создайте регуляторы с названиями Trim, De-Ess, Body, Presence, Air, FX.
- Свяжите каждый регулятор с ключевым параметром (правый клик по параметру → Link to controller… → выберите управление на Control Surface).
- Сохраните пресет Patcher (иконка диска), чтобы в следующий раз вся полоса была одним устройством.
Patcher поддерживает порядок в вашей цепочке и ускоряет работу на ноутбуке — не нужно открывать 6 окон для настройки 6 параметров.
X. Быстрый просмотр нескольких пресетов
- Сохраните несколько состояний микшера в браузере в папке _Presets/Vocals.
- Держите финальный Fruity Balance в слоте 10 для согласования выхода при A/B сравнении.
- Перетащите состояние на вставку, говорите 5 секунд, решайте, отменяйте (Ctrl+Z), пробуйте следующее. Сохраните лучшие 2–3; удалите лишнее.
XI. Выживание двухдорожечного бита (яркие хэты, тяжёлые сабы)
Если инструментал — стереофайл, создавайте пространство, а не "больше яркости" на вокале.
- Динамическое снижение присутствия: Поместите Fruity Parametric EQ 2 на бит-бас с мягким колоколообразным фильтром около 3 кГц. Добавьте Fruity Peak Controller на Lead. Свяжите усиление полосы эквалайзера с Peak Controller (инвертировано). Теперь бит снижается на 1–2 дБ только во время речи вокала.
- Контроль брызг: держите Air вокала сдержанным; примените низкочастотный фильтр к возвратам около 6–7 кГц, если хай-хэты звучат слишком ярко.
- Проверка моно: кратко переключите мастер в моно; композиция должна хорошо звучать даже на телефоне.
XII. Трекинг против микширования: что печатать
Записывайте сухой звук, слушайте с эффектами: мониторьте через пресет на вставке, но включайте запись на диск на дорожке, чтобы захватить сырой дубль. Если коллеге нужен «демо вайб», направьте Lead на дорожку PRINT и также запишите влажную страховку (Lead_Wet).
Поздняя фиксация: Замораживайте или рендерьте тяжелые эффекты ближе к концу; сохраняйте версию _FXPRINT для повторного использования.
XIII. Устранение неполадок (проблема → целенаправленное действие)
- Резкие «С» после добавления Air: немного увеличьте де-эссинг; уменьшите полку Air примерно на 0,5 дБ; фильтруйте возвраты около 6–7 кГц.
- Вокал тонет под 808: делайте куплеты суше; добавьте небольшое повышение Presence; используйте Peak Controller для приглушения на бите в диапазоне 2–4 кГц.
- Щелчки или треск: увеличьте буфер при микшировании; отключите HQ/овершэмплинг до рендера; закройте фоновые приложения.
- Пресет звучит иначе при экспорте: проверьте режимы оверсэмплинга/качества и переключатели линейной фазы; избегайте усиления клип-гейна на мастере.
- Задержка при записи: обходите длинные реверберации и процессоры с look-ahead; используйте прямой мониторинг, если ваш интерфейс это поддерживает.
- Прыжки уровней при переключении A/B: держите финальный Trim (Fruity Balance) для выравнивания уровней; громче выигрывает несправедливо.
XIV. Организация и вызов (минуты сегодня, часы сэкономлены позже)
-
Имена для сортировки:
Лид — Чистый,Лид — Air+,Рэп — Панч,Гармония — Широкая,Ad-Lib — Телефон. - Цветовая маркировка дорожек: ведущий — один цвет, стеки — другой, возвраты — третий; навигация становится мгновенно быстрее.
- Шаблон проекта: держите «Starter — Vocals (FL)» с дорожками и двумя FX-треками (Slap/Plate). Дублируйте для каждой новой песни.
XV. FAQ (быстрые ответы)
Где должна располагаться коррекция тона?
Первым или почти вверху (после Trim), чтобы последующая компрессия и де-эссинг видели стабильный сигнал.
Один компрессор или два?
Два компрессора звучат мягче: Comp A формирует фразы (3–5 дБ GR); Comp B ловит пики (1–2 дБ). Это звучит естественнее, чем один сильный компрессор.
Насколько громким должен быть вокал при микшировании?
Пики после эффектов около −6 до −3 дБFS. Оставьте безопасность по true-peak и громкость для мастеринга.
Нужен ли именно тот микрофон, который указан в пресете?
Нет. Пресеты — это отправные точки. Адаптируйте Trim, De-Ess, Body, Presence и FX под свой голос и микрофон.
XVI. Узнайте больше (следующий лучший шаг)
Если нужны дополнительные шаги для настройки сессии, вы также можете узнать как установить вокальные пресеты FL Studio
XVII. Быстрый план действий (копируемый)
- Загрузите состояние микшера или rack Patcher; установите Trim так, чтобы Comp A сжимал на 3–5 дБ.
- Де-эссинг до «мягко-яркого», а не тусклого; добавляйте немного Presence только если дикция скрыта.
- Направляйте посылы Slap/Plate; фильтруйте возвраты; приглушайте Slap от ведущего вокала.
- Сохраняйте пресеты для конкретных дорожек (ведущий вокал, дубли, гармонии); используйте цветовую маркировку дорожек.
- Рендерьте черновики с запасом по громкости; не допускайте клиппинга на мастере.
При правильном использовании вокальные пресеты — это надежные ярлыки, а не костыли. Сохраняйте запас по громкости, делайте небольшие изменения, автоматизируйте важное, и ваш голос будет звучать впереди без резкости — песня за песней. Если хотите начать с готовых настроек для современного рэпа, попа и R&B внутри этого DAW, возьмите подобранные вокальные пресеты FL Studio и шаблон записи FL Studio и закрепите свои собственные версии «лучшего соответствия» для быстрых и стабильных сессий.