Вокальные пресеты в Cubase — это пресеты дорожек/эффектов/стрипов, которые можно загрузить одним движением для применения эквалайзера, компрессии, де-эссинга, окраски и пространства. Это руководство показывает, как выбрать правильный пресет, установить здоровый уровень усиления, настроить Quick Controls, маршрутизировать FX каналы, автоматизировать сцены и сохранять версии для конкретных дорожек — чтобы ваши вокалы звучали на телефонах, наушниках и больших колонках. Если вы хотите проверенные стартовые точки, настроенные для этой DAW, прослушайте курированные вокальные пресеты Cubase и затем точно настройте пороги и посылы для вашего микрофона и помещения.
I. Что такое «вокальный пресет» в Cubase
В Cubase «вокальный пресет» обычно означает один или несколько из следующих элементов:
- Пресет дорожки (.vstpreset) — восстанавливает вставки, Channel Strip/EQ и выбранную маршрутизацию на дорожке.
- Пресет цепочки эффектов (.vstpreset) — только стек вставок (порядок + настройки), который можно применить к любой дорожке.
- Пресет Channel Strip/EQ — стандартный стрип + только эквалайзер; отлично подходит для низкопотребляющих, только стандартных рабочих процессов.
- Архив дорожки (.xml) — импортирует заранее настроенную схему (Lead, Doubles, Harmonies, FX каналы) в текущий проект.
- Шаблон проекта — открывает новую сессию с готовыми дорожками, группами и каналами эффектов.
Использование пресета означает адаптацию усиления, де-эссинга, присутствия и баланса эффектов под ваш голос, а не просто его загрузку. Ниже приведены шаги, которые делают эту адаптацию быстрой и повторяемой.
II. Предварительная подготовка (чтобы пресет работал корректно)
- Драйвер и задержка: ASIO на Windows / Core Audio на macOS; 64–128 сэмплов на дорожку; увеличьте позже для микширования.
- Частота сессии: 44.1 кГц для музыки (48 кГц для видео).
- Цель пикового входа: пойте на уровне исполнения; стремитесь к сырым входным -12 до -8 дБFS перед обработкой.
- Control Room (опционально): включите, если хотите отдельные миксы для наушников и разговор.
- Открыть MediaBay: нажмите F5; вы будете использовать его для быстрого просмотра, тегирования и вызова пресетов.
III. Методы загрузки (и когда их использовать)
1) Пресет дорожки (самый быстрый, полная цепочка)
- Создайте/выберите аудиодорожку с именем Lead Vox.
- В инспекторе нажмите Загрузить пресет дорожки и выберите ваш вокальный пресет.
- Подтвердите порядок: EQ → Comp A → De-Ess → (Color/Sat) → Comp B (ловушка) плюс ваши отправки.
- Сразу Сохраните пресет дорожки под Lead — Clean (ВашеИмя), чтобы изменения не перезаписали оригинал.
Используйте, когда хотите полностью заменить дорожку одним кликом.
2) Пресет цепочки эффектов (точная замена)
- На вашей вокальной дорожке откройте меню вставок.
- Выберите Загрузить пресет цепочки эффектов и выберите цепочку.
- Настройте, затем сохраните под своим именем для быстрого вызова.
Используйте, когда у вас уже есть маршрутизация/отправки и нужно только изменить тон/динамику.
3) Архив дорожки (.xml) (полный импорт рига)
- Файл → Импорт → Архив дорожки… и выберите .xml.
- Выберите дорожки для импорта (Lead, Doubles L/R, Harmonies, FX: Slap/Plate).
- Установите вход микрофона на Lead и начните запись.
Используйте, когда хотите, чтобы вся вокальная система была добавлена в текущий проект.
4) Шаблон проекта (готов к старту)
- Из Hub создайте проект, используя ваш вокальный шаблон.
- Треки, группы и FX-каналы преднастроены; просто установите вход и начинайте.
Используйте, когда хотите, чтобы каждая новая песня была «готова к студии».
IV. Gain staging: сделать или сломать
- Сначала микрофонный предусилитель: настройте интерфейс так, чтобы сырые пики были около −12 до −8 dBFS.
- Trim перед Comp A: используйте любой этап Input/Trim, чтобы достичь ~3–5 дБ ослабления на фразах (не постоянно на пределе).
- После цепочки: держите пики треков около −6 до −3 dBFS; мастеринг оставьте на потом.
- Согласование уровней при A/B: добавьте финальный Trim для справедливого сравнения; громче часто кажется «лучше».
V. Quick Controls = быстрый ручной контроль
Назначьте наиболее часто используемые параметры на Track Quick Controls один раз и сохраните с пресетом:
- QC1 = Trim/Input
- QC2 = количество De-Ess
- QC3 = Body (нижняя полка)
- QC4 = Presence (широкий колокол)
- QC5 = Air (верхняя полка)
- QC6 = порог Comp A
- QC7 = уровень посылки Slap
- QC8 = уровень посылки Plate
Теперь вы можете управлять тоном и пространством из Inspector/MixConsole без открытия плагинов — отлично для ноутбука или контроллера.
VI. Lead против стэков: стройте «семью», а не клонов
- Lead: моно-центр с плотным звучанием; минимальные расширители; автоматизируйте громкость, чтобы история была на переднем плане.
- Doubles L/R: выше HPF, чуть больше де-эссинга, заглушены на −6 до −9 дБ; микро-панорамирование влево/вправо; избегайте хорусных расширителей, которые сжимаются в моно.
- Harmonies: темнее EQ, чем Lead, шире, чем doubles; опционально +0.5–1 дБ около 5 кГц для блеска, только если нужно.
- Ad-libs: узкая полоса (HPF ~200 Гц, LPF ~8–10 кГц), сайд-панорамирование, короткие эхо на переходах.
Сохраните по одному пресету на роль — Lead — Clean, Double — Tight, Harmony — Wide — чтобы вызов был мгновенным и последовательным.
VII. Время и пространство (FX-каналы делают основную работу)
- Создайте FX Channel A = Slap: Mono/StereoDelay около 90–110 мс; HPF 150 Гц, LPF 6 кГц; низкая обратная связь.
- Создайте FX Channel B = Plate: REVelation или плагин plate с временем 0.7–1.0 с; предзадержка 20–50 мс; фильтруйте возвраты.
- Send automation: +1–2 дБ в припеве; ниже в плотных куплетах; держите возвраты с фильтрацией, чтобы избежать шипения.
- Duck the Slap: вставьте компрессор на канал Slap FX; сайдчейн от Lead; быстрая атака/релиз, чтобы эхо звучало между слогами.
VIII. Двухдорожечные биты (яркие хэты, тяжёлые сабы)
- Carve, don’t fight: на инструментальном шине мягкое сайдчейнированное снижение средних (2–4 кГц) во время вокальных партий позволяет согласным выделяться без истончения бита.
- Sub coexistence: если слова теряются под хвостами 808, держите куплеты суше и добавьте небольшой подъём Presence вместо сильной компрессии.
- Mono check: нажмите кнопку моно в Control Room; если история сохраняется на телефоне, ваши решения работают.
IX. Стартовая цепочка только из стока (можно перестраивать в любом месте)
- Channel EQ (first): HPF 80–100 Гц; широкое снижение −1 до −2 дБ на 250–350 Гц, если звук коробочный; опциональный узкий вырез около 1 кГц, если носовой.
- Channel Strip → Compressor A: соотношение 2:1–3:1; атака 10–30 мс; релиз 80–160 мс; ~3–5 дБ GR на фразах.
- Channel Strip → De-Esser: целевой диапазон 6–8 кГц; уменьшайте, пока наушники не станут комфортными; избегайте приглушения согласных.
- Channel Strip → Compressor B (ловушка): быстрее, 1–2 дБ на пиках; стабилизирует посылы.
- Magneto II (опционально): лёгкая сатурация для плотности; выход согласован, чтобы «громче» не вводило в заблуждение.
- Эквалайзер канала (полировка): +0,5–1 дБ широкополосно около 3–4 кГц только если дикция скрыта; в конце небольшой Air shelf.
Оберните это как пресет дорожки и назначьте Quick Controls (Trim/De-Ess/Body/Presence/Air/Comp/Slap/Plate). Сохраните под Lead — Stock Clean.
X. Быстрый просмотр пресетов (без потери позиции)
- Избранное MediaBay: добавьте папку поставщика в Избранное; отметьте звёздочками топ-3; меньше вариантов = быстрее работа.
- Сравнение уровней A/B: держите Trim в конце цепочки; переключайте пресеты, удерживая выход стабильным.
- Снимки MixConsole: сохраняйте несколько состояний (Clean, Air+, Warm) для быстрого сравнения.
XI. Запись против микширования: что печатать
Записывайте сухой сигнал, слушайте с эффектами: мониторьте через пресет, но записывайте чистый вход. Если коллеге нужен «демо вайб», направьте Lead в группу для печати и запишите Lead_Wet. Держите имена понятными (Lead_Dry, Lead_Wet).
Фиксируйте поздно: замораживайте тяжёлые FX или рендерьте стемы ближе к концу; держите дорожку «_FXPRINT» для восстановления.
XII. Автоматизация, которая продаёт партию (микро, а не макро)
- Регулировка громкости: +0,5–1 дБ на сильных долях; −0,5 дБ для скороговорок.
- Порог де-эссера: задавайте чуть более жёсткое значение на ярких фразах, более мягкое на тёмных.
- Send rides: подталкивайте Slap/Plate в припев; оттягивайте в плотных куплетах; оставляйте хвосты отфильтрованными.
XIII. Организация и восстановление (минуты сегодня, часы сэкономлены позже)
-
Имена для сортировки:
Лид — Чистый,Лид — Air+,Рэп — Панч,Гармония — Широкая,Ad-Lib — Телефон. - По одному на роль: отдельные пресеты для Lead/Doubles/Harmonies предотвращают чрезмерное де-эссирование или излишнее осветление центра.
- Теги MediaBay: тегируйте по Use (Lead/Rap/R&B), Vibe (Clean/Airy/Warm) и Mic (SM7B/NT1 и др.).
- Шаблон: храните шаблон проекта с дорожками + FX каналами; начинайте каждую песню с него.
XIV. Устранение неполадок (проблема → целенаправленное действие)
- Жёсткие S после добавления Air: слегка увеличьте De-Ess; уменьшите Air примерно на 0,5 дБ; low-pass FX возвращается к ~6–7 кГц.
- Вокал тонет под 808: делайте куплеты суше; немного поднимите Presence; добавьте тонкое среднечастотное понижение на инструментале во время вокальных фраз.
- Пресет звучит иначе при экспорте: проверьте переключатели качества/оверсэмплинга и мастер-канал; избегайте клиппинга; сохраняйте настройки Control Room постоянными.
- Задержка при записи: уменьшите буфер; отключите длинные реверберации; используйте Control Room cue для прямого мониторинга, если ваш интерфейс это поддерживает.
- Макросы (QCs) ничего не двигают: переназначьте параметры на QCs и пересохраните пресет дорожки, чтобы назначения сохранились.
- Прыжки уровней в A/B тестах: выравнивайте уровни с помощью финального трима; громче несправедливо выигрывает у слуха.
XV. Важно качество записи (ваш пресет скажет вам спасибо)
Пресеты раскрываются при стабильной записи: постоянное расстояние до микрофона, поп-фильтр, обработанный угол и разумный мониторинг.
XVI. Быстрые вопросы и ответы
Где должна располагаться коррекция тона?
Первым или почти в начале (после любого входного трима), чтобы последующая компрессия/De-Ess видели стабильный сигнал.
Один компрессор или два?
Два компрессора звучат мягче: Comp A формирует фразы (3–5 дБ GR); Comp B ловит пики (1–2 дБ GR).
Насколько громко должны звучать вокалы при микшировании?
Держите пики после эффектов около −6 до −3 дБFS; оставьте запас по true-peak и общую громкость для мастеринга.
Нужен ли микрофон, указанный в пресете?
Нет. Пресеты — это отправные точки. Адаптируйте Trim, De-Ess, Body, Presence и эффекты под свой голос/микрофон.
XVII. Быстрый план действий (копируемый)
- Загрузите пресет дорожки/эффекта; установите Trim так, чтобы Comp A касался 3–5 дБ на фразах.
- Де-эссинг до «мягко-яркого», а не тусклого; добавляйте немного Presence только если дикция скрыта.
- Маршрутизируйте каналы эффектов Slap/Plate; фильтруйте возвраты; автоматизируйте посылы в припев.
- Назначьте Quick Controls (Trim/De-Ess/Body/Presence/Air/Comp/Slap/Plate) и сохраните свою версию.
- Создавайте пресеты по ролям (ведущий, дубли, гармонии); начинайте будущие песни с шаблона.
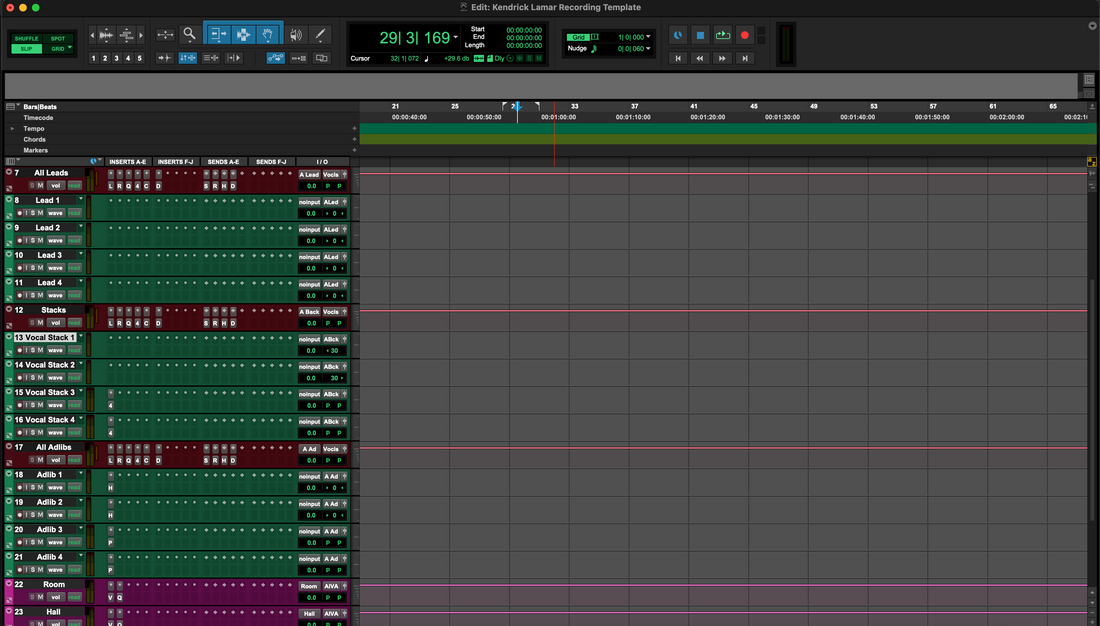
При правильном использовании вокальные пресеты — это надежные ярлыки, а не костыли. Сохраняйте запас по уровню, делайте небольшие изменения, автоматизируйте важное, и ваш голос будет звучать впереди без резкости — песня за песней. Если хотите начать с рэков, которые уже следуют этим правилам, попробуйте специально созданный Cubase recording template и закрепите свои собственные версии «лучшего соответствия» для быстрых и стабильных сессий.