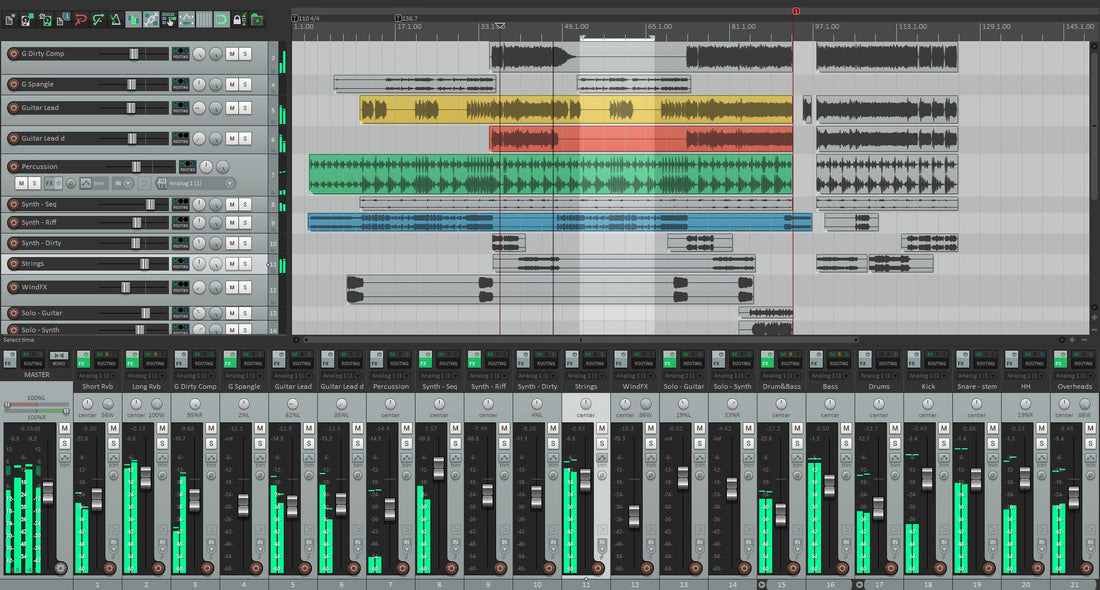
REAPER vocal presets are ready-made chains you can load in seconds: EQ, compression, de-essing, tone color, and space. This guide shows safe install methods, where files live, how to save personal versions, and quick fixes—so your first take sounds polished instead of raw. If you want a proven starting point before you fine-tune by ear, browse focused vocal presets and match thresholds to your mic and room.
I. What a REAPER vocal preset actually is
In REAPER, “presets” usually arrive as one or more of the following:
-
FX Chain (
.RfxChain) — a full insert stack you can drop on any track. -
Track Template (
.RTrackTemplate) — a prebuilt track with FX, I/O, color, envelopes, and sends (e.g., Slap / Plate). -
Project Template (
.RPPsaved as a template) — a starter session with Lead, Doubles, Harmonies, Ad-libs, and aux returns ready. - Individual plug-in presets — per-FX settings stored inside REAPER’s resource folders.
Good packs often include two formats (FX Chain + Track Template). Use whichever fits your workflow.
II. One-time setup (do this first)
- Update REAPER to a current build.
- Reveal your Resource Path: Options → Show REAPER resource path in explorer/finder. Leave this window open.
- If your pack needs third-party plug-ins, install and license them now.
- Scan plug-ins: Preferences → Plug-ins → VST (and AU on macOS) → verify folders → Clear cache/re-scan.
- Create a test project with one audio track named “Lead Vox.”
III. Three installation routes (pick one)
A) Drop in an FX Chain (.RfxChain) — fastest
- Unzip your download. Find the
.RfxChainfiles. - In REAPER, select your vocal track.
- Drag the
.RfxChainfile from Finder/Explorer onto the track’s FX button (or into the FX window). The chain loads instantly. - Click the FX window’s + menu → FX chains → Save all FX as chain. Name it clearly (e.g., Lead — Clean Pop (RPR)).
When to use: quick auditioning and zero folder work.
B) Install a Track Template (.RTrackTemplate) — lane + sends in one move
- Open the Resource Path folder you revealed earlier.
- Open the
TrackTemplatessubfolder. If it doesn’t exist, create it. - Copy your
.RTrackTemplatefiles into this folder (keep the vendor subfolder if provided). - Back in REAPER: Track → Insert track from template → choose your new template.
When to use: you want the whole lane (FX, routing, sends, colors) in one click.
C) Use a Project Template — entire session prewired
- Copy the provided project file into the
ProjectTemplatesfolder inside your Resource Path (create it if missing). - File → Project templates → select your template to start new sessions fully wired.
When to use: you prefer opening to a “studio-ready” layout every time.
IV. Where things live (paths you’ll actually use)
| Folder | Typical Windows | Typical macOS | Typical Linux |
|---|---|---|---|
| Resource Path (root) | %APPDATA%\REAPER\ |
~/Library/Application Support/REAPER/ |
~/.config/REAPER/ |
| FX Chains | …\FXChains\ |
…/FXChains/ |
…/FXChains/ |
| Track Templates | …\TrackTemplates\ |
…/TrackTemplates/ |
…/TrackTemplates/ |
| Project Templates | …\ProjectTemplates\ |
…/ProjectTemplates/ |
…/ProjectTemplates/ |
Tip: Always use Options → Show REAPER resource path… as the source of truth. Folder names are the same on all OSes.
V. First-time load: route, monitor, gain-stage
- Route the mic: set the track input to your interface’s vocal channel. Arm the track; enable input monitoring if needed.
- Set healthy input: sing at performance volume; aim raw peaks around −12 to −8 dBFS before any processing.
- Load the preset: apply the FX Chain or insert the Track Template; confirm order (EQ → Comp → De-Ess → Color → FX).
- Record 10–20 s and A/B the chain (FX window power button). You want clearer diction and steadier level without harshness.
VI. Make the preset yours (small moves, big wins)
- Trim/Input: normalize level into the first compressor—consistent input beats heavy gain reduction.
- De-Ess: soften S/T/SH until earbuds relax; stop before you dull consonants.
- Body (120–200 Hz): add warmth; if the booth is boxy, subtract gently at 250–350 Hz.
- Presence (3–4 kHz): tiny, wide nudges help diction; if hats/claps are bright, carve the beat instead of over-boosting the voice.
- Air (10–12 kHz): micro-lift after sibilance is calm.
- FX sends: slapback 90–120 ms (filtered 150 Hz–6 kHz) and a short plate (0.7–1.0 s, 20–50 ms pre-delay). Keep verses drier; open the chorus.
VII. Role-based lanes (save a family, not one catch-all)
- Lead: mono-true, minimal widening. Rides and diction first.
- Doubles L/R: higher HPF than lead, a touch more de-ess, tucked 6–9 dB under; micro-pan left/right.
- Harmonies: darker EQ, wider panning; a gentle 5 kHz shimmer can add sheen without sharpening S’s.
- Ad-libs: narrower bandwidth (HPF ~200 Hz, LPF ~8–10 kHz); short throws on transitions.
After tuning each lane, save its chain as a distinct FX Chain (e.g., Lead — Clean, Double — Tight, Harmony — Wide).
VIII. A safe stock-only chain you can rebuild in REAPER
- ReaEQ (first): high-pass 80–100 Hz; wide −1 to −2 dB at 250–350 Hz if boxy; optional narrow dip near 1 kHz if nasal.
- ReaComp A (shape): ratio 2:1–3:1; attack 10–30 ms; release 80–160 ms; target ~3–5 dB GR on phrases so consonants breathe.
- De-ess: option 1 ReaXcomp with a high band at ~6–8 kHz doing gentle GR, or option 2 ReaFIR in subtract mode focused on sibilant range.
- ReaComp B (catcher): faster to grab 1–2 dB on peaks; stabilizes send levels.
- Saturation: JS: Saturation or a light tape/triode plug-in at low mix; match output so loudness doesn’t fool you.
- ReaEQ polish (last): +0.5–1 dB wide near 3–4 kHz only if diction hides; micro air shelf after de-ess if needed.
- Sends: ReaDelay for slap (90–110 ms, filtered), ReaVerbate/plate IR for a short bright plate; filter returns to avoid hiss.
Save this as Lead — Stock Clean (RPR) and create lighter/heavier variants for different songs.
IX. Speed tricks inside REAPER
- Show key knobs in the TCP/MCP: in the FX window, right-click a parameter → Show in track controls. Now you can adjust it from the track without opening the plug-in.
- Color code lanes: keep Lead one color, stacks another, returns a third. Session navigation gets faster immediately.
- Templates: keep a “Starter — Vocals” project template with all lanes and returns labeled. Start every song from it.
- Lite vs Full chains: track with a lean chain (EQ → light comp → de-ess). Enable polish after takes are in.
X. Two-track beats (bright hats, heavy subs)
- Carve, don’t fight: put ReaEQ on the instrumental buss and add a small dynamic dip at 2–4 kHz when the vocal speaks (ReaComp keyed from the vocal into an EQ gain link, or use a dynamic EQ plug-in). Release quickly so music pops back between syllables.
- Sub coexistence: if syllables sink under 808 tails, keep verses drier; raise presence slightly; avoid over-compression that makes pumping obvious.
- Top-end comfort: filter delay/plate returns; avoid big air shelves if hats are already sizzling.
- Mono check: the lead must read on a phone speaker; put width into stacks and returns, not the center insert.
XI. Troubleshooting (problem → focused move)
- Chain loads but a plug-in is offline: install the exact plug-in (VST3/AU/CLAP), re-scan (Preferences → Plug-ins), then reload the chain.
-
Don’t see Track Templates: confirm files are in
…/TrackTemplates/inside your Resource Path, not your downloads folder. Restart REAPER. - FX knobs do nothing: check that the module isn’t bypassed; verify parameter modulation isn’t fighting your setting; re-save the chain.
- S’s harsh after brightening: raise de-ess slightly; reduce the air shelf by ~0.5 dB; low-pass FX returns to ~6–7 kHz.
- Latency while monitoring: bypass long reverbs and look-ahead processors; lower device buffer while tracking; raise it for mixing.
- Levels jump between presets: level-match when A/B’ing; use JS: Volume or an output trim at the end of the chain for fair comparisons.
- Moving to a new computer: copy your entire Resource Path (and vendor folder) → paste to the same location → rescan plug-ins.
XII. Save once, reuse forever
- Personalize the chain for your voice and save it with your name.
- Template a session with Lead, Doubles L/R, Harmonies, Ad-libs, and two returns (Slap, Plate).
- Back up your Resource Path and vendor folder to cloud or an external drive.
- Document which third-party plug-ins are required inside a simple readme in the same folder.
XIII. Learn more (clean handoffs & deliverables)
When it’s time to collaborate or master, a tidy export saves hours.
XIV. Copyable quick-install recap
- Unzip the pack.
-
Fast: drag
.RfxChainonto the vocal track → save as your chain. -
Organized: copy
.RTrackTemplateto…/TrackTemplates/→ Insert track from template. -
Studio-ready: copy a project file into
…/ProjectTemplates/→ start from it. - Set input peaks around −12 to −8 dBFS, tweak de-ess/body/presence lightly, and record.
- Back up your Resource Path and vendor folder.
With one clean install, a lean tracking chain, and a reusable starter, REAPER becomes a fast, repeatable workflow for vocals that translate on phones, earbuds, and big rooms—without wrestling settings every session.


