Modelli di registrazione
Ottimizza la tua registrazione con i nostri Modelli Vocali pronti all’uso, dotati di plugin standard.
Tipo: Modello di Registrazione
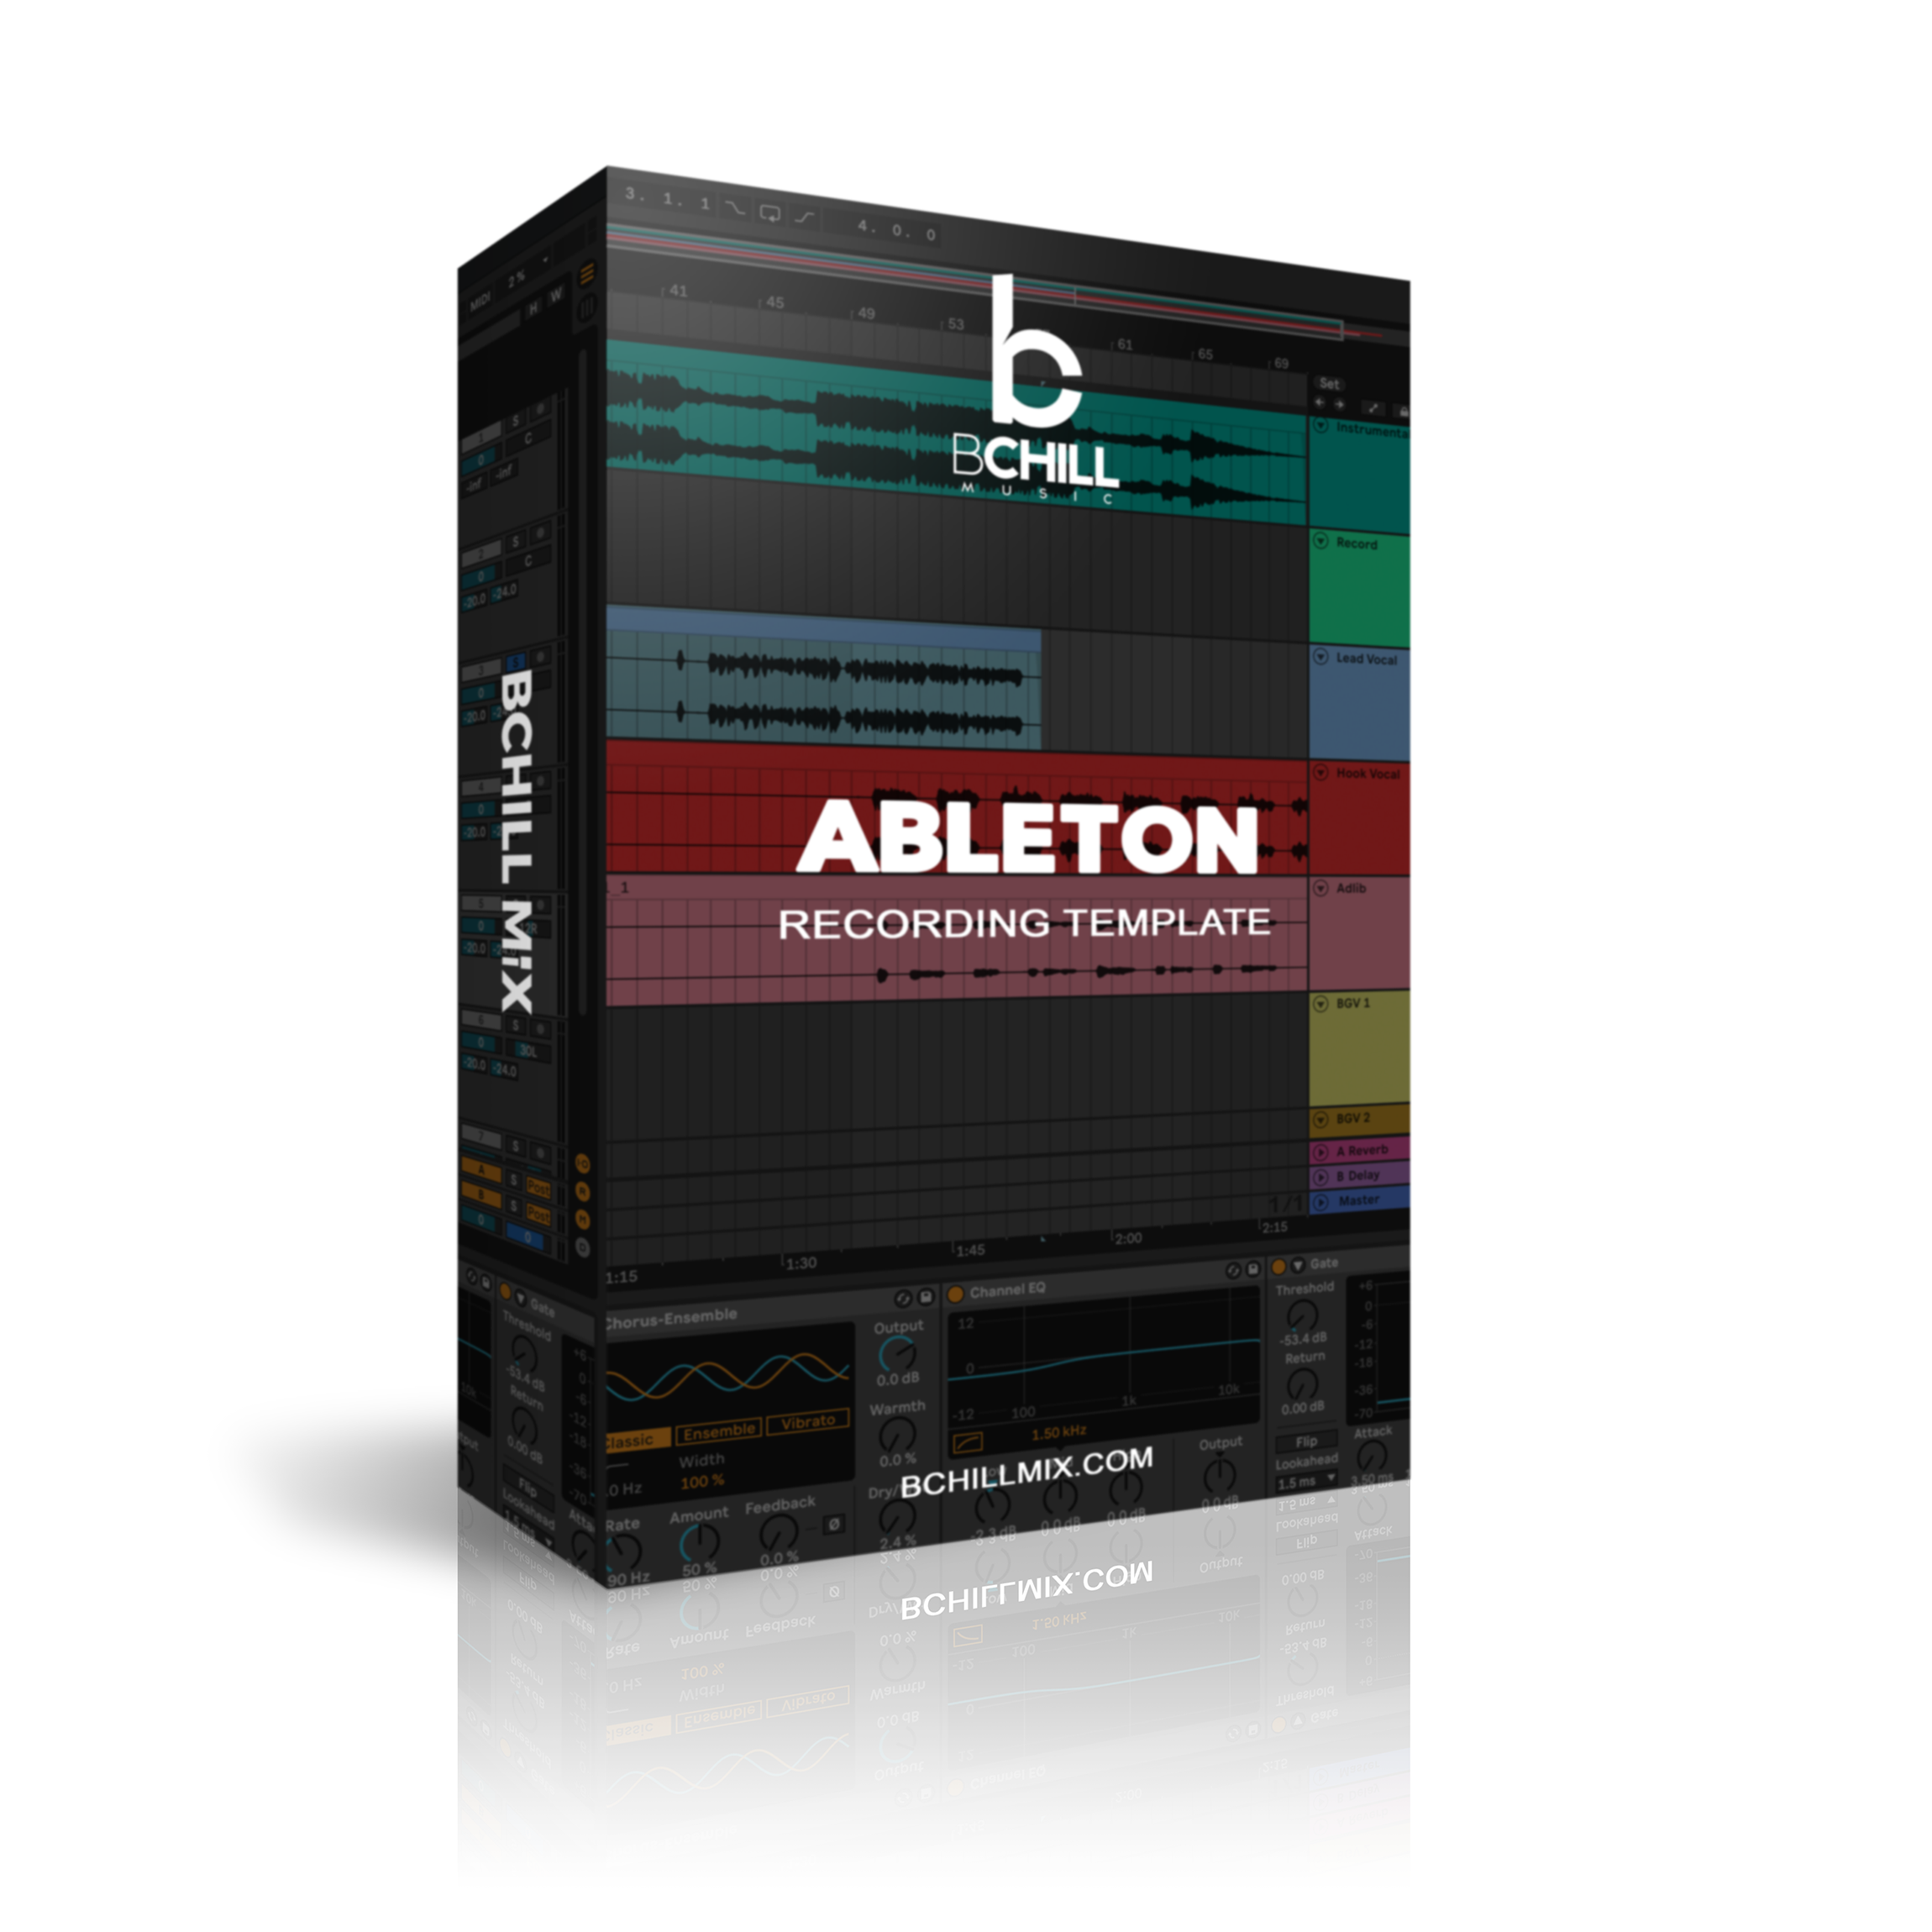
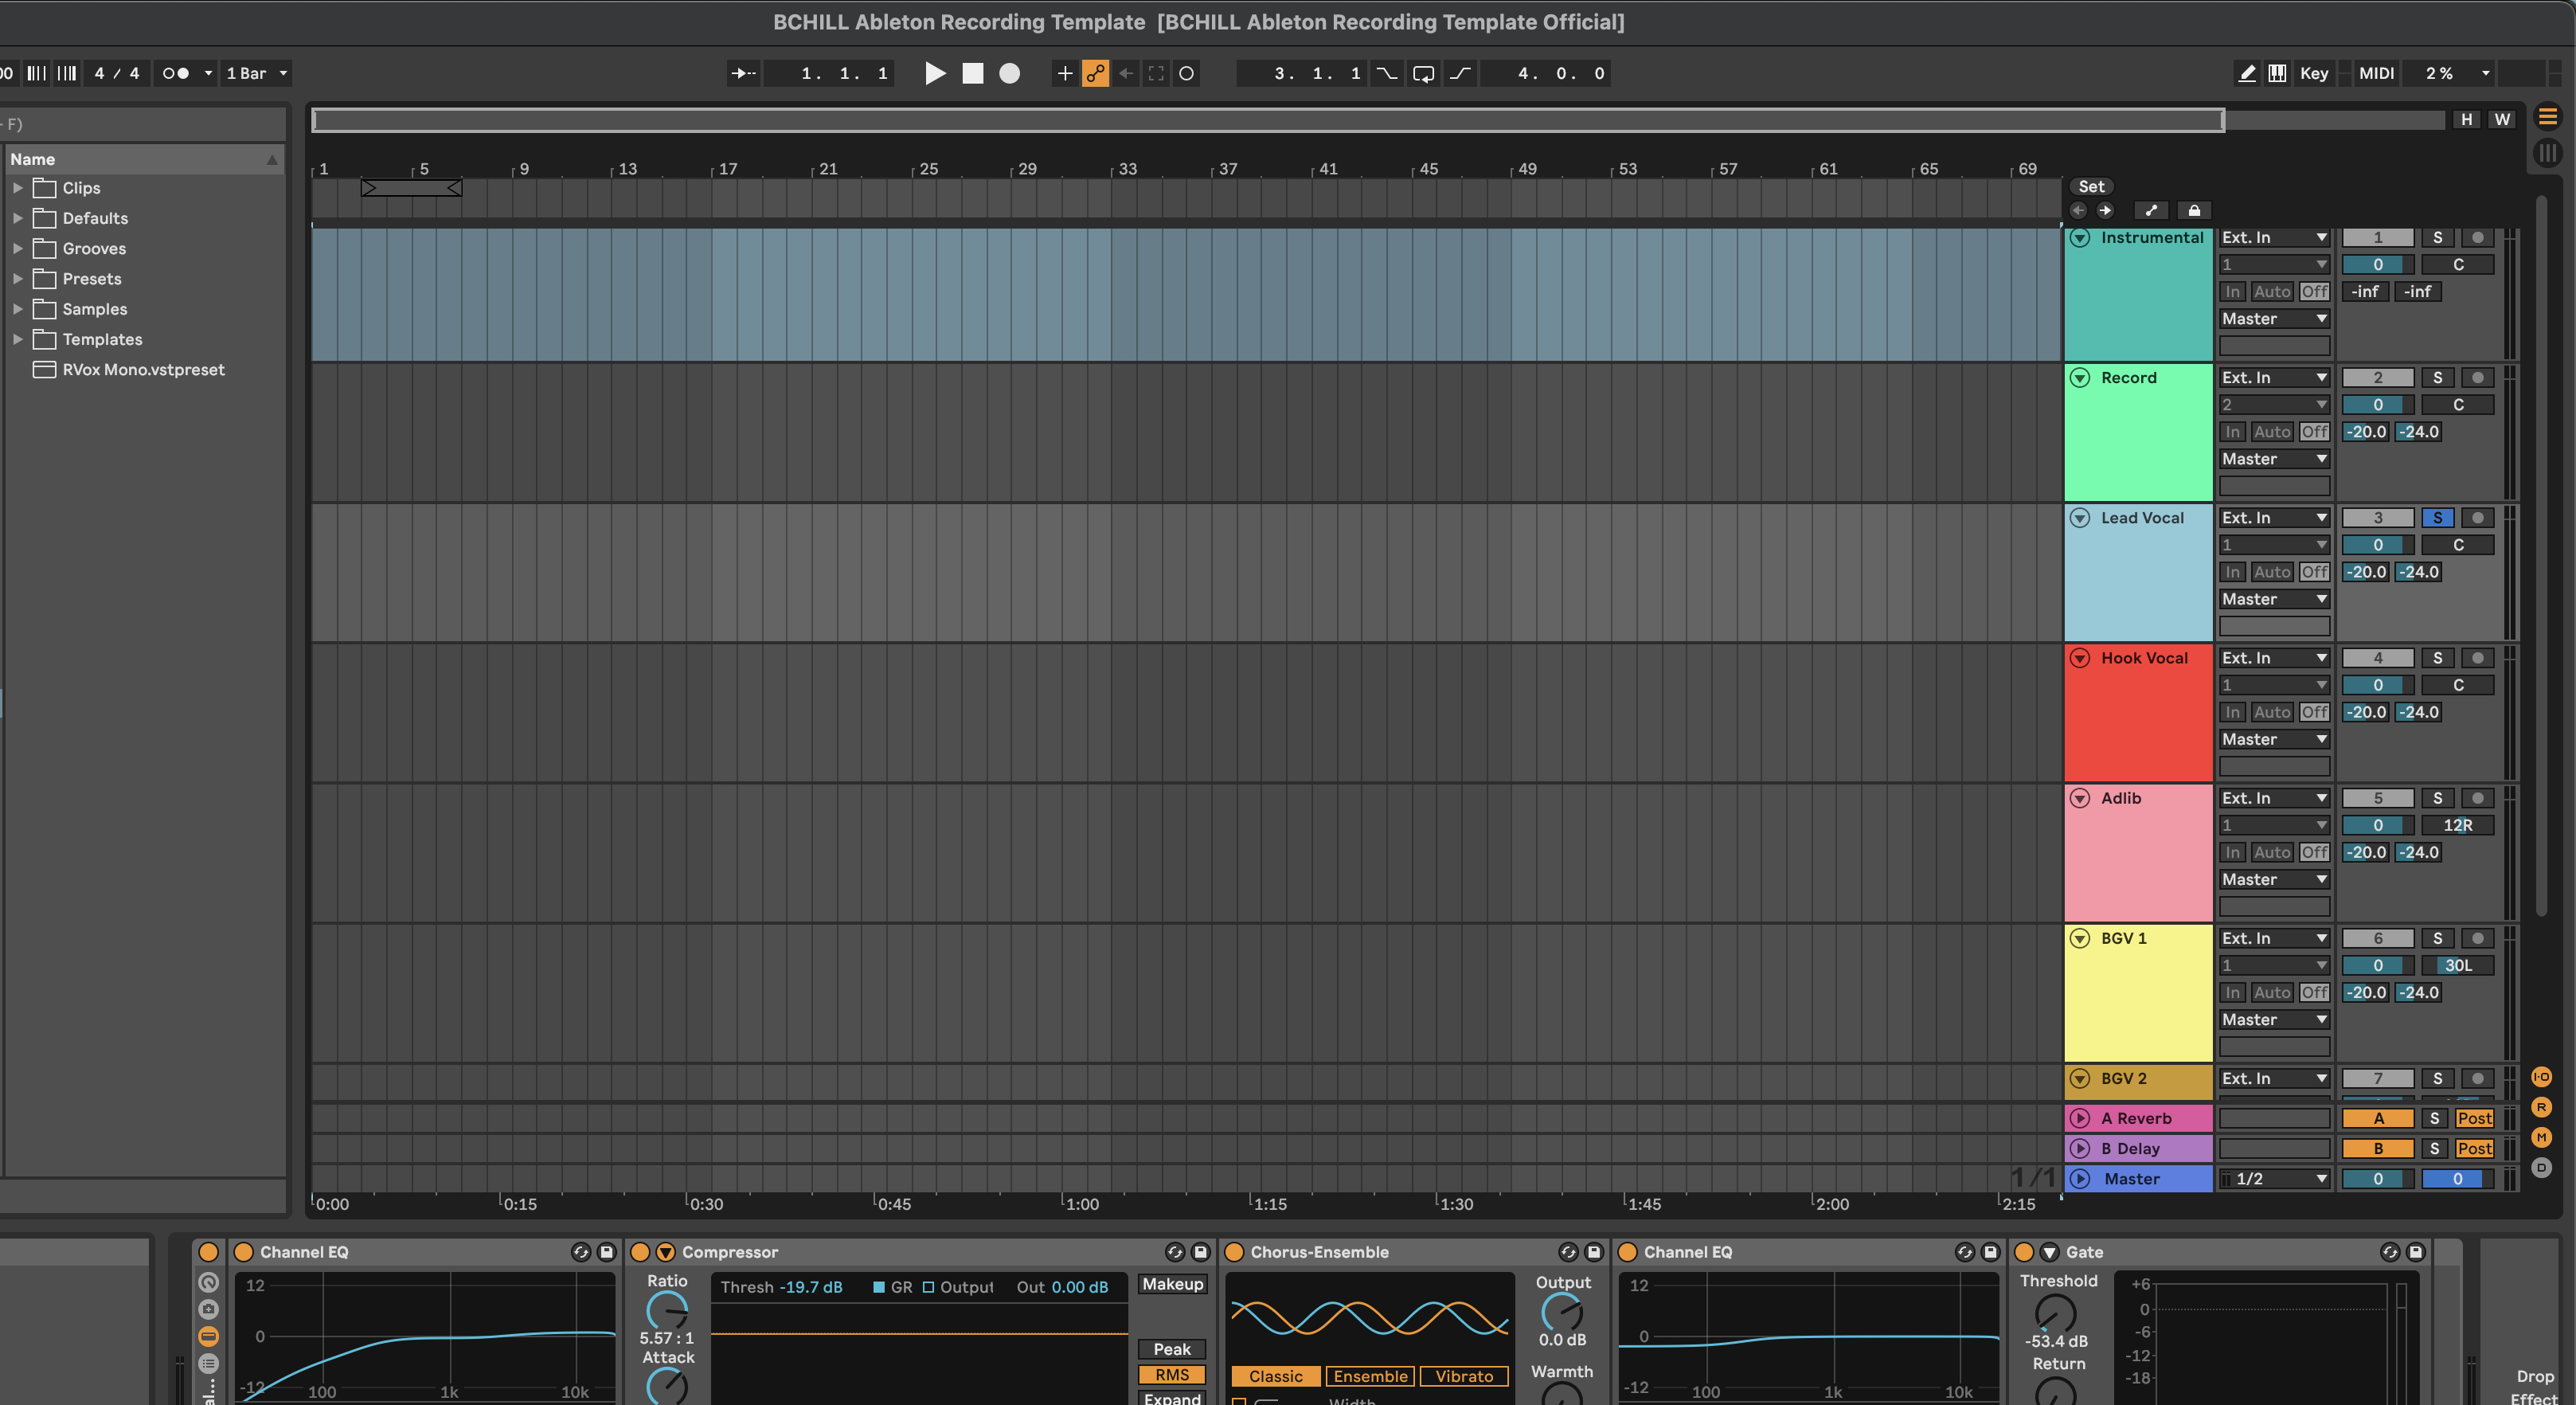
Modello di registrazione Ableton Live (Plugin standard)
Tipo: Modello di Registrazione
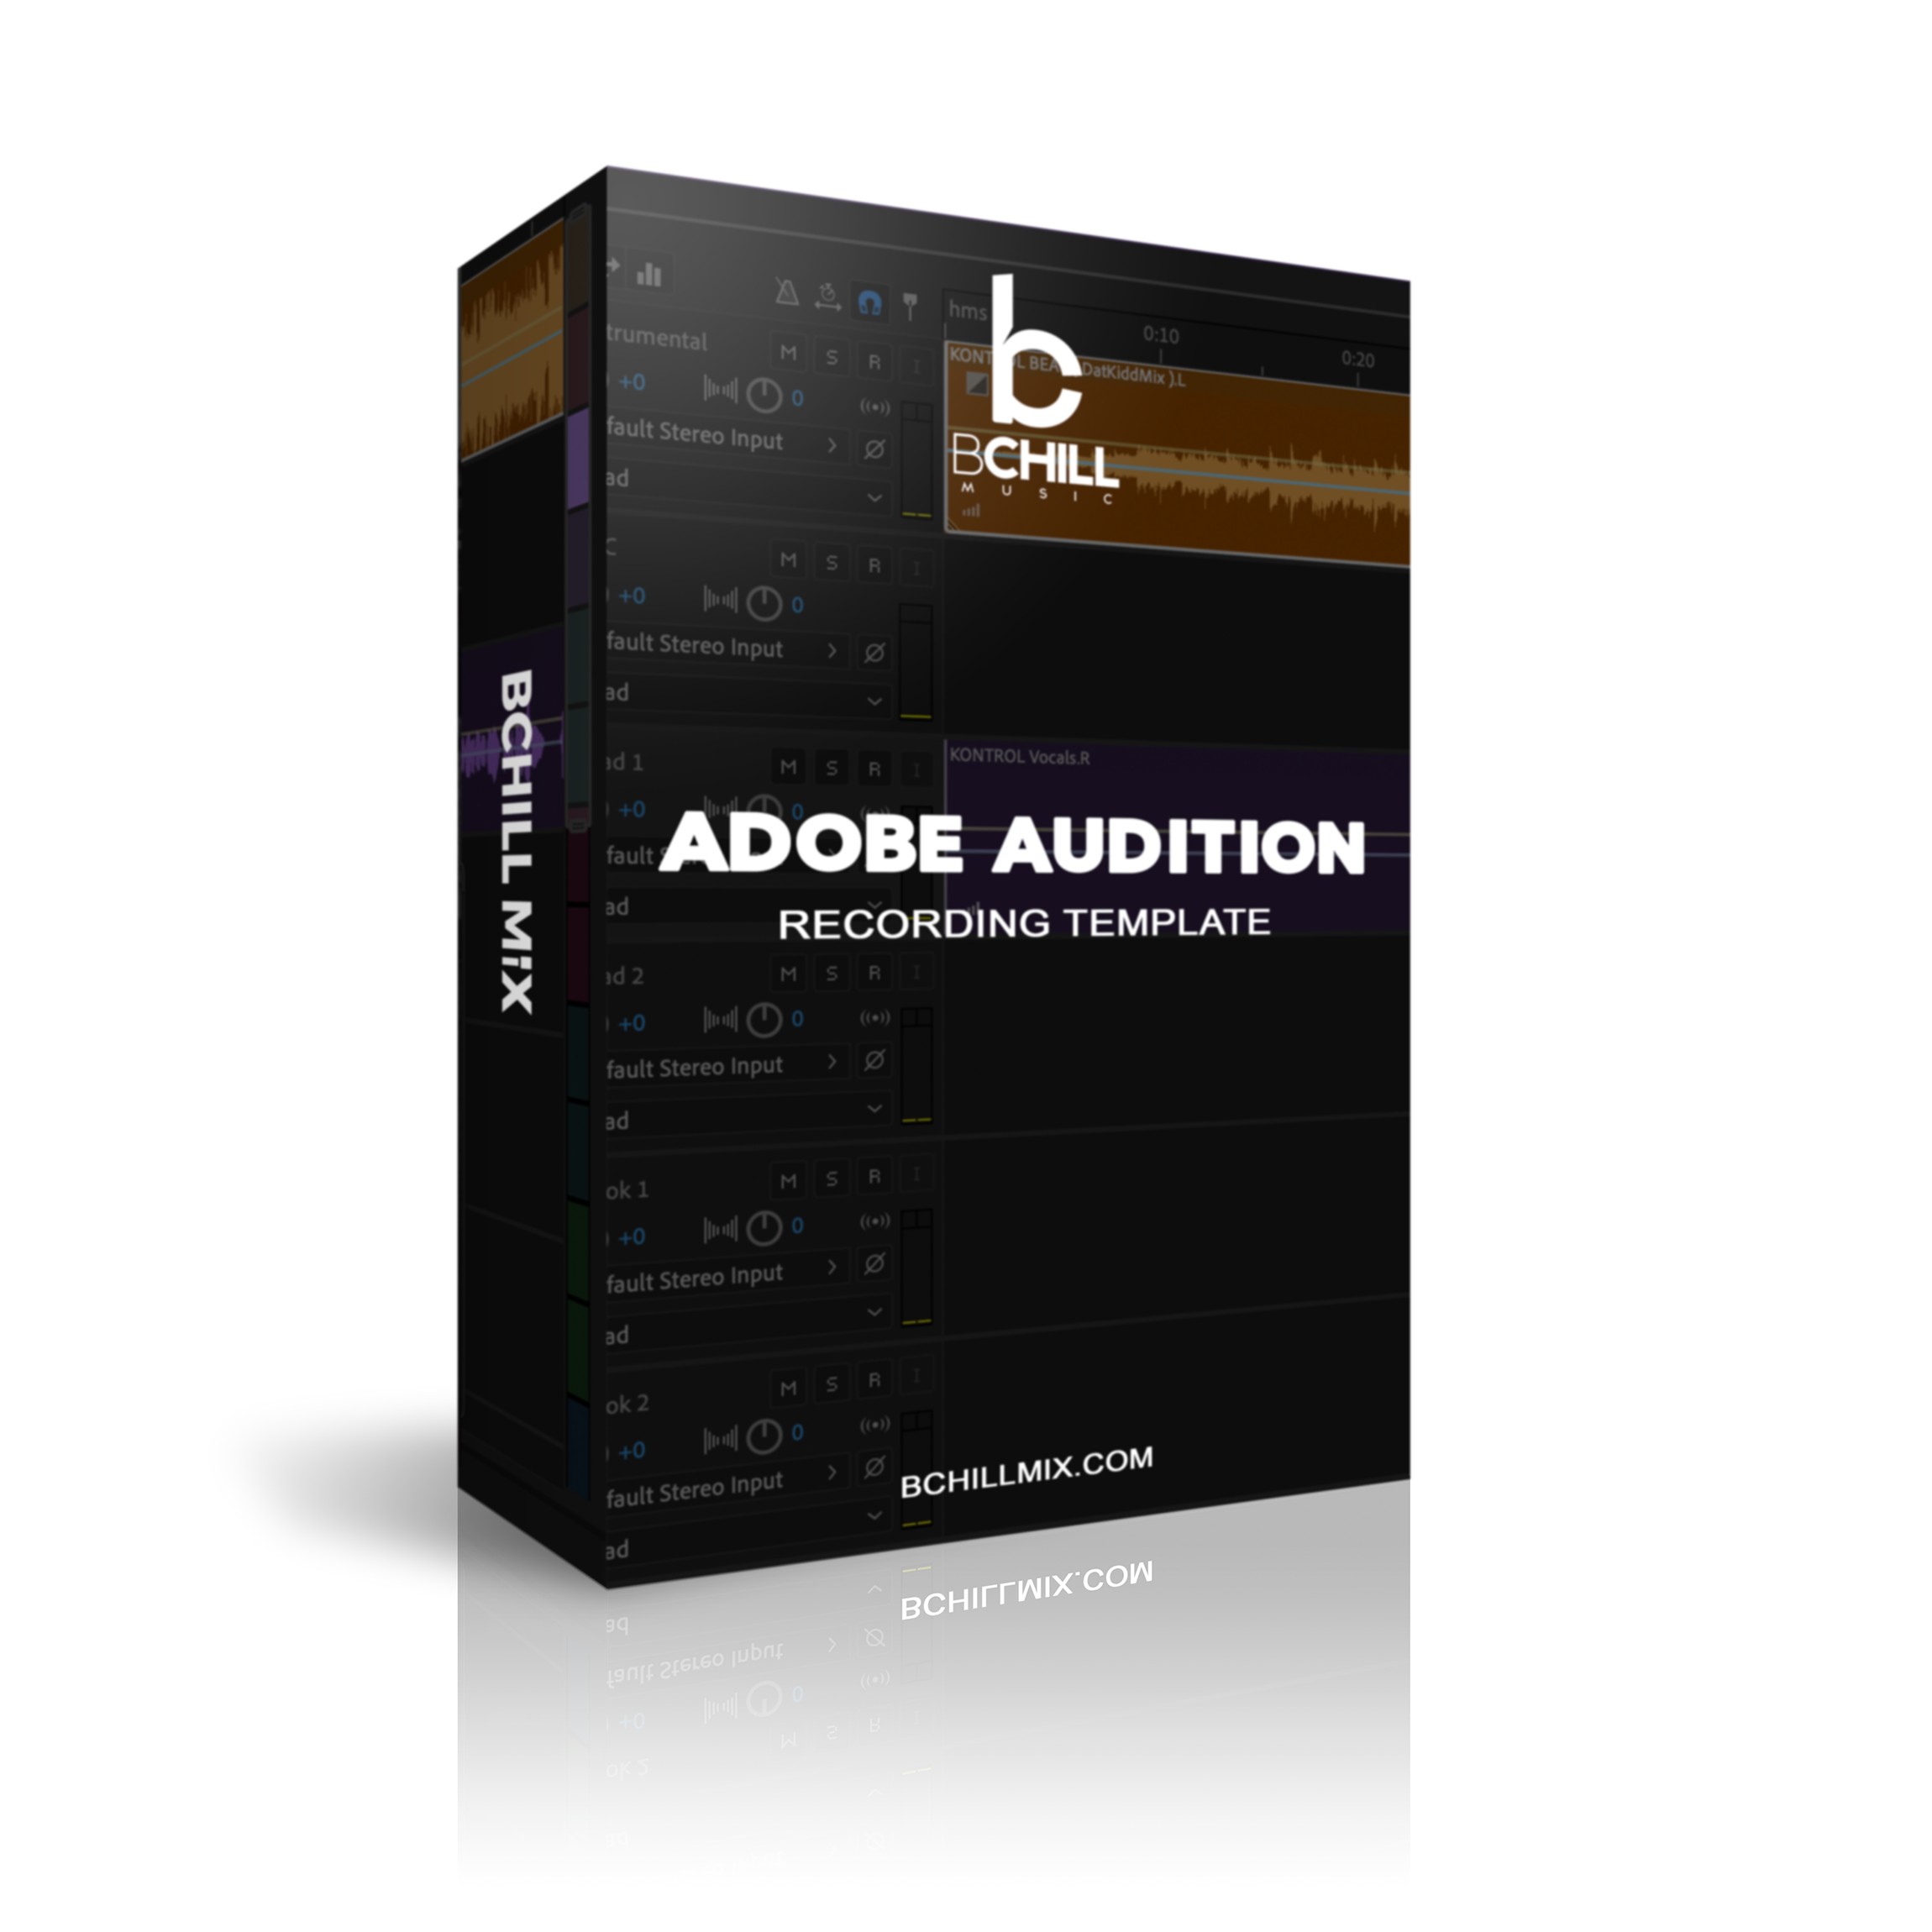
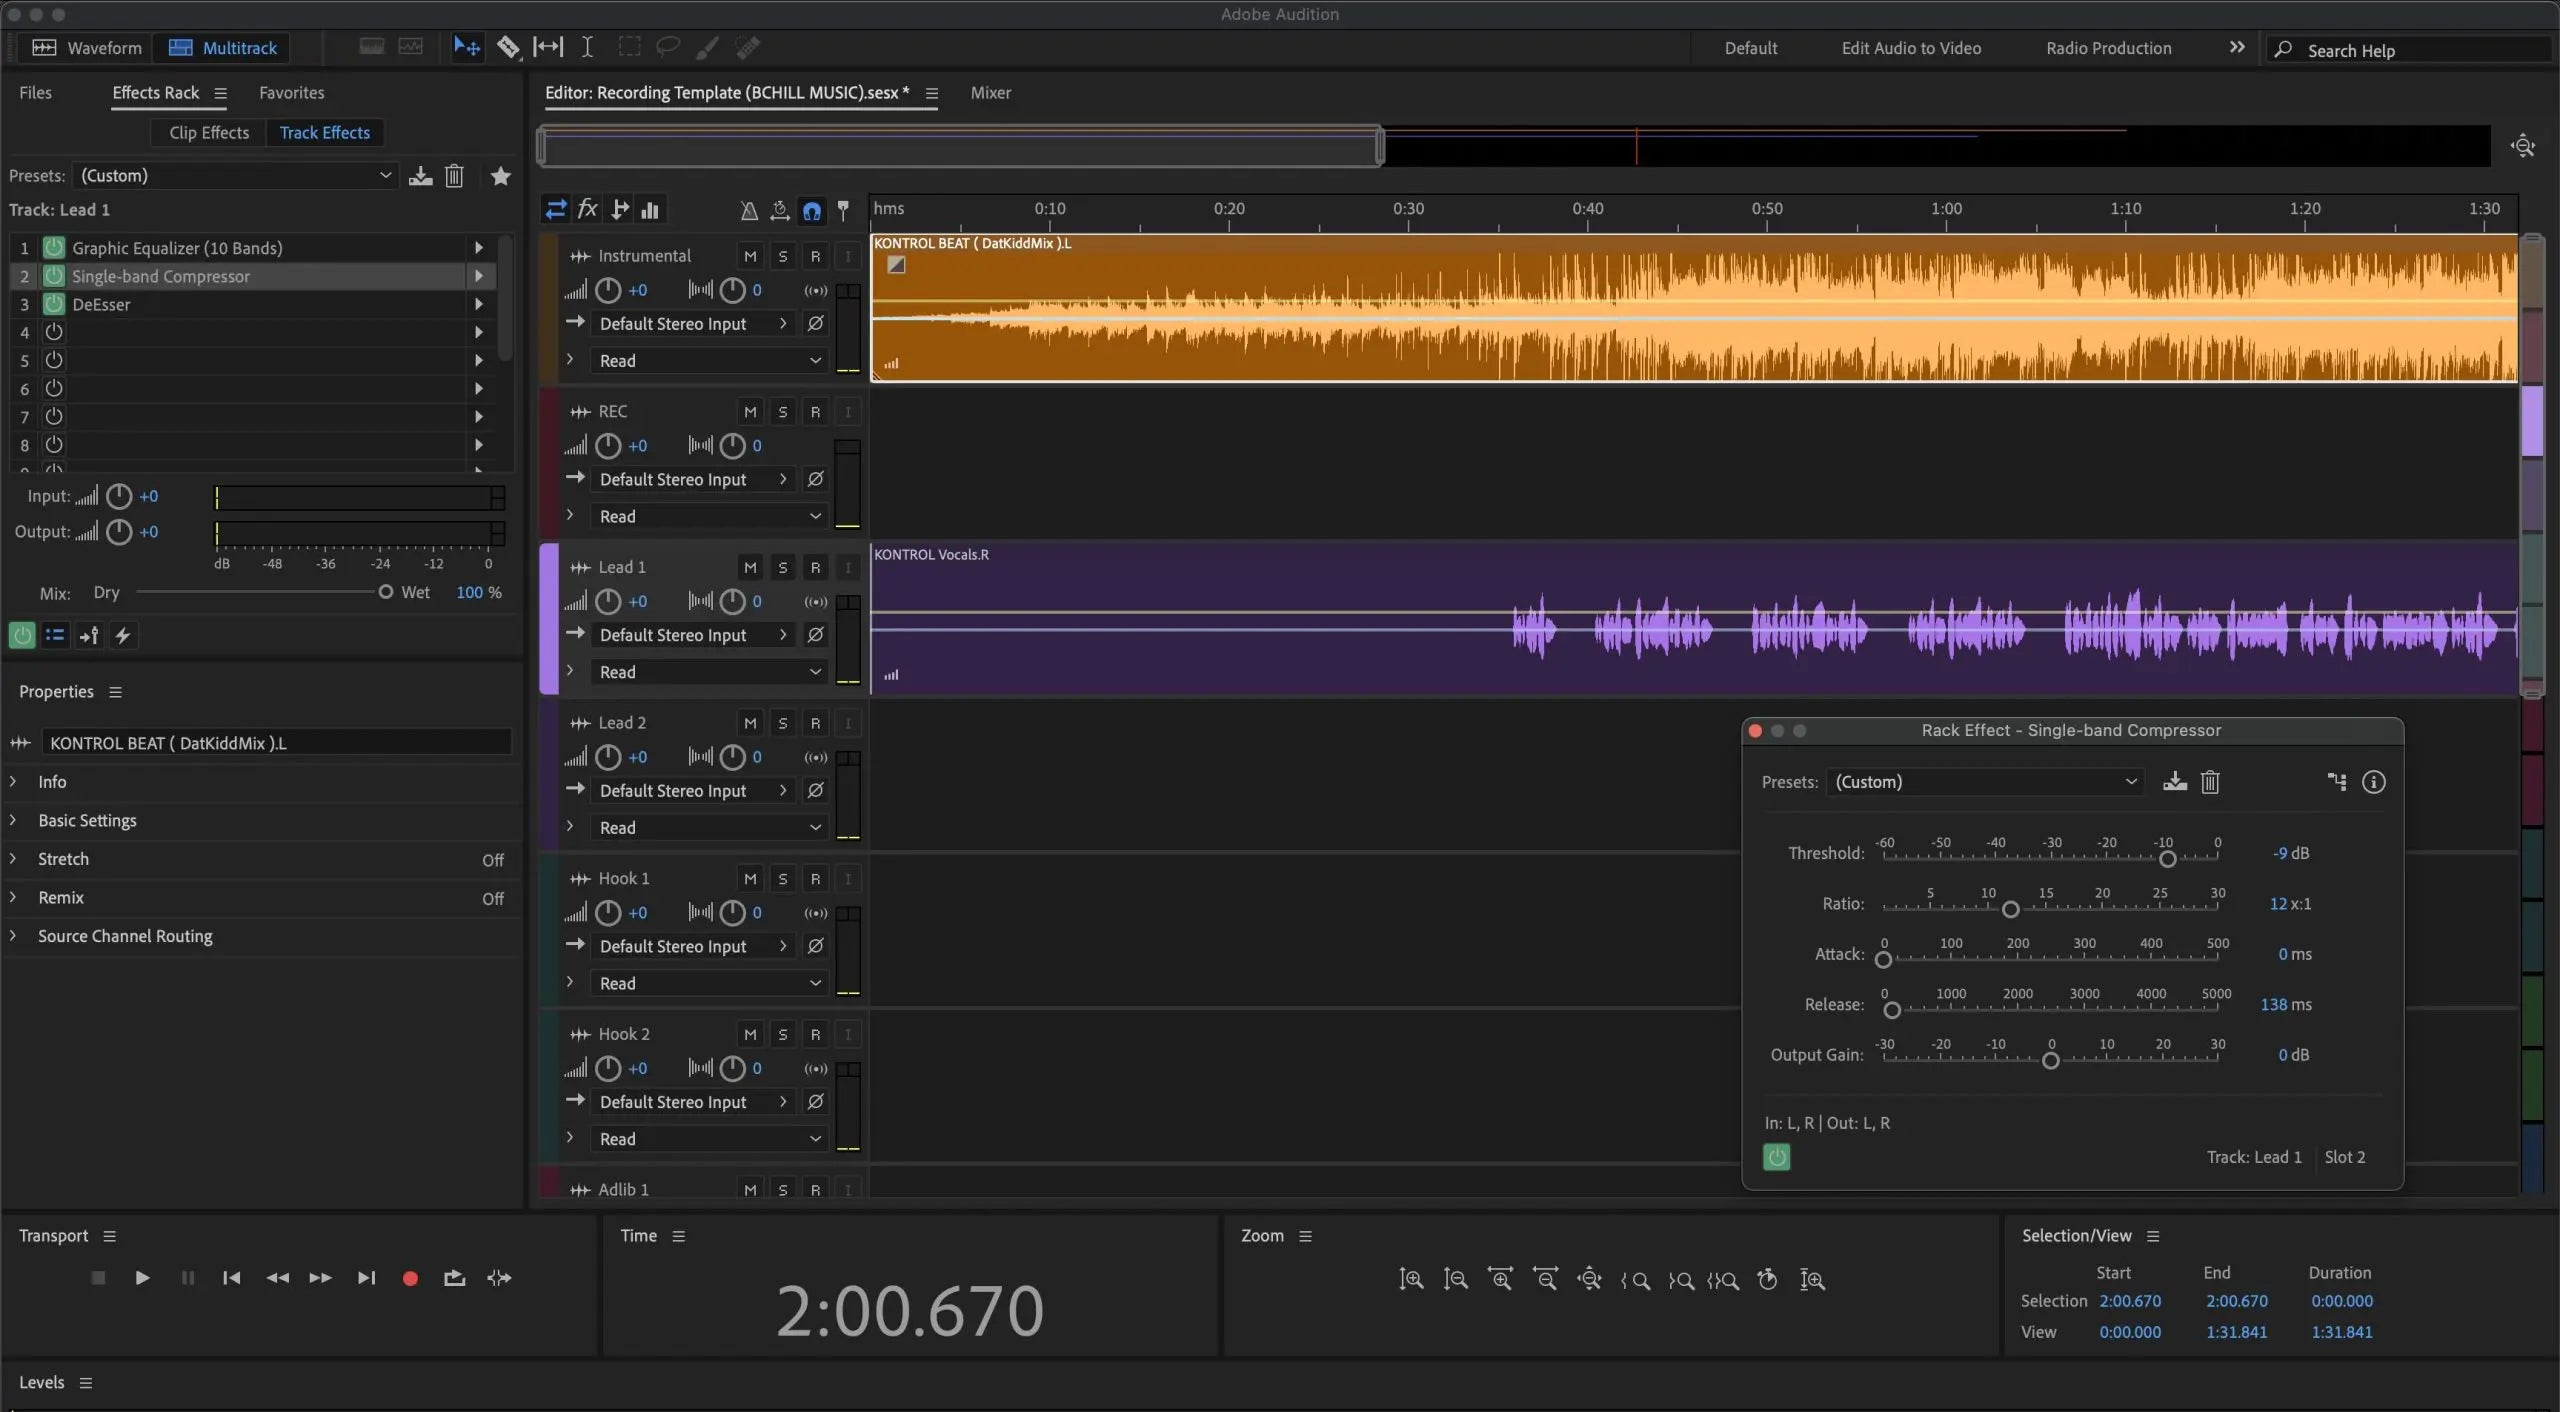
Modello di registrazione Adobe Audition (Plugin standard)
Tipo: Modello di Registrazione
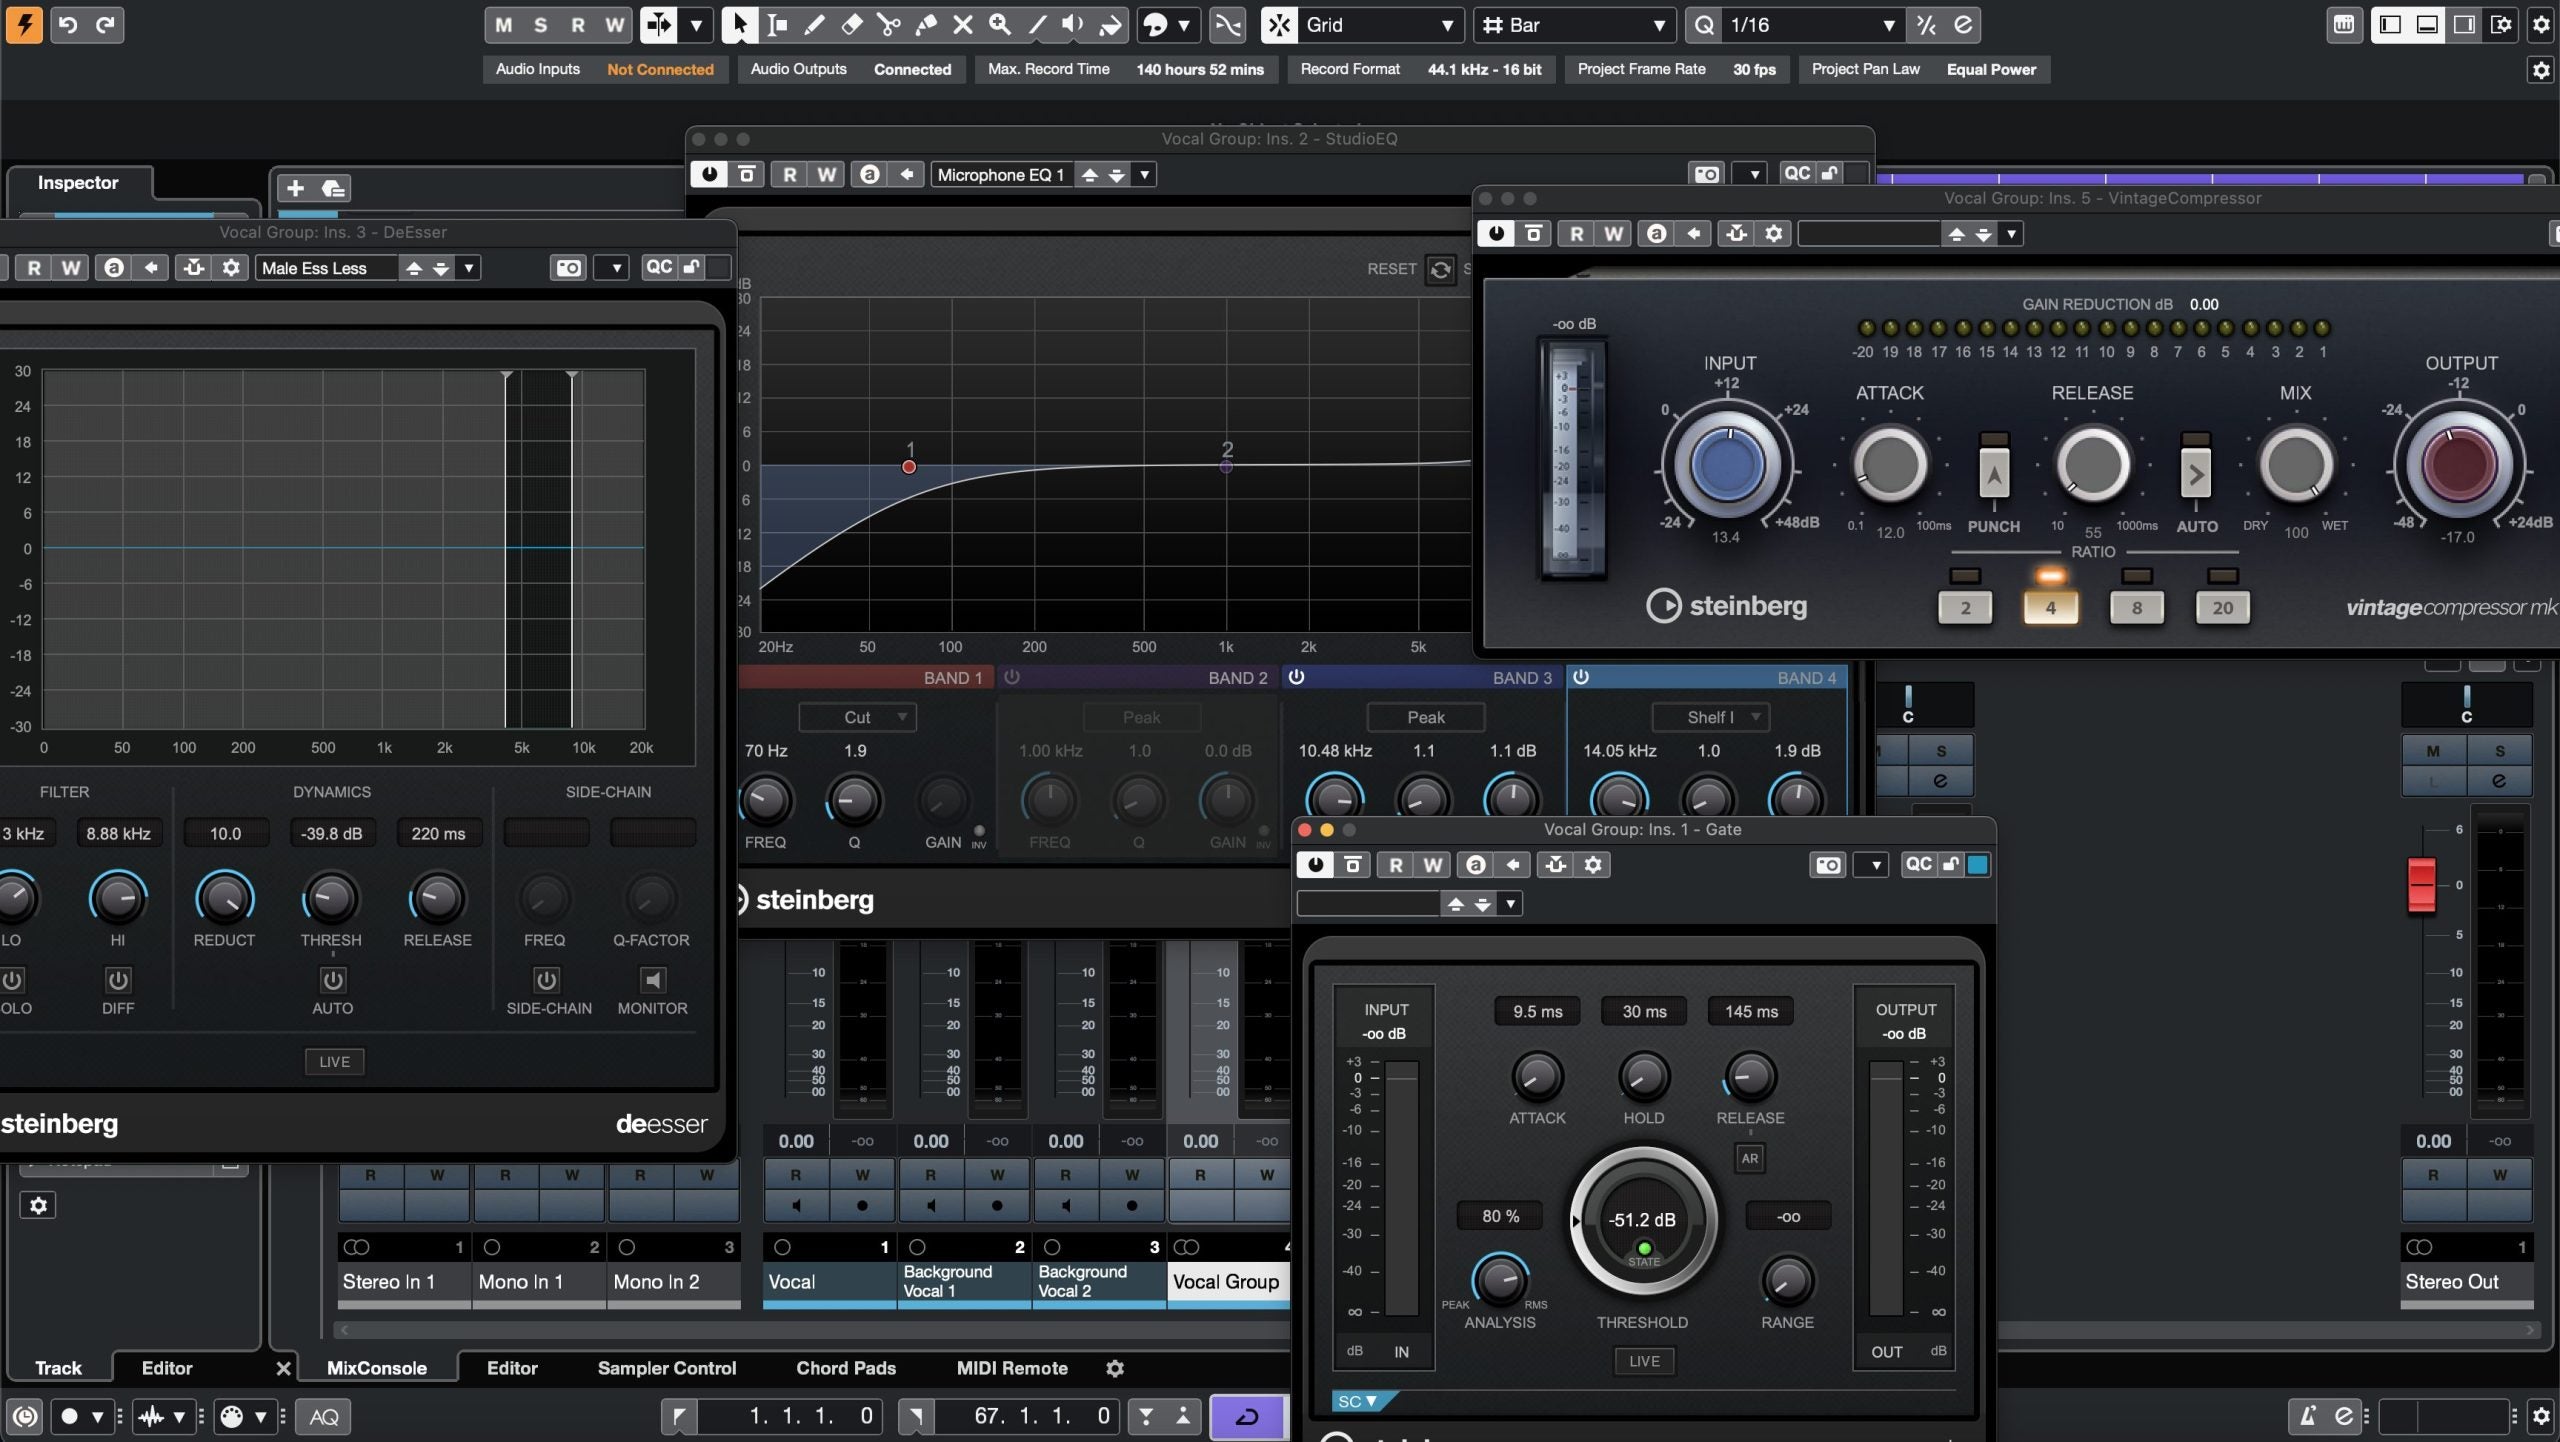
Modello di registrazione Cubase (Plugin standard)
Tipo: Modello di Registrazione
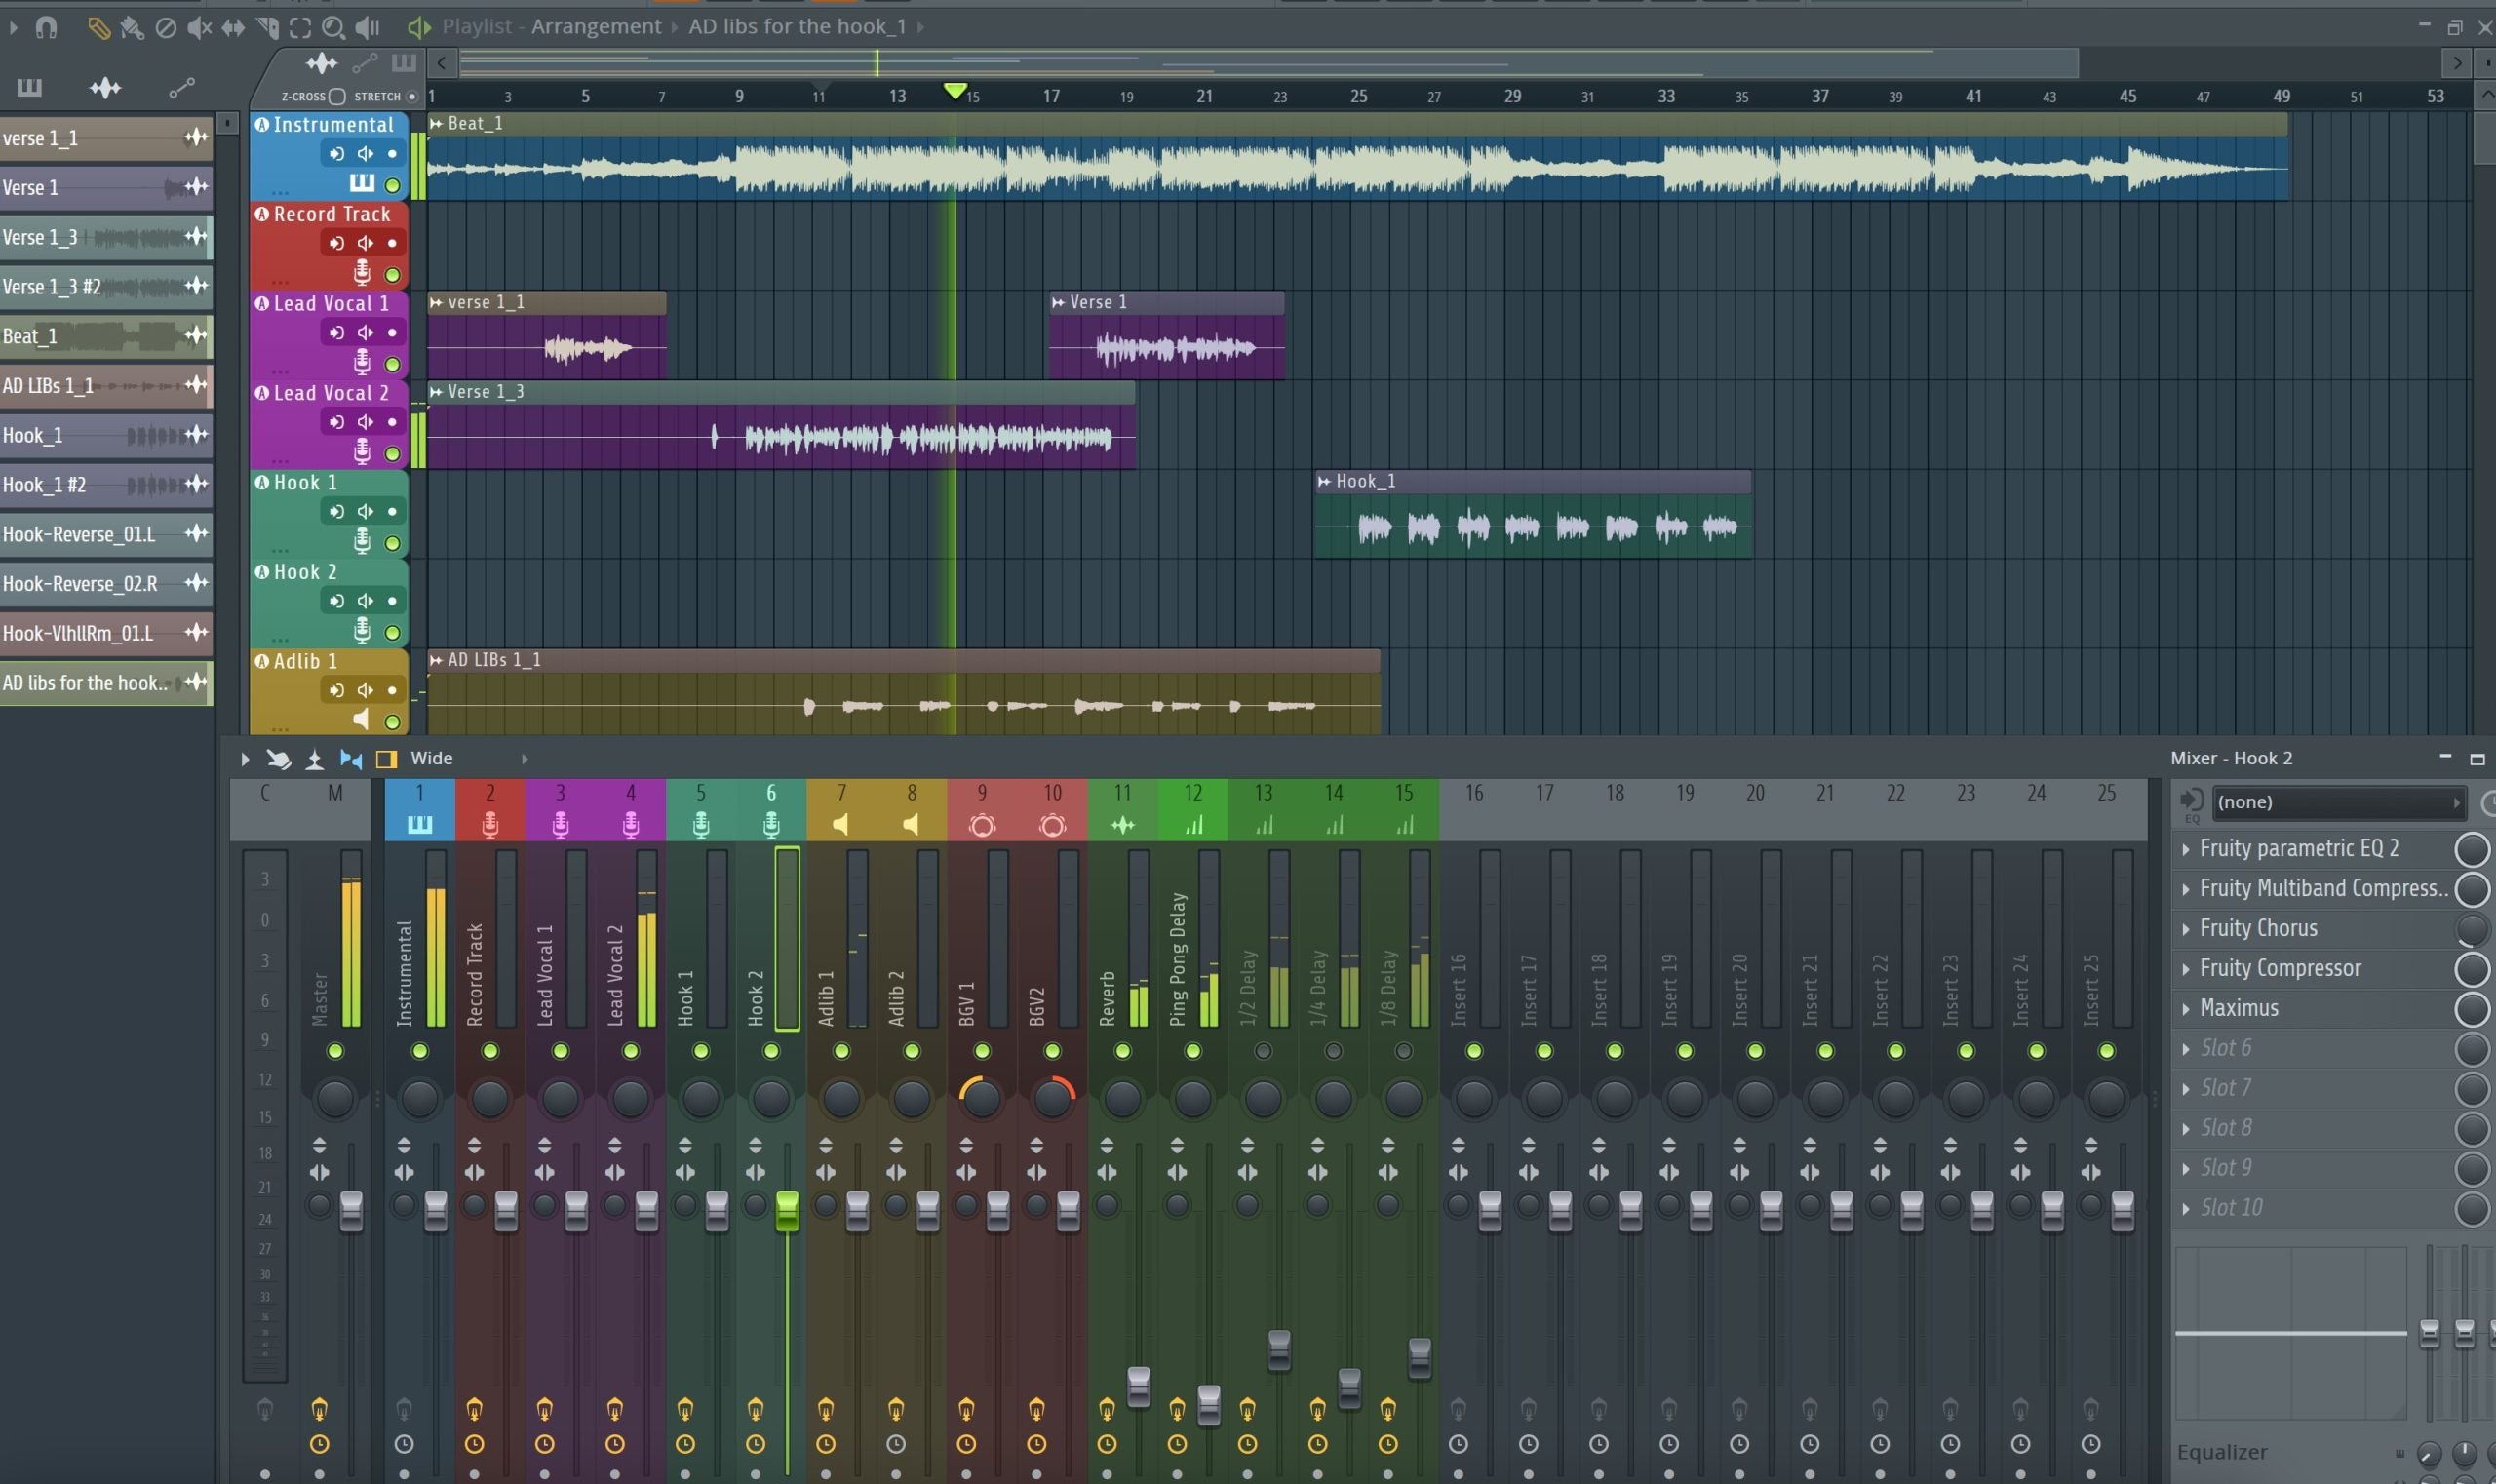
Modello di registrazione FL Studio (Plugin standard)
Tipo: Modello di Registrazione
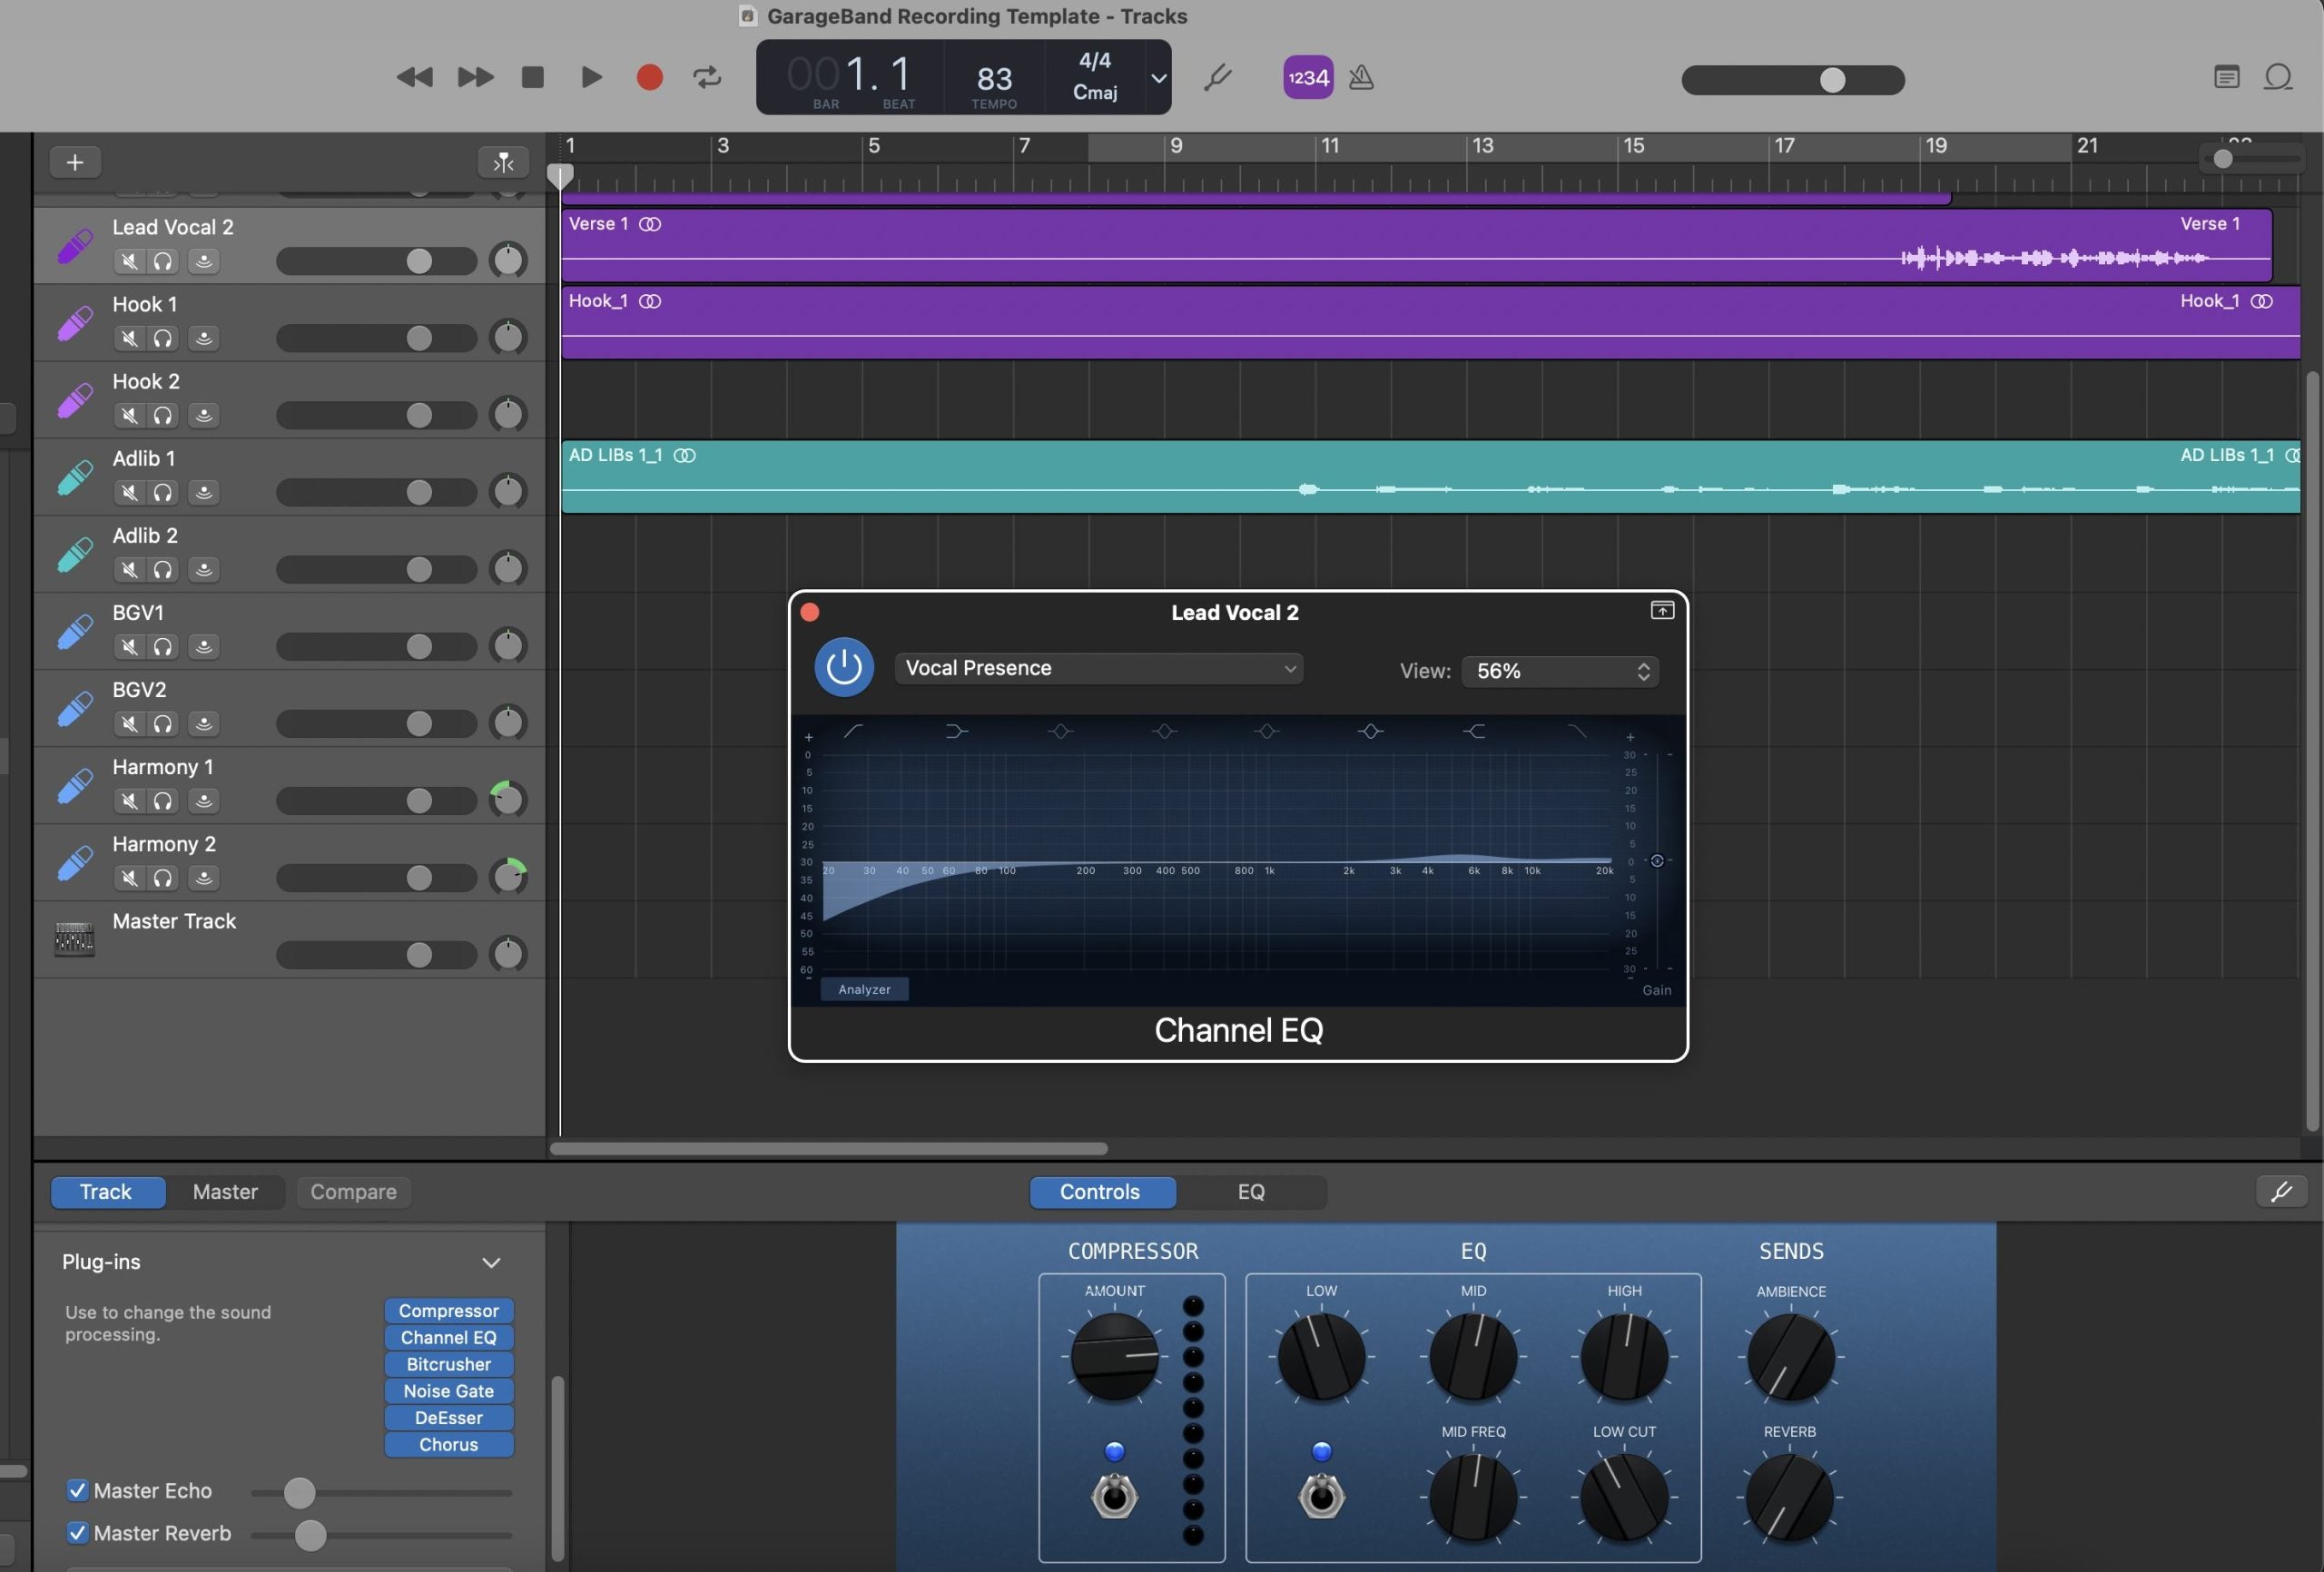
Modello di registrazione GarageBand (Plugin standard)
Tipo: Modello di Registrazione
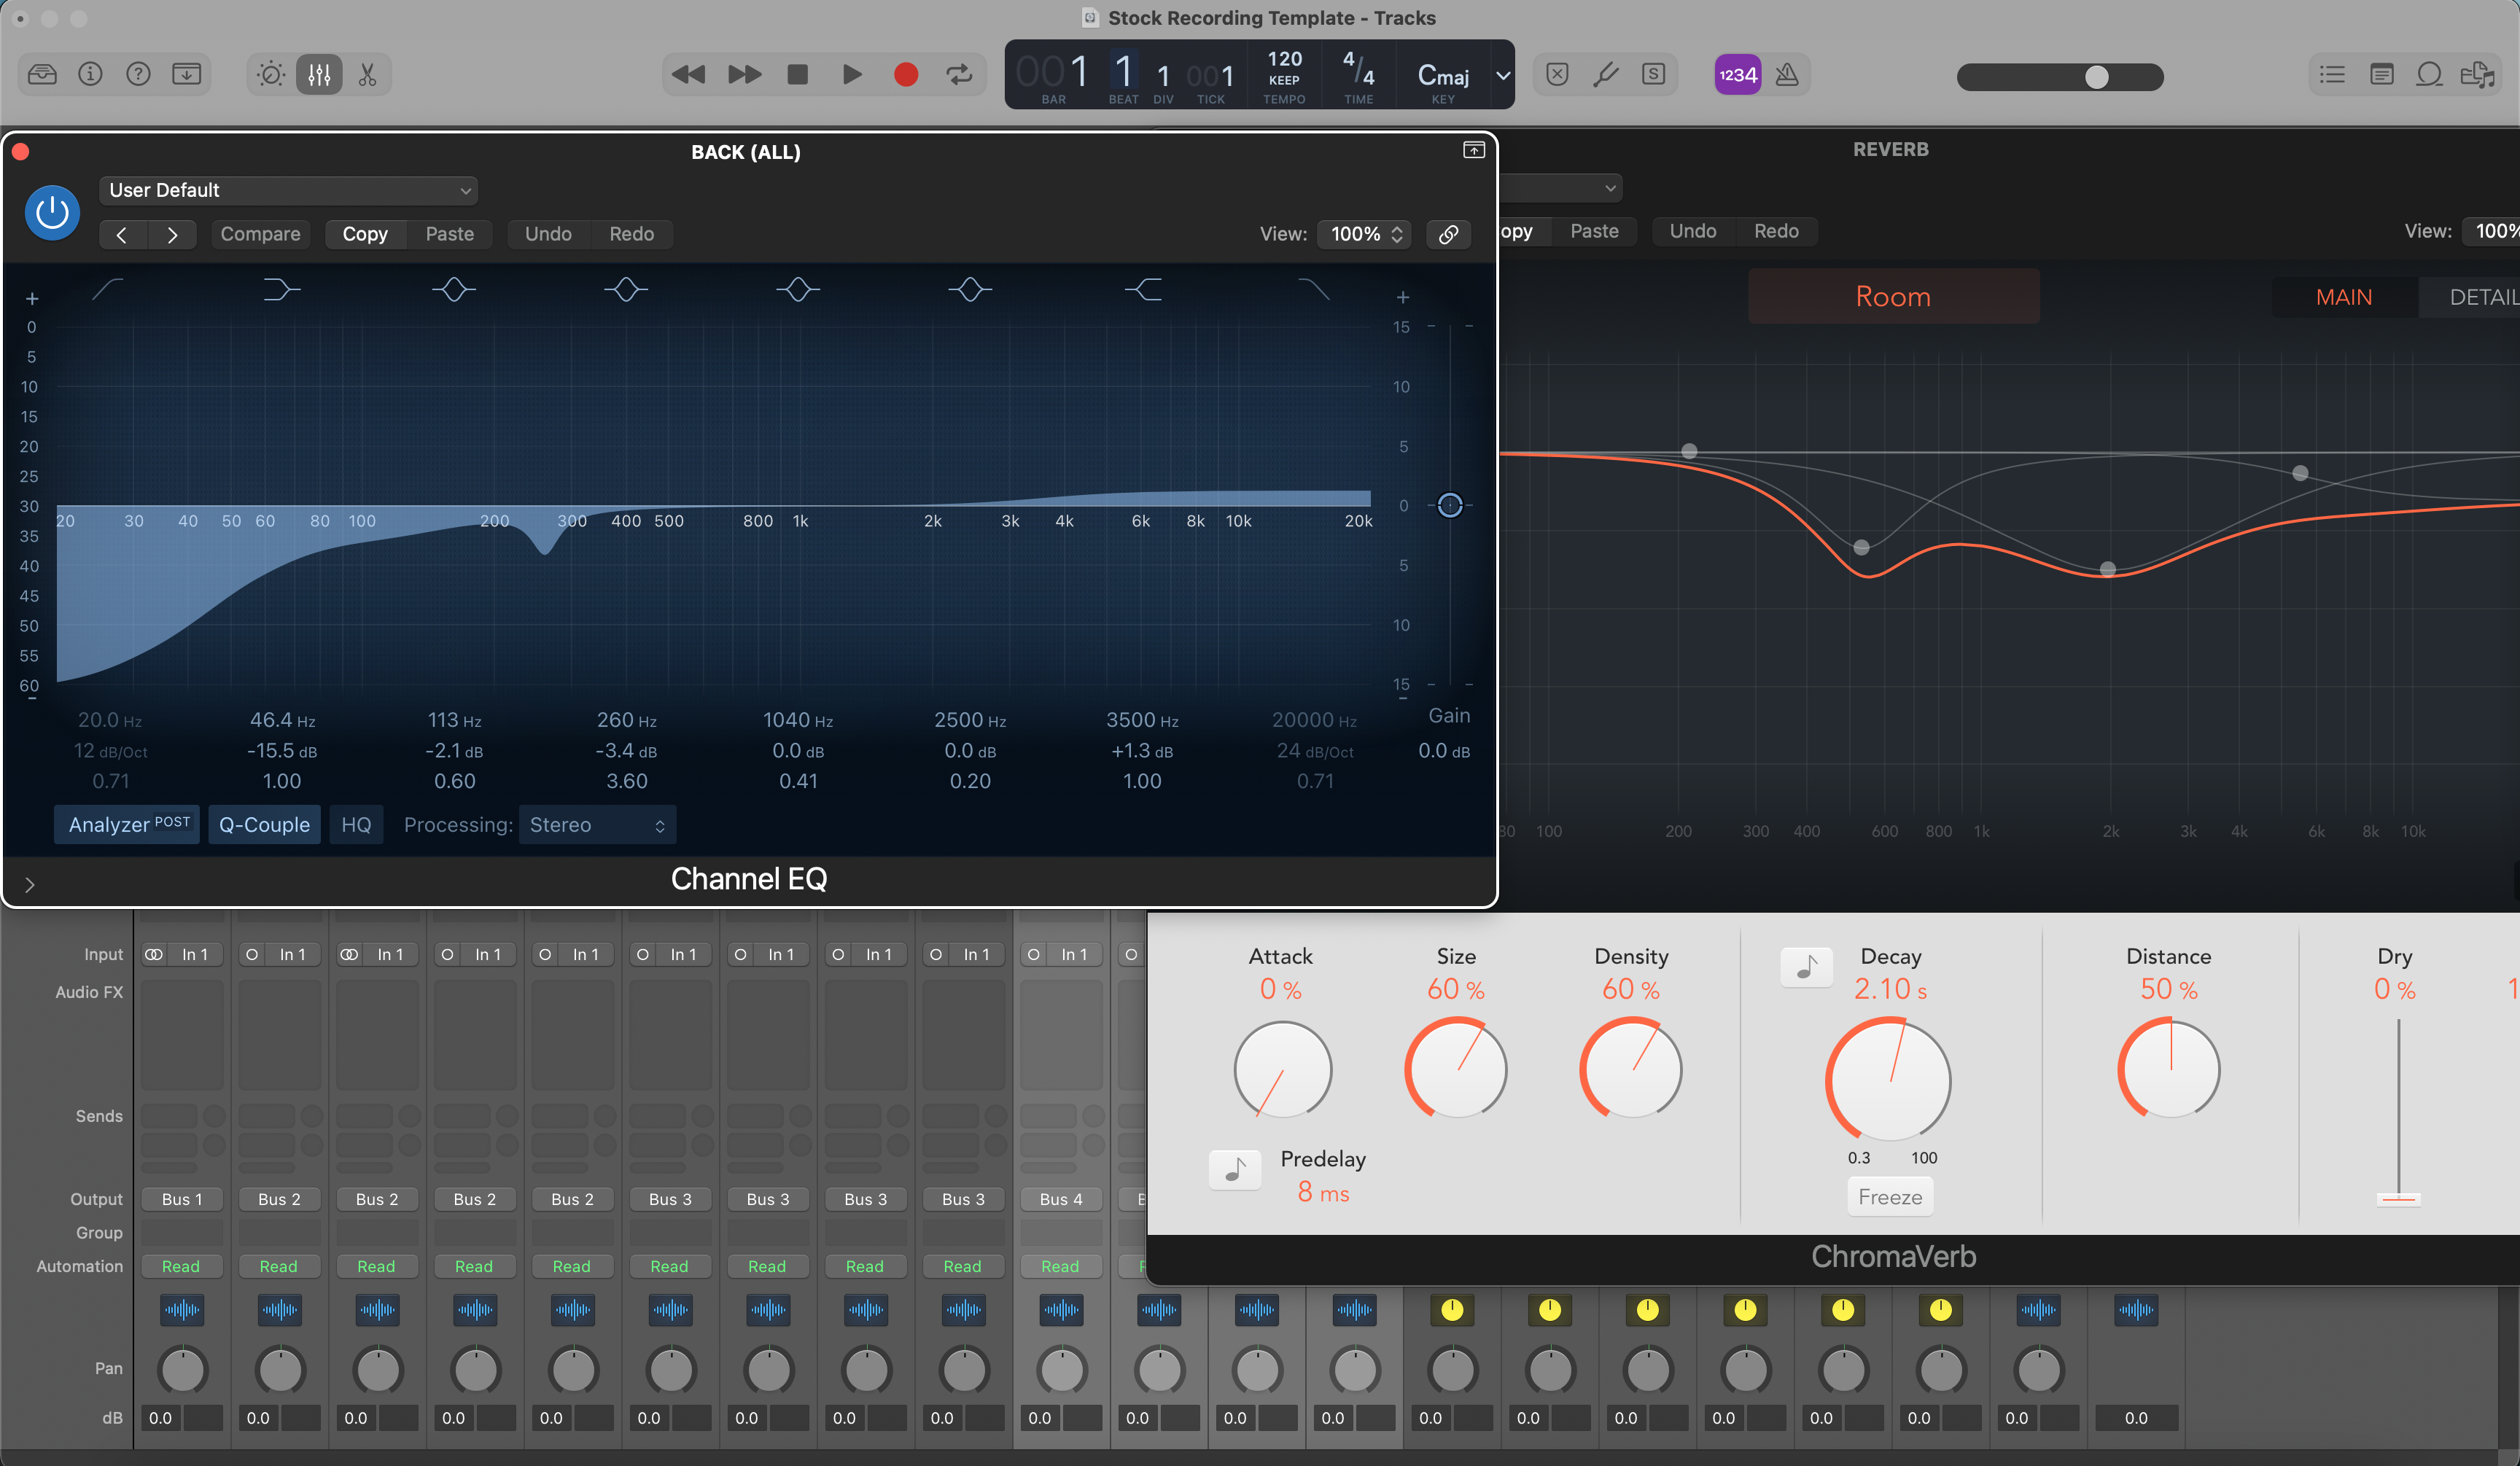
Modello di registrazione Logic Pro (Plugin standard)
Tipo: Modello di Registrazione
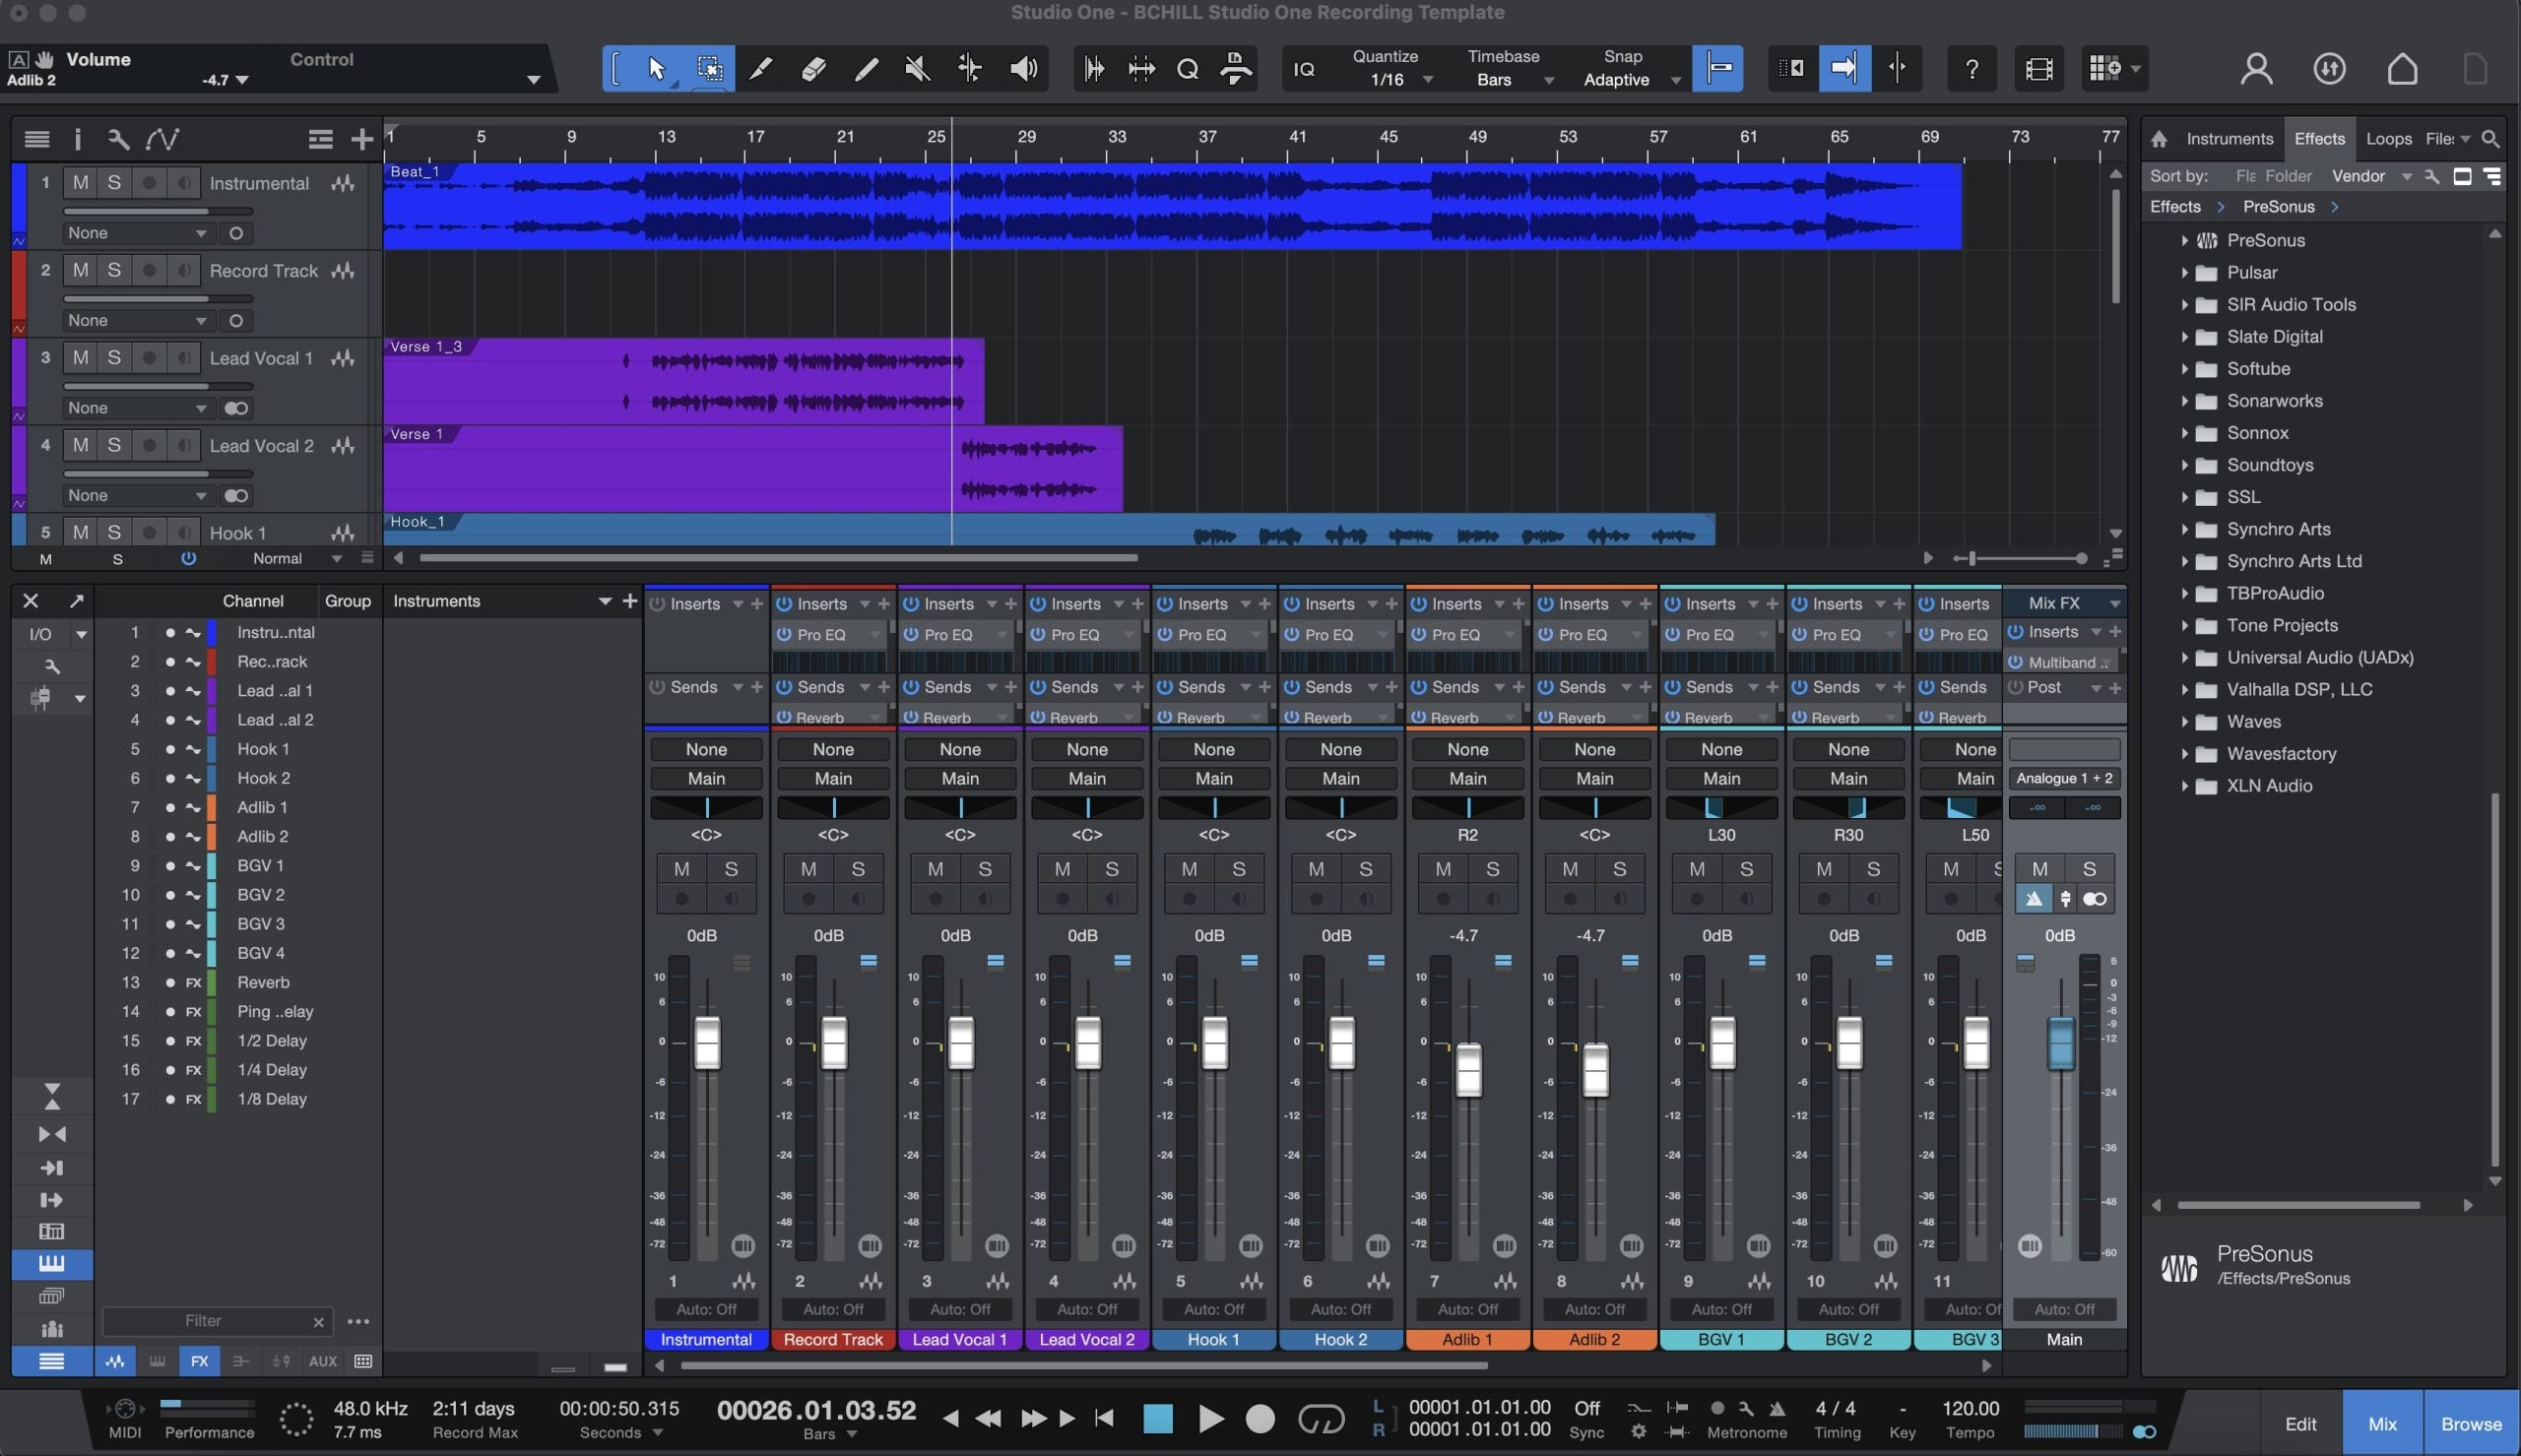
Modello di registrazione Studio One (Plugin standard)
Tipo: Modello di Registrazione
Il modello di registrazione esclusivo Pro Tools (plugin standard)
Domande frequenti
Cosa significa "modello standard"?
Cosa significa "modello standard"?
Un modello predefinito utilizza i plugin già inclusi nel DAW invece di dipendere da plugin esterni a pagamento.
Questo lo rende più facile da aprire, più semplice da mantenere e molto meno complicato per gli artisti che vogliono risultati senza dover prima aumentare il budget per i plugin.
Cosa ottengo dopo aver acquistato un modello stock?
Cosa ottengo dopo aver acquistato un modello stock?
Ricevi il file di sessione o modello specifico per DAW descritto nella pagina del prodotto, oltre a eventuali note di configurazione incluse per caricarlo correttamente.
Il vantaggio principale è che il routing e il flusso di lavoro vocale sono già impostati senza costringerti a possedere pacchetti di plugin aggiuntivi.
Quanto tempo ci vuole per ricevere i file del modello stock dopo l'acquisto?
Quanto tempo ci vuole per ricevere i file del modello stock dopo l'acquisto?
I modelli stock sono download digitali, quindi la consegna è generalmente immediata dopo il pagamento.
Ciò significa che di solito puoi aprire il file e iniziare subito a organizzare la tua sessione.
Ho bisogno di plugin di terze parti per utilizzare questi modelli predefiniti?
Ho bisogno di plugin di terze parti per utilizzare questi modelli predefiniti?
No. Questo è il punto principale della collezione.
Questi modelli sono progettati per funzionare con gli strumenti inclusi nel DAW, così puoi iniziare subito senza acquistare pacchetti di plugin aggiuntivi.
Quali DAW sono incluse in questa raccolta?
Quali DAW sono incluse in questa raccolta?
La collezione è costruita attorno a flussi di lavoro DAW supportati, dove i modelli di plugin standard hanno senso per la registrazione e la configurazione delle sessioni vocali.
Usa i dettagli della pagina del prodotto per confermare esattamente la DAW e la versione prima dell'acquisto.
Come installo un modello di registrazione predefinito nel mio DAW?
Come installo un modello di registrazione predefinito nel mio DAW?
Apri o importa il modello utilizzando il normale flusso di lavoro di sessione/modello del DAW, quindi conferma I/O, impostazioni di registrazione e eventuali piccole modifiche al routing necessarie per il tuo hardware.
Poiché i plugin sono standard, la configurazione è solitamente più semplice rispetto alle sessioni basate su plugin premium.
Questi modelli predefiniti sono adatti ai principianti?
Questi modelli predefiniti sono adatti ai principianti?
Sì. Sono uno dei modi più semplici per i principianti di aprire una sessione più organizzata senza bloccarsi sulla compatibilità dei plugin.
Aiutano anche gli utenti esperti a mantenere una base veloce e portatile quando desiderano meno attriti tecnici.
Posso aggiungere in seguito plugin come Waves, FabFilter, Auto-Tune o altri?
Posso aggiungere in seguito plugin come Waves, FabFilter, Auto-Tune o altri?
Sì. Un modello standard è comunque completamente personalizzabile.
Molti artisti usano modelli standard come base stabile e poi migliorano alcune parti della catena in seguito con i loro strumenti preferiti di terze parti.
I modelli predefiniti possono ancora offrire voci dal suono professionale?
I modelli predefiniti possono ancora offrire voci dal suono professionale?
Sì, se la registrazione è solida e il modello è usato bene.
I risultati professionali derivano dalla registrazione, dall’arrangiamento e dalle decisioni all’interno della catena, non solo dal prezzo dei plugin.
Cosa rende questi migliori rispetto a creare una sessione con plugin standard da zero?
Cosa rende questi migliori rispetto a creare una sessione con plugin standard da zero?
Risparmiano il tempo che normalmente perderesti a ricostruire tracce, bus, invii, colori e una catena vocale di base per ogni nuova canzone.
Questo li rende particolarmente preziosi per gli artisti che desiderano una configurazione ripetibile senza ingombri tecnici.
Crea il tuo cestino

Trasforma la tua sessione in secondi
Configurazione istantanea della sessione con i nostri modelli di registrazione pronti all’uso e preset vocali.


Crediti Industria

Westside Boogie

Shontelle

Jarren Benton

DJ Tunez

Vory

Caskey

Rittz

Nia Riley

Eugy

Q Parker
Ascolta il nostro lavoro
R&B
Prima
Dopo
Rap
Prima
Dopo
Popolare
Prima
Dopo
Anima
Prima
Dopo
Roccia
Prima
Dopo
Latino
Prima
Dopo
Modelli di Registrazione Plugin Standard: Spiegazione e Funzionalità
Introduzione ai Modelli per Voce e Registrazione
Quando vuoi un suono vocale moderno e coerente senza ricostruire la stessa sessione da zero, i modelli di registrazione vocale ti offrono un punto di partenza rapido e affidabile. Un buon modello si apre con le tracce giuste, i bus, i colori e una catena vocale bilanciata così puoi concentrarti sulle performance, non sulla configurazione. Da BCHILL MIX, ogni modello è progettato per essere chiaro, portatile e facile da modificare, sia che tu registri in uno studio casalingo o in viaggio.
Questa guida spiega cosa sono i modelli di registrazione, quando sono utili, come differiscono dai preset vocali e i passaggi esatti per installarli e regolarli. Vedrai anche layout pratici per rap, R&B, pop e lavori di contenuto/voce, più consigli per il gain staging, la latenza e la collaborazione. Se preferisci un punto di partenza specifico per DAW, puoi esplorare collezioni mirate come modelli Pro Tools, modelli Logic Pro e il più ampio catalogo di Preset Vocali.
Cos’è un Modello di Registrazione Vocale?
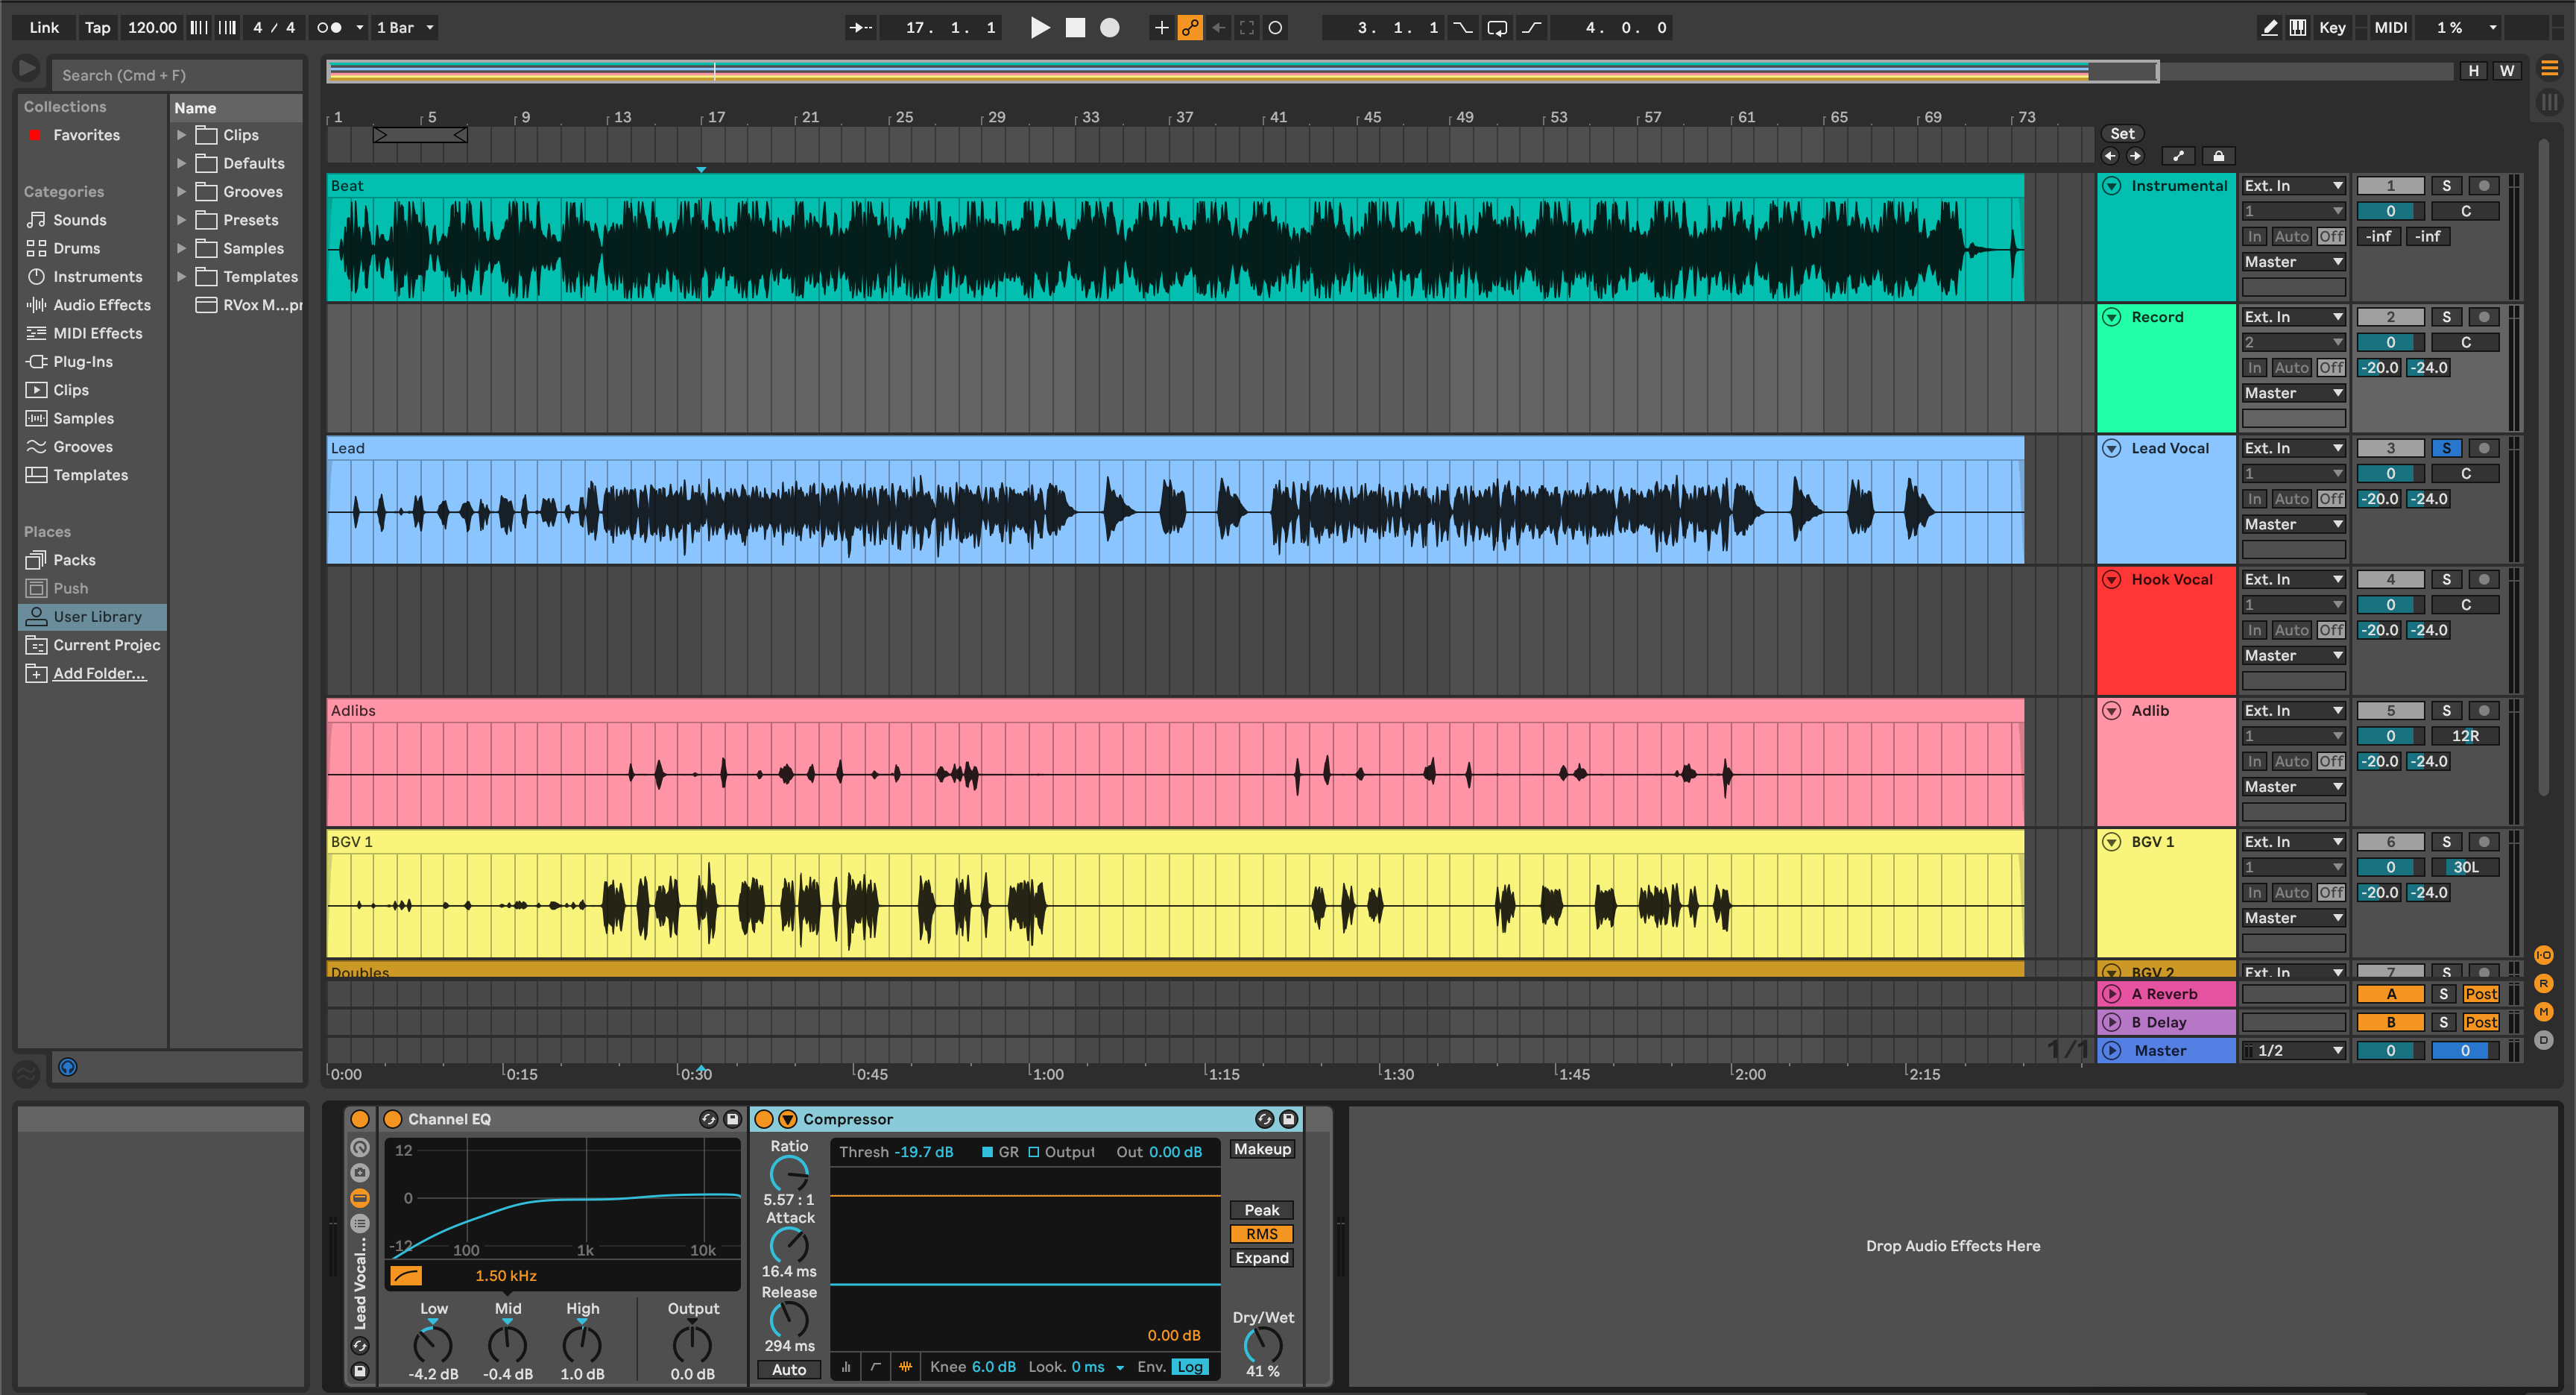
Un modello di registrazione è un file di sessione DAW pronto all’uso che si apre con:
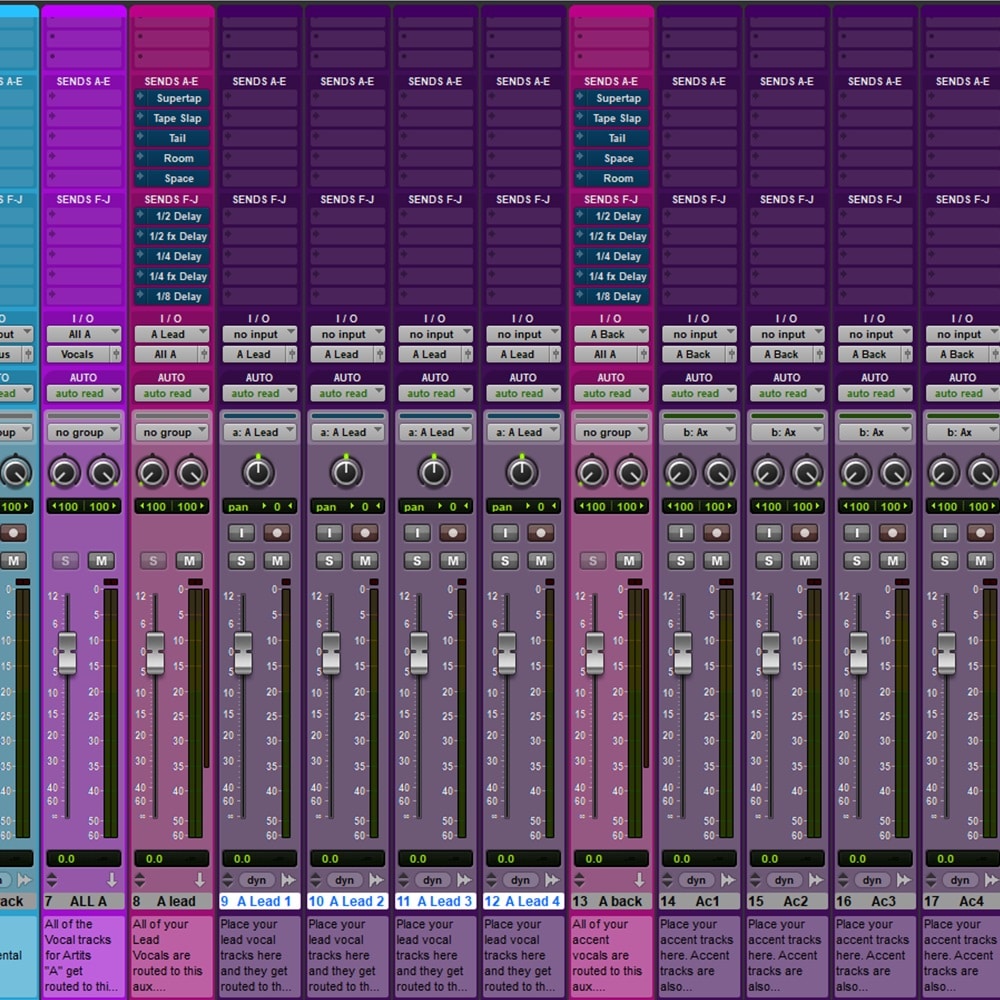
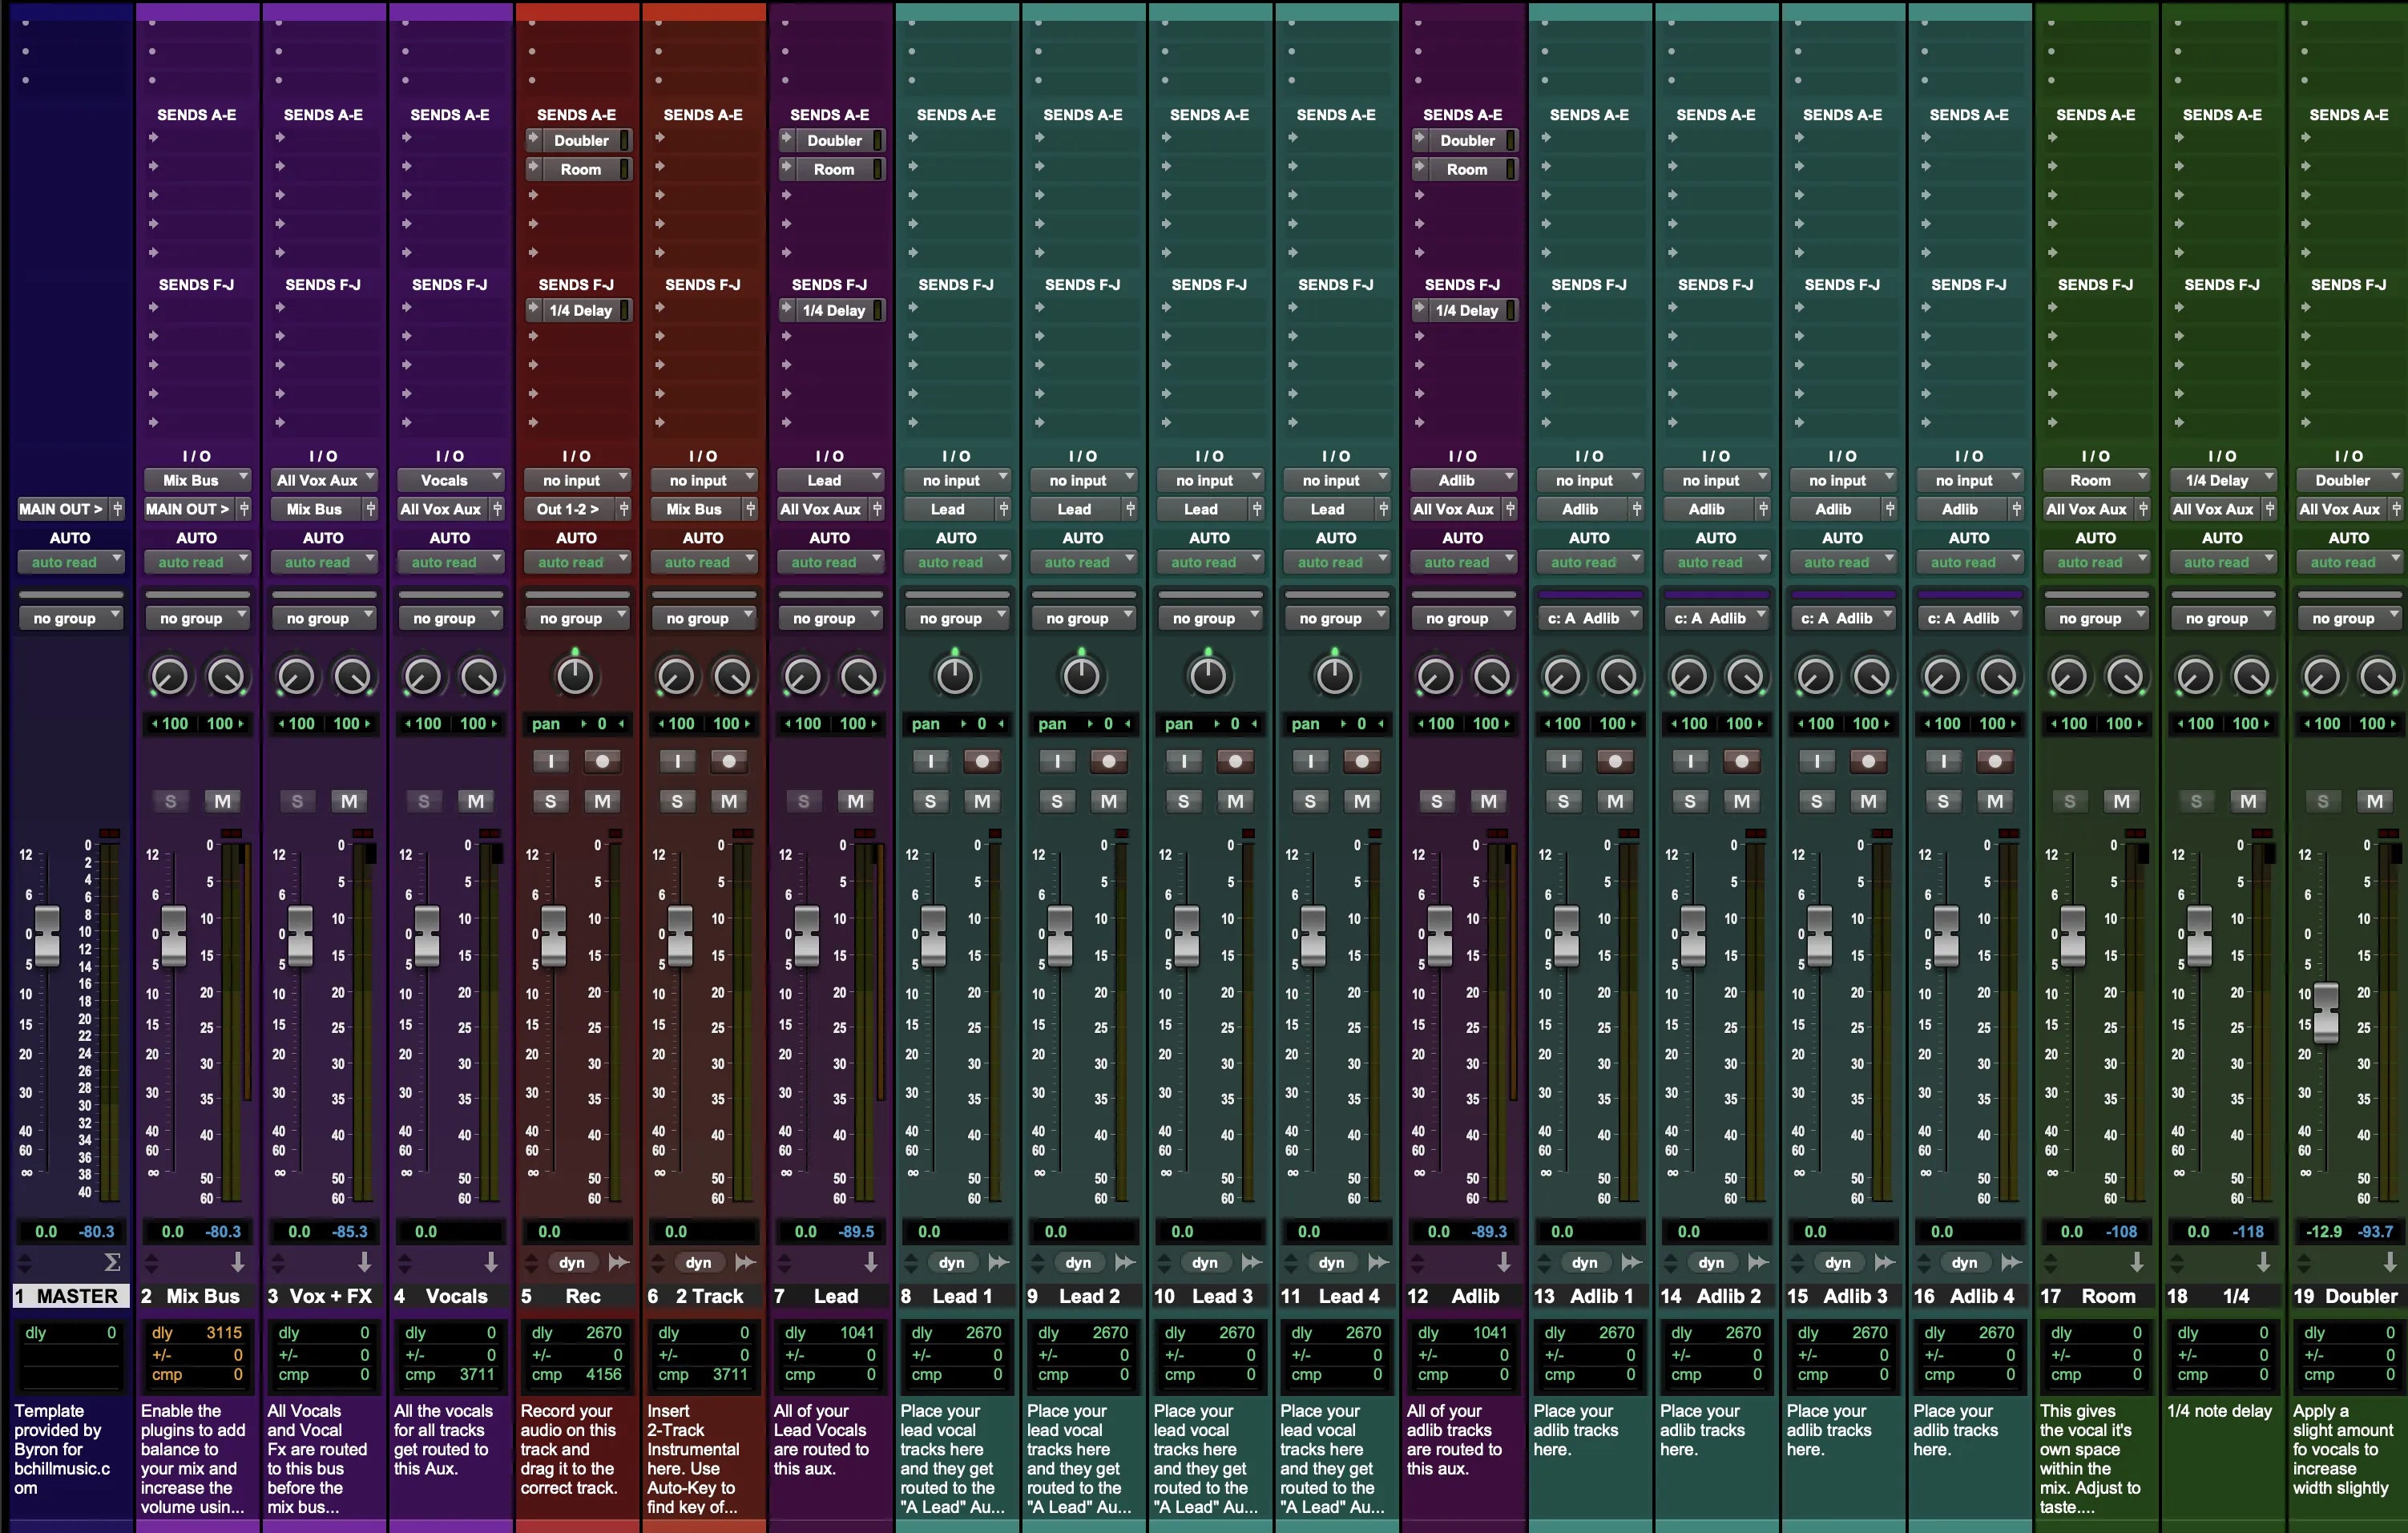
- Tracce preindirizzate (Lead, Doppi, Armonie, Ad-libs, Strumentale/Beat, Stampa, Talkback) con I/O impostati e meter visibili.
- Layout codificato a colori così puoi trovare le parti all’istante ed evitare “dov’è finita quella traccia?” durante le registrazioni.
- Bus vocali e ritorni FX (short plate/room, delay sincronizzato al tempo e un bus utility per larghezza o slap).
- Una catena vocale calibrata: filtro passa-alto delicato, piccoli interventi chirurgici di EQ, compressione seriale leggera, de-esser prima di qualsiasi aria/luminosità e invii per lo spazio.
I modelli eliminano la configurazione ripetitiva e mantengono la headroom costante tra i progetti. Invece di reinventare il routing, apri una sessione già pronta per la registrazione e tocchi solo i pochi controlli che cambiano davvero da canzone a canzone (guadagno microfono, soglie compressore, livelli invii).
Perché Usare i Modelli (Vantaggi e Quando Sono Utili)
- Velocità: Apri, armi, registra. Il ritmo conta, soprattutto per artisti che lavorano velocemente o catturano idee con scadenze strette.
- Coerenza: Un layout stabile mantiene tono e livelli allineati da demo a release, aiutando EP e contenuti seriali a risultare coerenti.
- Focus creativo: Con il routing gestito, dedichi tempo alla performance, doppi/ad-libs, armonie e arrangiamento.
- Traduzione: Gain staging calibrato più dinamiche sensate fanno viaggiare bene le bozze su auricolari, telefoni, auto e monitor.
- Collaborazione: Condividi lo stesso modello così vocalist e ingegneri remoti sentono bilanci simili anche su setup diversi.
Ottimi casi d’uso: sessioni di scrittura rapide, collaborazioni remote, uscite settimanali di singoli, reels/shorts/voiceover, giornate in studio con più artisti e qualsiasi flusso di lavoro dove devi passare dall’idea alla take in pochi minuti.
Catene Stock vs. Premium (Cosa Serve Davvero)
I modelli stock (nativi) usano solo i processori integrati nella tua DAW. Si caricano su qualsiasi macchina compatibile—nessuna licenza extra—e sono ideali per portabilità, basso utilizzo CPU e sessioni senza problemi. Questa è la scelta predefinita per la maggior parte dei creatori: apri ovunque, registra subito.
I modelli premium incorporano alcuni processori di terze parti se il tuo setup li ha già (EQ dinamici, compressori caratteristici, saturazione avanzata, riverberi speciali o strumenti di pitch). Le catene premium offrono un controllo più fine o un “colore” riconoscibile, ma richiedono quei plug-in su ogni computer che carica la sessione.
Scelta rapida: se sei nuovo ai modelli, inizia con lo stock per affidabilità. Se possiedi già alcuni strumenti di terze parti e vuoi una finitura extra, tieni una versione premium per il mixdown. Molti artisti usano entrambi: stock per tracking ovunque, premium per il finishing a casa o in studio.
Installazione e Avvio Rapido (Passo per Passo)
- Scarica e decomprimi. Metti il file modello nella cartella templates/projects della tua DAW (o tienilo in una directory “Templates” che salvi regolarmente).
- Apri e etichetta. Avvia il modello come nuovo progetto. Conferma che i nomi delle tracce (Lead, Doppi, Armonie, Ad-libs, Stampa, Talkback) e i colori corrispondano alle tue preferenze così navighi d’istinto.
- Imposta ingresso e livelli. Scegli l’ingresso microfono sulla traccia Lead. Registra una linea di prova e regola il guadagno del preamplificatore in modo che i picchi siano intorno a −10 a −6 dBFS sul meter della traccia—niente luci rosse sull’interfaccia.
- Carica la catena. Se il modello include una catena vocale, sarà pre-inserita; altrimenti inserisci: EQ → Comp (livellamento) → De-esser → Comp (veloce/picco) → saturazione opzionale → invii a Delay/Riverbero. Mantieni gli inserti per lo più asciutti durante la registrazione; usa gli invii per lo spazio per mantenere chiarezza e bassa latenza.
- Regola soglie e invii. Punta a qualche dB di riduzione del guadagno sulle frasi più forti senza pompare. Se aggiungi aria, rivedi il de-esser per mantenere le “s” morbide. Parti con invii delay/riverbero bassi e automatizza in aumento nei ritornelli.
- Salva la tua versione. Conserva un modello utente con I/O, colori e meter impostati. Salva una seconda versione con le tue soglie vocali per sessioni davvero a un clic.
Checklist latenza: attiva la modalità a bassa latenza della DAW durante la registrazione, riduci la dimensione del buffer e bypassa processori pesanti con look-ahead fino al mix. Registra a 24 bit per una headroom sana; la profondità di bit è più importante di frequenze di campionamento ultra alte nei flussi vocali tipici.
Layout Pratici e Note di Stile (Rap, R&B, Pop, Voce Chiara/Podcast)
Layout base (funziona su tutte le DAW):
- Tracce: Lead, Doppi, Armonie (L/R), Ad-libs, Stacks, Strumentale/Beat, Stampa, Talkback.
- Bus: Bus Vocale (collante delicato), FX A (short plate/room), FX B (delay sincronizzato al tempo), Utility (slap o allargatore), Compressore parallelo (opzionale).
- Marker: Verso/Ritornello/Ponte per velocizzare navigazione e comping.
Lead rap: Mantieni vivi i transienti con due compressori leggeri in serie. Concentrati sull’intelligibilità tra 2 e 5 kHz; crea piccoli spazi nel beat invece di sovra-potenziare la voce. Usa uno slap corto o un piccolo plate per energia senza wash; automatizza gli invii delay per sollevare i ritornelli.
R&B / Soul: Alti morbidi con calore controllato nei medi bassi. Usa un soft air shelf e un’ambienza più ampia con pre-delay lungo così la voce resta in primo piano. Filtro passa-alto un po’ più alto sui cori rispetto al lead e aggiungi un po’ più di de-ess per far sedere gli stack senza sfocature.
Pop: Alti lucidi con de-ess accurato, delay sincronizzati al tempo per spazio ritmico e una piccola stanza per “collante.” In arrangiamenti densi, scava 2–4 kHz in chitarre/synth per mantenere le parole intelligibili. Confronta le scelte a volume uguale—“più forte” può influenzare i controlli A/B.
Voce chiara / podcast / parlato: Dai priorità a intelligibilità e controllo del rumore. Usa compressione trasparente, de-ess moderato e un accenno di ambienza corta se il dry sembra innaturale. La tecnica vince: distanza costante dal microfono, filtro anti-pop e una stanza silenziosa battono sempre un’elaborazione pesante.
Stacks e ad-libs: Filtro passa-alto un po’ più alto del lead, aggiungi un po’ più di de-ess e considera un ritorno FX più ampio o lungo così gli strati si separano senza confusione. Per larghezza istantanea, pan doppie L/R e sposta leggermente i tempi prima di aggiungere effetti extra.
Modelli vs. Preset Vocali (Come Funzionano Insieme)
I preset vocali sono catene salvate (i processori e il loro ordine). I modelli di registrazione sono sessioni complete (tracce, bus, routing, colori, meter, marker) che possono includere anche un preset vocale sulle tracce chiave. La maggior parte dei creatori usa entrambi:
- Apri un modello per organizzazione, headroom e routing che non cambiano mai.
- Carica un preset che corrisponde al mood (Bright, Neutral, Soft o tarato per genere), regola le soglie e salva una versione personalizzata per la tua voce.
Consiglio per collaborazioni: condividi un modello compatto e un preset di riferimento così i collaboratori remoti sentono bilanci simili.
All'interno della Sessione: Screenshot del Modello Vocale e di Registrazione
Gli schermi mostrano layout pronti per la registrazione di rap, R&B, pop e voce chiara. Parti da queste configurazioni e regola con precisione compressione, de-essing e ritardo/riverbero per il tuo suono.