


1What is Gain Staging
Gain staging is the practice of managing signal levels throughout the audio path—from microphone to final output. Proper gain staging ensures each component in the signal chain operates at optimal levels, maximizing quality while avoiding distortion and noise.
Every piece of audio equipment (and plugin) has an ideal operating range. Too low, and the signal drowns in noise floor. Too high, and distortion occurs. Gain staging navigates between these extremes at every stage.
Our calculator helps you understand how gain changes accumulate through your signal chain and plan appropriate levels for each stage of production.
2Why It Matters
Poor gain staging causes cascading problems. Recording too hot causes digital clipping—harsh, irrecoverable distortion. Recording too low buries the signal in quantization noise that becomes audible when you normalize or compress later.
Plugins behave differently at different levels. Many emulations of analog gear expect signals at certain levels to model saturation accurately. Too hot or too cold, and the response characteristics change, often for the worse.
Mixing with poorly staged tracks leads to constant fader riding and gain compensation. Properly staged sessions keep faders near unity (0 dB), giving you full control range and making automation more intuitive.
The K-System: Bob Katz's K-System provides standardized metering references where 0 on the meter corresponds to a specific SPL. K-14 suits most music; K-20 for classical and jazz. This approach ensures consistent loudness perception during mixing.
3Digital Gain Staging
In 32-bit floating point DAWs, true clipping only occurs at the output stage. Individual tracks can "exceed" 0 dBFS internally without distortion—the math handles it. However, this doesn't mean levels don't matter.
Plugins often operate in fixed-point internally, expecting reasonable input levels. Sending extremely hot signals into plugins can cause internal clipping or simply wrong-sounding processing as algorithms operate outside intended ranges.
The analog emulation revolution complicates things further. Classic hardware was designed for +4 dBu professional levels or -10 dBV consumer levels. Plugin recreations model behavior at these levels—significantly hotter or colder inputs produce different (usually worse) results.
4Optimal Target Levels
Recording targets around -18 dBFS provide ample headroom while maintaining excellent signal-to-noise ratio. This level leaves roughly 18 dB of headroom for peaks and transients while keeping you well above the noise floor.
For mixing, aim for average levels around -18 to -12 dBFS on individual tracks. This leaves room for processing gain and keeps your master fader operating sensibly when summing multiple tracks.
Master bus targets depend on delivery format. Streaming services often target -14 LUFS integrated loudness. CD masters might push to -9 LUFS or louder. Vinyl requires different considerations entirely. Know your destination.
5Signal Chain Management
Gain changes accumulate. A +3 dB boost at the preamp, +6 dB from a compressor's makeup gain, and +3 dB EQ boost adds up to +12 dB—potentially problematic. Track cumulative gain through your entire signal path.
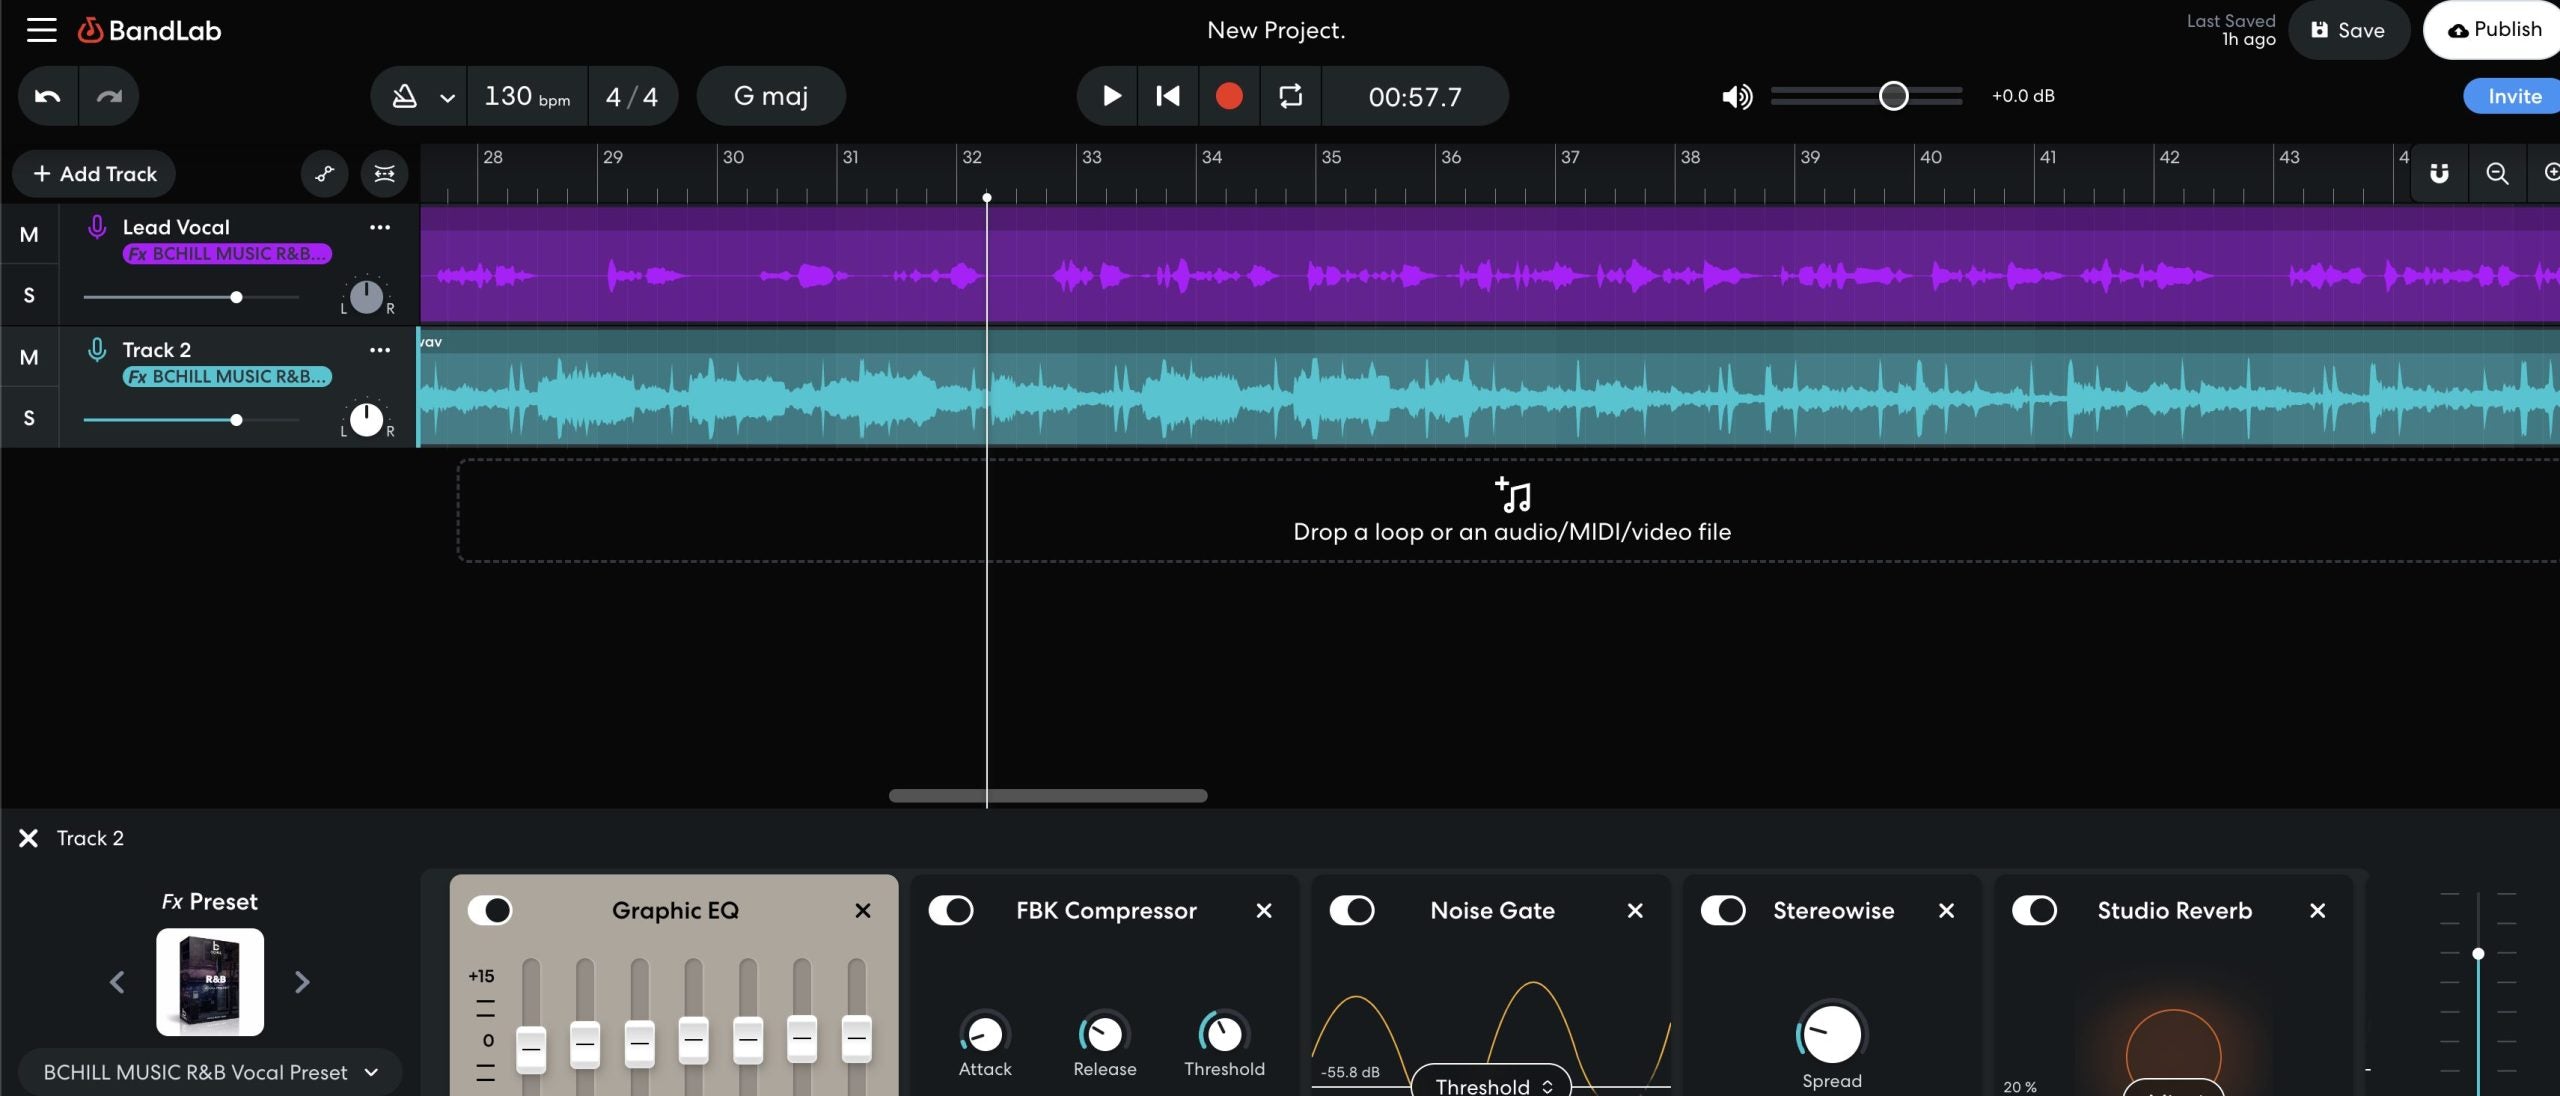
Use utility gain plugins between processors to manage levels. If a compressor's output is too hot for the next plugin, insert a simple gain plugin to compensate. These level management plugins are "free" in terms of quality impact.
Work backward from the output when troubleshooting. If your master is too hot, check bus levels. If buses are hot, check individual tracks. Find where levels diverge from targets and correct at the source.
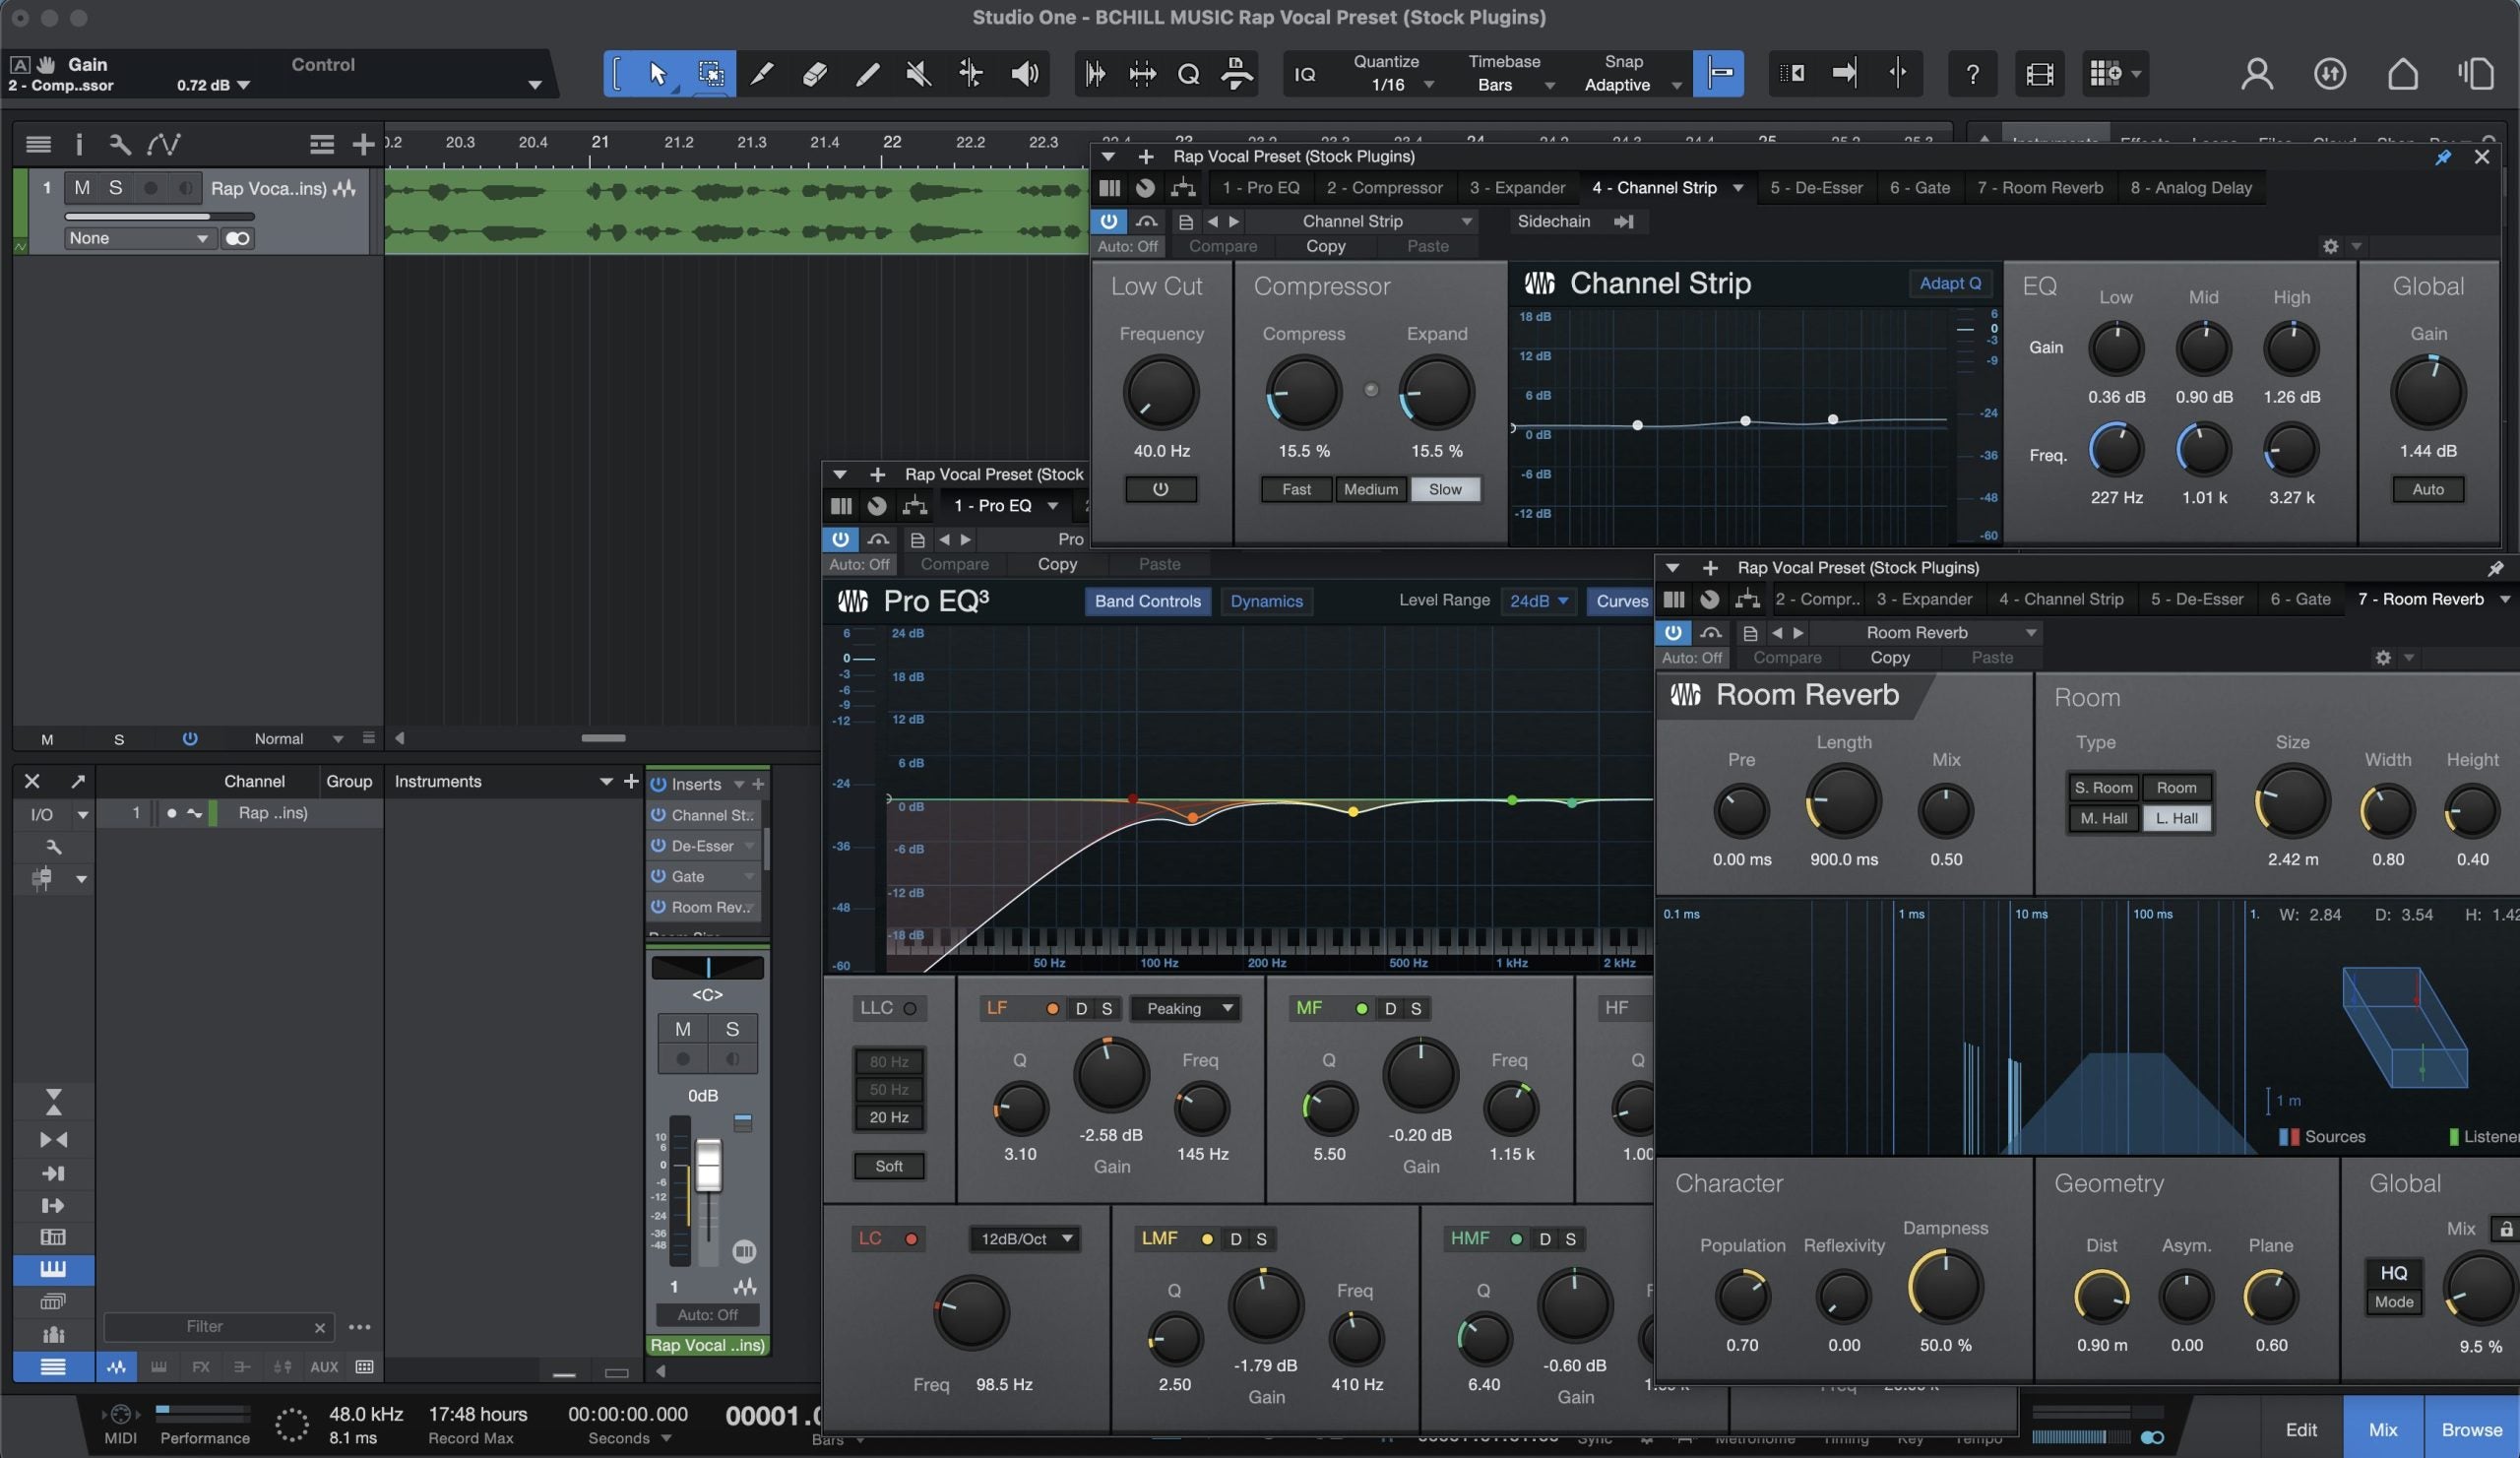
6Plugin Gain Staging
Analog-modeled compressors often expect input levels around -18 dBFS (approximately +4 dBu in analog terms). The VCA, FET, or optical modeling responds correctly at these levels. Dramatically different inputs produce different compression character.
Saturation plugins are particularly level-sensitive. Their entire purpose is level-dependent harmonic generation. Too cold, and you get nothing. Too hot, and you get harsh digital artifacts instead of warm analog color.
EQ plugins are generally more forgiving, but extreme levels can still cause issues with filter resonance and high-frequency boost. Maintain reasonable levels even through "transparent" processors.
7Metering Strategies
Peak meters show instantaneous maximum levels—essential for avoiding digital clipping. But peak levels alone don't indicate perceived loudness. A snare hit might peak at -3 dBFS while averaging -20 dBFS.
RMS and LUFS meters show average loudness, better correlating with perception. LUFS (Loudness Units Full Scale) is the modern standard, incorporating psychoacoustic weighting for accurate loudness measurement.
Use both peak and loudness metering. Peaks prevent clipping; loudness targets ensure appropriate perceived volume. Many meters show both simultaneously, and you should monitor both throughout production.
8Tips & Best Practices
Set levels at the source. Adjust preamp gain before recording rather than fixing levels later. Downstream gain changes work, but source-level correction is cleaner and sets up success.
Leave headroom everywhere. You'll need room for processing, summing, and mastering. Trying to maximize levels at every stage leaves no room for the next stage's contribution.
Calibrate your monitoring. If your monitors are too loud, you'll instinctively mix too quietly. If too quiet, you'll push levels. Consistent monitoring helps maintain consistent gain staging habits.
Create templates with proper gain staging built in. Pre-configured channel strips with appropriate gain structure save time and ensure consistency across projects.