


How to Install Recording Templates in GarageBand (Mac & iOS)
GarageBand doesn’t ship with a “Save as Template” button, but you can still work like a pro: create a master project once, keep it pristine, and open a fresh copy for every song. This guide shows reliable ways to do that on Mac and on iPhone/iPad, plus a vocal-first layout you can reuse for fast recording, clean monitoring, and consistent exports. For tone that loads in seconds inside your template, browse purpose-built GarageBand vocal presets and fine-tune thresholds and send amounts to your mic and room.
I. Template logic in GarageBand (no magic menu, just smart copies)
In GarageBand, a “template” is simply a project you never record into. You open that master, then work from a duplicate. On Mac you can even make the master behave like a true template using Finder’s Stationery Pad flag. On iOS you duplicate the project from the My Songs browser. Either way, the master stays clean while every new song starts with labeled tracks, returns, colors, and ready routing.
- Master project: contains tracks by role, returns, and a headphone-friendly chain. Locked by workflow, not by password.
- Working copy: a duplicate named for the song and saved in its own folder. All takes and edits live here.
- Variants: keep separate masters for “Vocal over 2-Track Beat,” “Full Stems,” “Podcast Dual Mic,” etc.
II. Paths & places (where your projects actually live)
Organization matters when you bounce between Mac and iOS. Decide where the master lives, and keep assets close.
- Mac: Store your master in Music/GarageBand/Templates (create this folder), or any folder you back up regularly (local + cloud).
- iPhone/iPad: Keep masters in the My Songs browser; if you use Files/iCloud Drive, keep a Templates folder there too.
- Assets: Put any custom patches, samples, or notes in a sibling folder named Template Assets so they move with the project.
III. Mac workflow: the Stationery Pad method (behaves like a real template)
- Build your master. Create a new project named “Template — Vocal Record — 48k”. Add the tracks/returns below (Section V), set colors, and confirm your input device in Preferences.
- Save the master. File → Save. Quit GarageBand.
- Flag as Stationery Pad. In Finder, select the template file → Command-I (Get Info) → check Stationery Pad. Now double-clicking this file will always open a copy, never the original.
-
Open → rename. When the copy opens, immediately File → Save As… (or rename in the title bar) to
Artist_Song_YYYY-MMin its own folder.
Why this rocks: You can’t accidentally overwrite your master. Every open is a fresh, song-ready file.
IV. iPhone/iPad workflow: duplicate from My Songs
- Create the master. In My Songs, open a new project and set up the tracks/returns (Section V). Name it “Template — Vocal Record — Mobile”.
- Duplicate before recording. In My Songs, tap Select → tap the template → Duplicate. Rename the copy for your song.
- Record in the copy. Open the duplicate and work there. Keep the original template untouched for the next session.
Tip: If you sync via iCloud, keep a Templates folder so masters and assets stay together across devices.
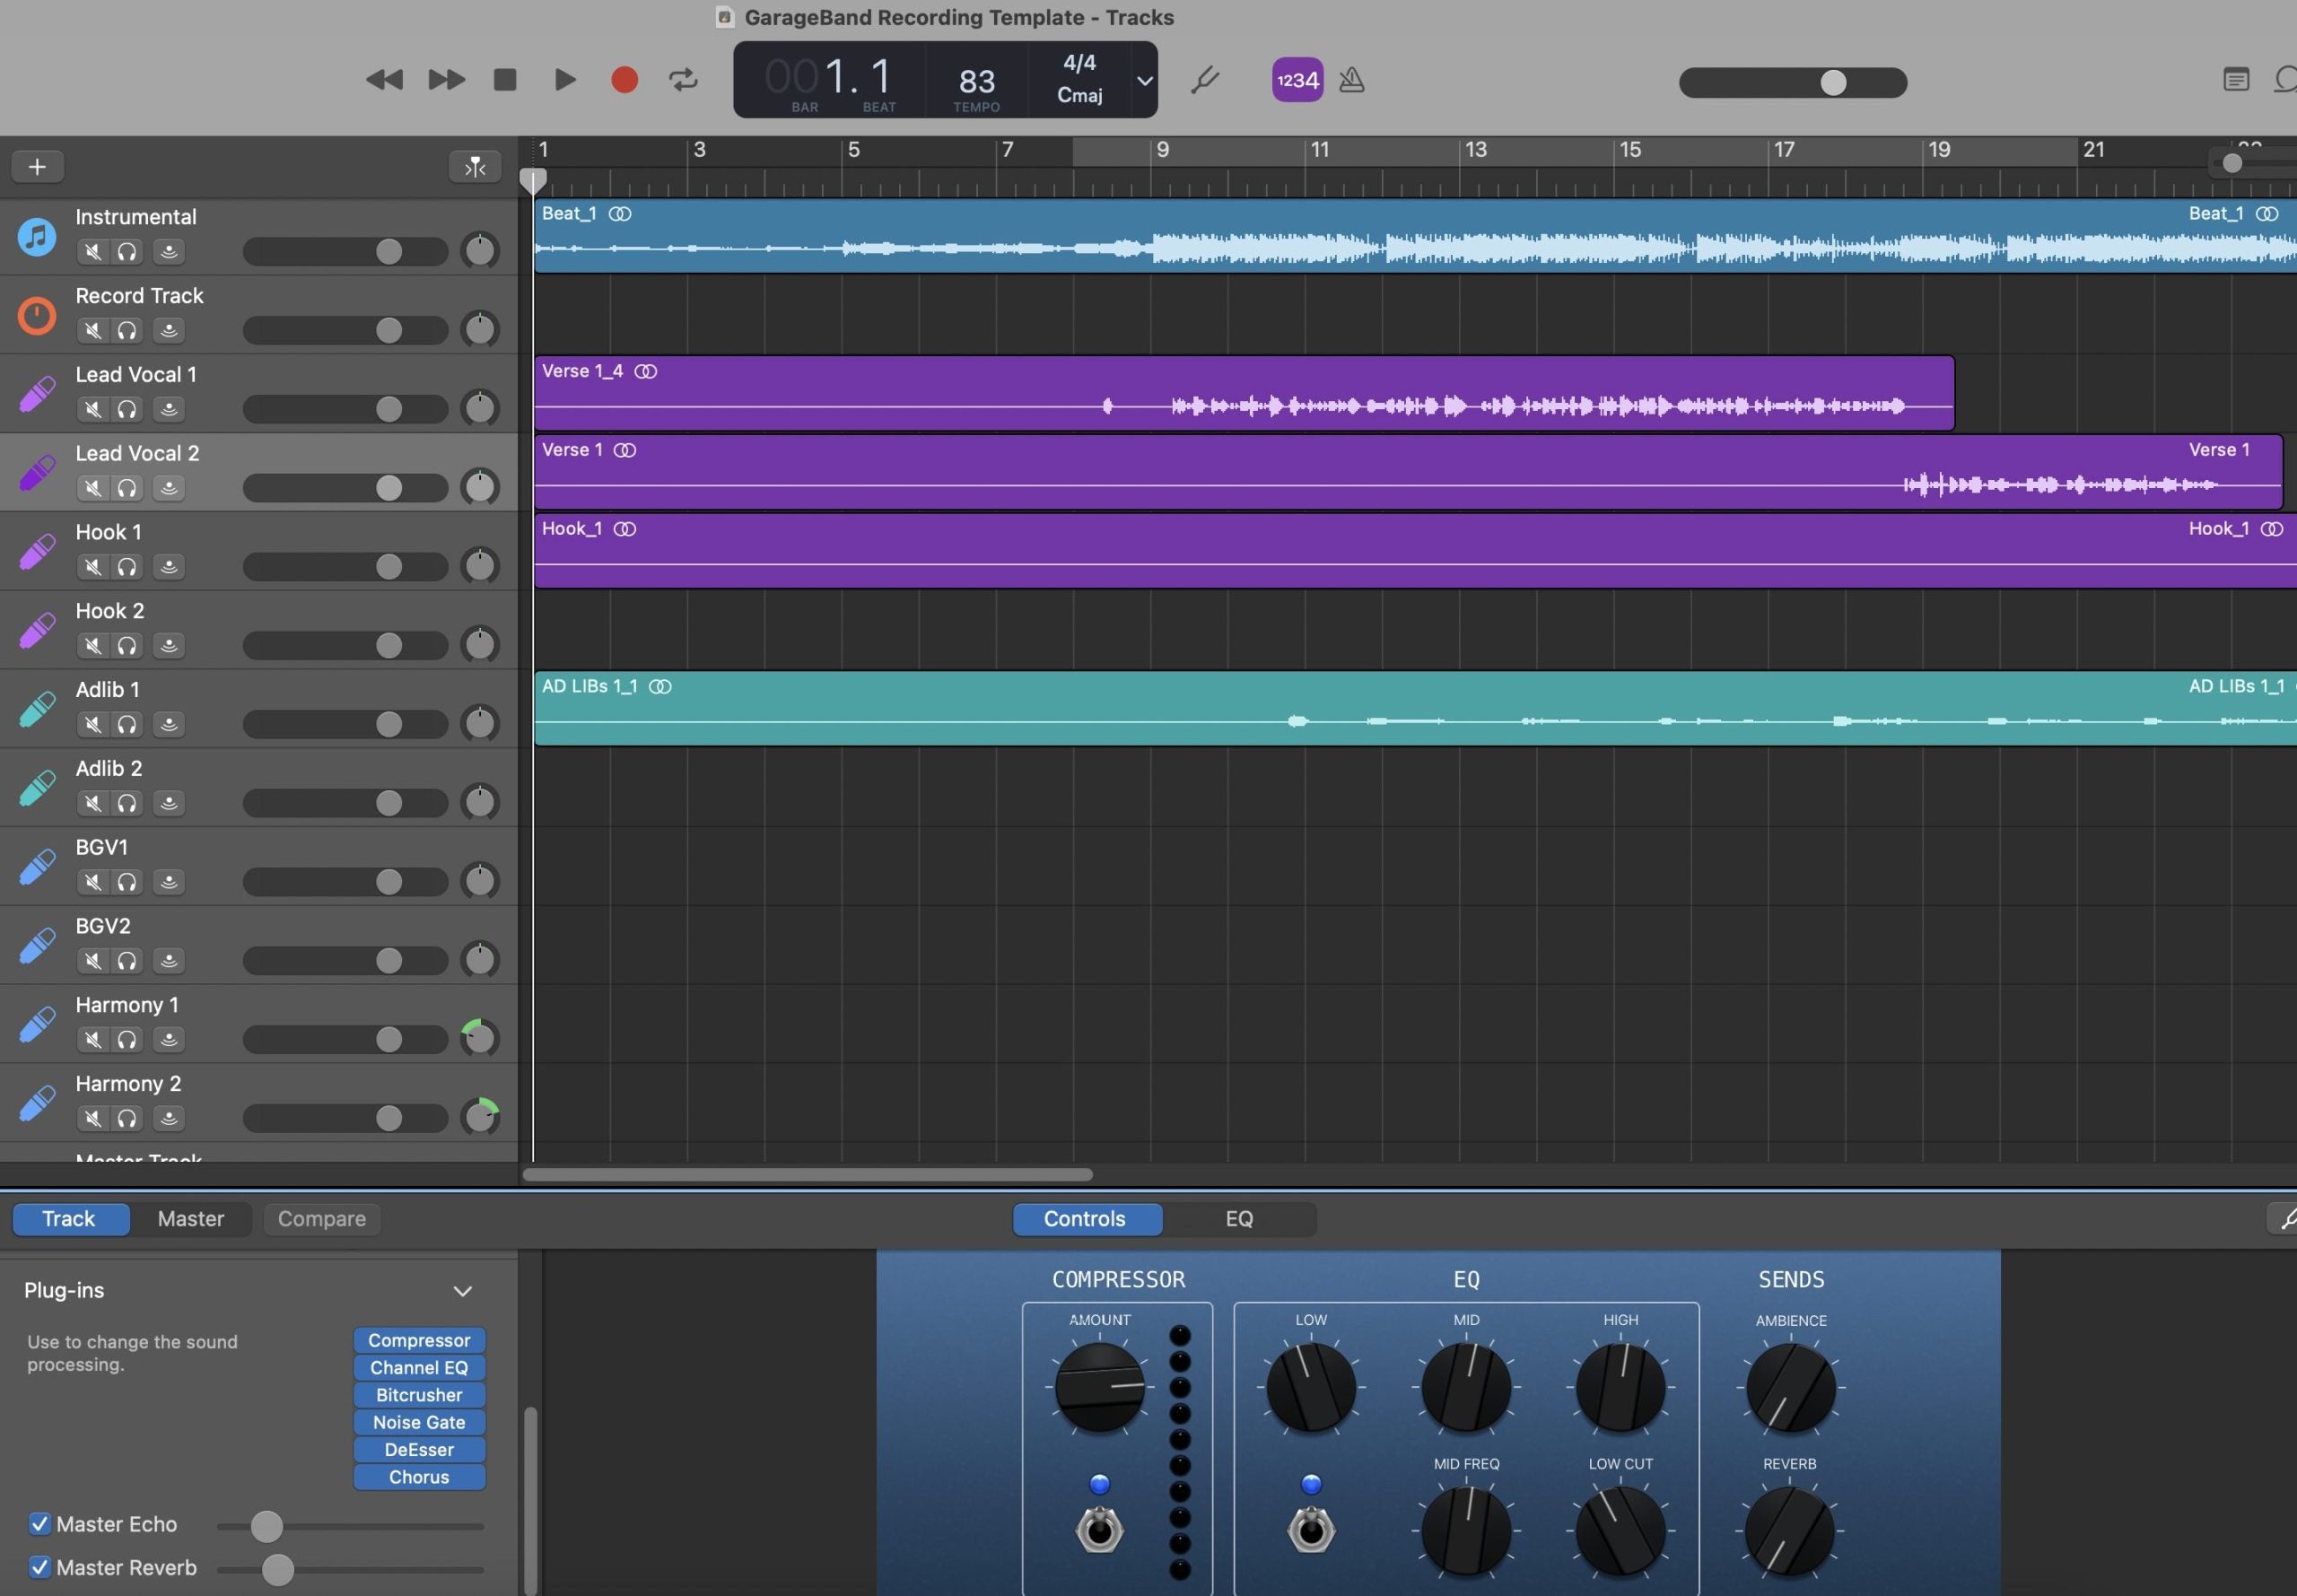
V. Session anatomy: a vocal-first scaffold that stays out of the way
Use this as your GarageBand-friendly structure. Keep names, colors, and order consistent so your eyes find parts instantly.
- Lead Vox (mono) — the story lives here. Dry-leaning while tracking, with low-latency control.
- Boost Lines (mono) — tight unisons on select words. Slightly higher HPF; more de-ess than Lead.
- Ad-libs (mono) — panned per section; band-limited for character.
- Harmonies (stereo or dual mono) — darker, wider; less top than Lead.
- Vocal Bus (if you prefer submixing) — gentle glue and broad de-ess; Master stays clean.
- Returns — Room (0.4–0.8 s), Slap (90–120 ms mono), Tempo Echo (1/8 or dotted-eighth). Filter returns (HPF ~150 Hz, LPF ~6–7 kHz) so cans feel clear, not hazy.
- Markers — Verse / Pre / Hook / Bridge, plus a 1-bar count-in region for quick punches.
VI. Headphone confidence: low-latency tracking that feels right
Recording feels better when the singer hears clarity and timing without lag. Keep the chain lean, then sweeten later.
- Input gain: aim raw peaks ~−12 to −8 dBFS. If a shout leaps out, fix with clip gain later—don’t crush the whole chain.
- Lead Vox rack (tracking): HPF around 80–100 Hz → light compression (2:1–3:1; 2–3 dB on phrases) → broad de-ess. Optional: tiny color for density, output-matched.
- Bleed-safe sends: add a little Room and a short Slap; bright verbs mislead while tracking.
- De-ess first, “air” later: if you brighten, revisit the de-esser so S’s stay friendly on earbuds.
VII. Over a 2-track beat: carve space without chaos
Many vocal sessions start with a single stereo instrumental. Use a dedicated variant of your template:
- Tracks: Beat (stereo), Lead, Boost, Ad-libs, Harmonies (optional), and your returns.
- Beat control: ride intro/chorus level with region gain instead of smashing a limiter later.
- Space choice: keep returns smaller than with full stems; dry-leaning verses read better over dense beats.
- Hook lift: automate a tiny send bump to Tempo Echo in the last bar into the chorus; reset for verses.
VIII. Naming, colors, and revision etiquette (future you will cheer)
Templates work because they are easy to grab and hard to break. Follow strict habits:
-
Master names:
Template — Vocal Record — 48k,Template — Dubs over 2-Track,Template — Podcast Dual Mic. -
Song copies:
Artist_Song_YYYY-MM. One folder per song with audio files inside. - Colors: same palette every session (e.g., Lead = gold, Boost = orange, Ad-libs = blue, Returns = purple).
- Notes clip: pin a text note at bar 1 with mic distance, headphone sends, and any special routing.
IX. Troubleshooting atlas (one symptom → one fix)
- Hearing a doubled/flanged voice: you’re monitoring through hardware and software. Mute one path or track with a leaner chain.
- Template got overwritten: on Mac, re-enable Stationery Pad; on iOS, always duplicate from My Songs before recording.
- S’s are sharp on phones: widen the de-ess band slightly; back off any “air” shelf by 0.5 dB; low-pass delay returns ~6–7 kHz.
- Hook collapses in mono: keep the Lead centered and drier; put width in doubles/ad-libs; avoid wide chorus effects on the main vocal.
- Beat overpowers the vocal: trim Beat region −1 to −2 dB, lift Lead +0.5 dB; avoid over-compressing to “keep up.”
- Clicks at record start: enable a 1-bar count-in; make sure long look-ahead FX are bypassed while tracking.
- Export includes the click: turn the metronome off before sharing; don’t route it to the print path.
- Mobile vs. Mac sound mismatch: compare FX lists and order; match sends and output trims; small differences add up.
X. Coffee-break build (from empty to record-ready fast)
- New project: name it “Template — Vocal Record — 48k”. Set tempo/key if helpful.
- Add tracks: Lead (mono), Boost (mono), Ad-libs (mono), Harmonies (stereo), Beat (stereo, muted for this master).
- Routing: keep Master clean; if you submix, route vocals to a Vocal Bus with gentle glue and a broad de-ess.
- Returns: Room 0.4–0.8 s; Slap 90–120 ms mono; Tempo Echo with low feedback. Filter returns (HPF/LPF).
- Tracking chain: Lead HPF → light comp → de-ess → (optional color) → tiny polish EQ if diction hides. Ad-libs more filtered; Boost slightly tighter de-ess.
- Markers: drop Verse/Pre/Hook/Bridge and a 1-bar count-in.
- Save & protect: save the master; on Mac set Stationery Pad; on iOS keep it in My Songs and always duplicate first.
XI. Level discipline and exports (pass checks the first time)
- During takes: leave headroom; don’t engage brickwall limiting on the Master while recording.
- Before export: tighten region heads/tails; confirm the metronome is off; ensure no talkback or scratch tracks route to the Master.
- File format: export WAV at your session rate. Keep instrumental and a cappella aligned (same start, same tail) if you need alternates.
XII. Tone you can trust (chains that drop into your template)
Templates handle routing and speed; tone comes from the chain. If you want a head start that’s already dialed for GarageBand’s environment, load curated GarageBand vocal presets into your master, test on your mic, and save role-based variants (Lead, Boost, Ad-libs). This gives you day-one consistency with room to tweak by ear for each song.
XIII. Next step: presets install specifics for Mac & iOS
Your template is built; now get your chains organized. This step-by-step walkthrough covers where files live on macOS and iOS, plus quick fixes if a preset won’t appear: install GarageBand vocal presets.
XIV. FAQ lightning round
Do I need third-party plug-ins?
No. Build a stock master first. If you add premium tools, save a “stock” variant for collaborators who don’t own them.
Can I keep multiple masters?
Yes—maintain small, focused masters (Vocal over 2-Track, Full Stems, Podcast Dual Mic) instead of one giant file.
What about sample rate?
Keep the template labeled with your preferred rate and stay consistent across sessions; avoid last-minute resampling.
How loud should I track?
Aim for raw peaks around −12 to −8 dBFS. After processing, keep plenty of headroom; leave final loudness for mastering.
XV. Wrap-up
GarageBand recording templates are about smart duplication, not menus. Keep a protected master on Mac (Stationery Pad) and a duplicate-first habit on iOS. Build role-based lanes and filtered returns, track with a lean chain, and label everything clearly. Pair that structure with flexible chains, and every session will start fast, feel stable, and translate well on the first export.


