Great vocals don’t happen by accident. They come from a clear plan: clean recording, smart routing, tasteful tone shaping, steady dynamics, and space that supports the lyric. The good news—you can do all of it in FL Studio with stock tools. This guide walks you, step by step, through a modern workflow that’s fast, repeatable, and flexible enough to handle rap, R&B, pop, and spoken word.
I. What a finished vocal really sounds like in FL Studio
When people say “the vocals are mixed,” they mean the voice sits forward without harshness, the level is controlled without sounding squashed, the consonants are intelligible on small speakers, and the ambience feels like part of the record—not a cloud hiding the words. In FL Studio, you’ll get there by sending your recorded vocal clip or input to a dedicated Mixer track (often several for lead, doubles, and ad-libs), shaping tone with Fruity Parametric EQ 2, taming level with Fruity Limiter (COMP) or Maximus, and building space with Reeverb 2 and Delay 3. Under the hood, Audio settings, Mixer routing, post vs. pre-fader sends, and plugin delay compensation keep the timing and feel locked.
This is the same core process whether you’re mixing a melodic chorus with stacked harmonies, a rapid-fire 16 over a two-track beat, or a dry podcast voice that has to sound natural. Once you learn the building blocks, you can scale up: more tracks, more stacks, and more automation—without losing control.
II. Why this workflow matters
- Clarity that translates: Subtractive EQ removes mud and rumble before you add presence, so the vocal stays articulate on phones, laptops, and cars.
- Level control without pumping: The right compression timing (attack and release) preserves consonants and keeps phrases steady, even when the beat is loud.
- Space that supports the lyric: Time-synced delays and short plates add depth, while sidechain-ducking keeps words intelligible.
- Repeatable speed: Clear routing, sends, and a small set of channel presets mean you spend time deciding, not wiring.
- Low-latency confidence: Proper driver and buffer choices make tracking comfortable and keep performances on time.
If you want a shortcut for tone and dynamics, you can start from a curated chain and then tweak to your mic and voice. Our Vocal Presets drop straight onto a vocal channel or bus and give you a head start while staying easy to customize.

III. Quick-start (copy these six steps)
- Set audio & latency: In Options → Audio, choose your interface’s ASIO driver (or FL ASIO). Track at a small buffer for responsive monitoring; 64–128 samples is a sensible starting point. If round-trip creeps up as the project grows, freeze or disable heavy look-ahead/linear-phase plugs while tracking, then raise the buffer for mixing.
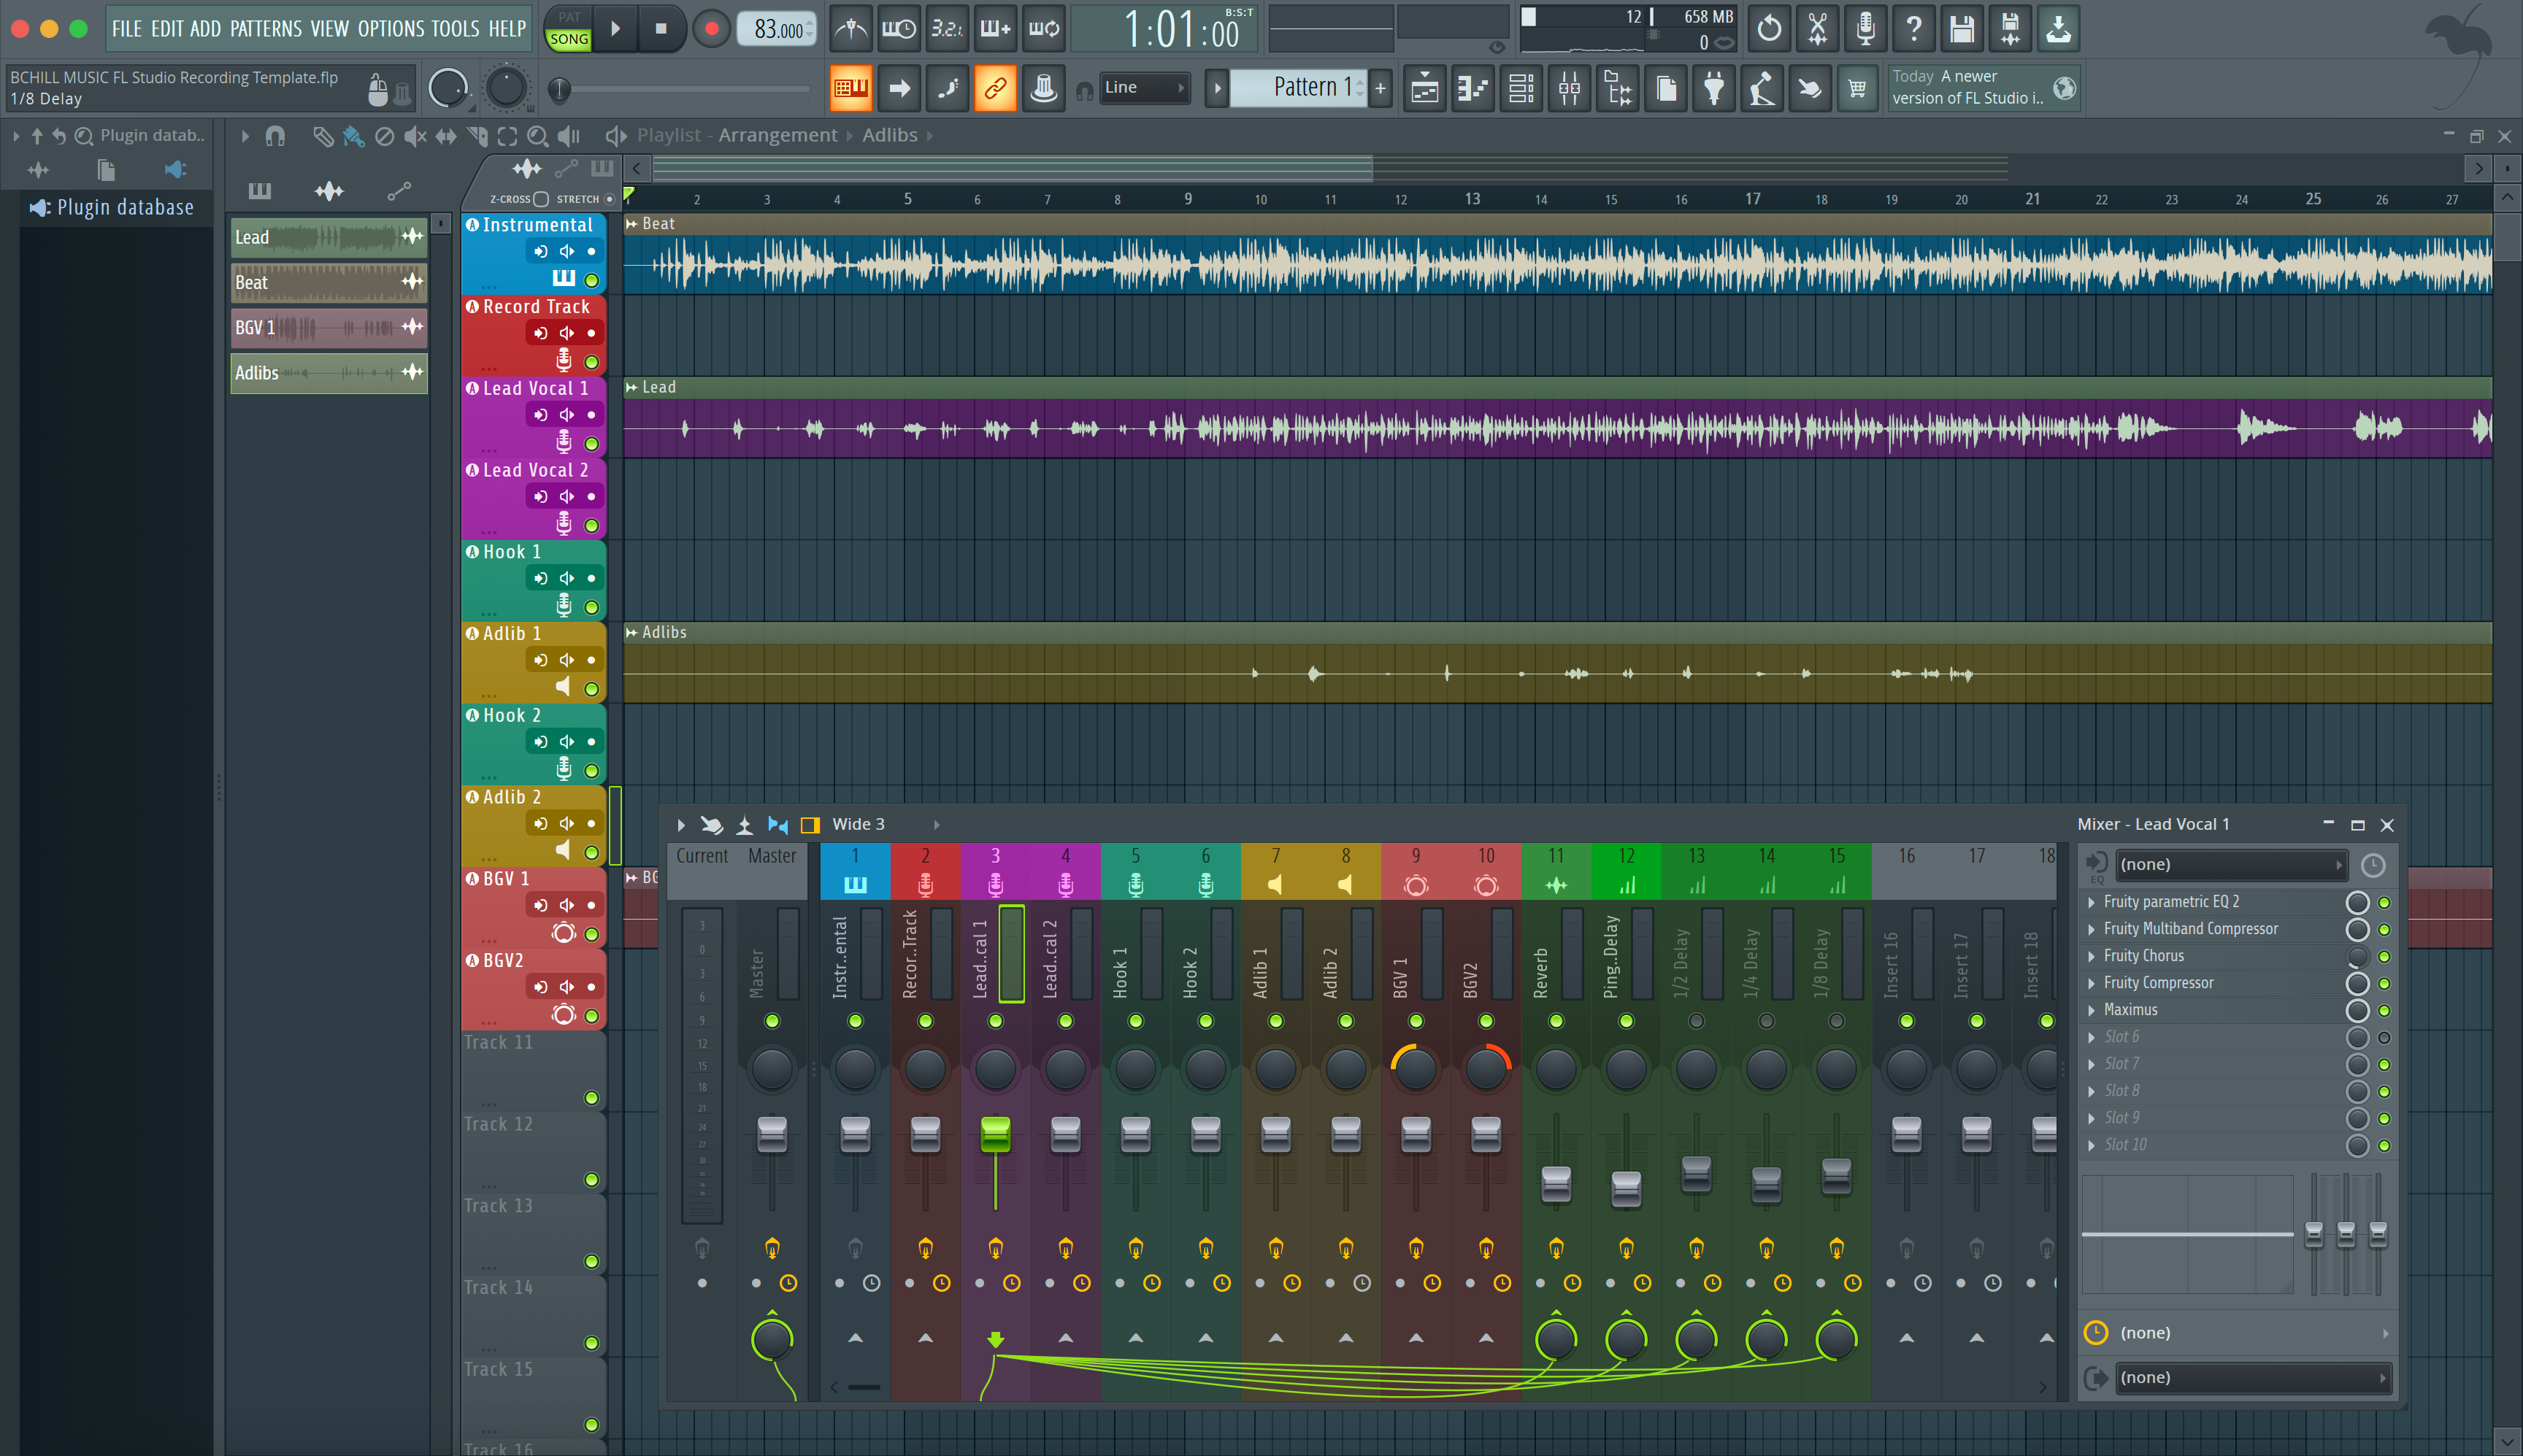
- Route the vocal: Send your vocal clip or input to a dedicated Mixer track named Lead Vox. Create additional tracks for Double L, Double R, and Ad-libs. For centralized control, route these to a Vocal Bus before the Master. Color-code and group so navigation stays fast.
-
Build a clean chain (stock-only):
- Slot 1: Fruity Parametric EQ 2 — High-pass 70–100 Hz to remove rumble; look for boxiness 200–400 Hz and pull a few dB; add presence 2–5 kHz only as needed; consider a gentle air shelf 10–12 kHz if the mic is dark.
- Slot 2: Compressor — Fruity Limiter in COMP mode, ratio 2–4:1, slower attack so consonants “speak,” medium release so phrases recover musically. Aim for 2–6 dB of gain reduction on peaks.
- Slot 3: De-esser — Use Maximus as a band-limited compressor in the 5–8 kHz region. Keep it event-driven: esses tuck back, brightness remains.
- Add space & timing: Create two FX returns: Vox Verb (Reeverb 2, decay 0.8–2.0 s, low-cut below ~120 Hz, soften highs) and Vox Delay (Delay 3, tempo-sync 1/8 or 1/4; low-pass repeats). Use the Mixer’s send switches for post-fader sends. If you need “confidence reverb” for the performer that doesn’t change when you ride the vocal fader, insert Fruity Send early for a pre-fader route.
- Sidechain for clarity: On each FX return, insert Fruity Limiter (COMP), set the vocal channel as sidechain input, and compress the return so it dips during phrases and blooms in the gaps. Intelligibility improves without killing vibe.
- Tune as needed: Comp your takes, then open NewTone for surgical note moves and transparent timing fixes. For light, real-time polish or harmonies, use Pitcher—often on ad-libs or stacks.
Once this works for your voice and mic, save the entire layout as a channel preset or Mixer state so every new session starts at “almost finished.”
IV. Style / use-case recipes you can paste into sessions
Rap — upfront, intelligible, fast
- EQ: HPF around 90 Hz; subtract 2–4 dB at 250–300 Hz if the beat is dense; add a narrow presence touch in the 3–5 kHz range if diction is buried; avoid over-brightening 10–12 kHz unless the mic is very dark.
- Compression: Limiter (COMP) with attack ~15–25 ms so consonants snap, release 80–150 ms for bounce, 3–6 dB GR. If ad-libs spike, add a fast secondary compressor just on that track.
- FX: Short plate (0.7–1.1 s) plus a tucked slapback or 1/8-note delay. Sidechain-duck the delay a few dB during syllables.
- Stacks: Keep doubles 6–10 dB below the lead; hard-pan L/R and trim consonants so timing lands together.
Melodic rap / R&B — smooth, airy, emotive
- EQ: HPF 70–90 Hz; gentle dip 250–400 Hz for clarity; optional shelf +1–2 dB at 10–12 kHz for sheen.
- Compression: Two light stages: first for macro leveling (2:1, 1–2 dB GR), second slightly faster to catch peaks (3:1, 1–3 dB GR).
- FX: Plate or hall 1.4–2.2 s with 20–40 ms pre-delay; dotted-eighth delay placed wide and low; sidechain both FX.
- Tuning: NewTone for note-by-note honesty; Pitcher lightly on harmonies if you want silky blend.
Pop — wide, polished, competitive
- EQ: Tame 180–350 Hz to leave room for synths; add a precise 2–4 kHz bump for diction; check sibilance after any “air” boost.
- Compression: Serial approach—slower attack first for shape, faster second for density. Keep GR modest per stage to avoid fatigue.
- FX: Dual delays (1/4 + 1/8) with high-cut repeats; short early reflections for closeness; wideners on the bus only. Always check mono, especially on stacked hooks.
Spoken word / podcast — natural and steady
- EQ: HPF ~80 Hz; a small lift around 3–4 kHz helps articulation; watch 6–7 kHz lisps.
- Compression: 2:1–3:1 with slow attack and medium release for consistent loudness without hype.
- FX: Minimal reverb; if it feels too dry, add a touch of early reflections instead of a long tail.
V. Troubleshooting & fast fixes
- Latency throws off performance. Track at a small buffer with an ASIO driver. If the project is heavy, disable high-latency FX during takes or make “tracking” and “mixing” versions of your chain.
- Printed effects by accident. Keep heavy processing on the bus and record the insert channel dry. If you need pre-fader verb in headphones, use Fruity Send so the performer hears space while you keep the recording clean.
- Sends feel unpredictable. Post-fader sends rise and fall with the vocal fader. For independent FX levels, tap pre-fader with Fruity Send or adjust the send knob when you automate the channel.
- Sibilance leaps out after “air.” Ease the shelf, then de-ess with Maximus in a narrow sibilant band (5–8 kHz). Aim for a couple of dB only on esses and tees.
- FX smear words. Sidechain-duck the reverb and delay returns using the dry vocal as the key. Set attack fast enough to get out of the way of consonants and release so the tail breathes between phrases.
- Phasey doubles or stacks. Slip-edit consonants, trim breaths, and hard-pan doubles. Avoid stacking wideners on top of hard-panned doubles; let panning and timing do the width.
- Timing feels off after adding a look-ahead plugin. FL Studio’s Auto-PDC usually handles it; if a route still drifts, apply Manual PDC on the affected track or print the effect and realign.
- Recording armed, but you hear silence. Check the Mixer track input, confirm the Recording filter includes Audio, and make sure your OS has granted microphone permission to FL Studio.
- Export sounds quieter than playback. Monitor volume doesn’t affect renders. Watch the Master peak level, avoid clipping, and leave a couple of dB of headroom for mastering.
VI. Advanced / pro tips
- Build a bus “core” and print buses. Route Lead, Doubles, and BGVs to their own sub-buses feeding a main Vocal Bus. Create Print buses (Lead Print, BGV Print, FX Print) for one-pass stem exports at the end of the mix.
- Dynamic EQ with Parametric EQ 2. Instead of heavy multiband, automate a narrow bell only where harshness appears—fast, transparent, and CPU-light. Pair with a light de-ess so brightness stays musical.
- Pre-fader cue verbs that ignore fader rides. Put Fruity Send in Slot 1 of the vocal channel and route to a Cue reverb return. The singer’s space stays constant while you automate the vocal fader freely.
- Elastic editing before tuning. Comp your takes in the Playlist, slip-edit breaths and consonants, then tune the comp in NewTone. You’ll need less pitch correction and the results will sound more natural.
- PDC sanity check. After creative processing (pitch shifters, spectral tools), glance at the Mixer Track Properties. If Manual PDC is lit, confirm offsets are still correct after arrangement changes.
- Export-ready gain structure. Keep the Master peaking below about −3 dBFS. Use a safety limiter only for roughs; for finals, leave headroom and print lossless (WAV/FLAC).
- Mix bus vs. vocal bus decisions. If the vocal loses presence when you engage the mix bus chain, rebalance at the vocal bus first—small level and EQ trims there usually beat pushing into the limiter harder.
- Automation that feels musical. Ride phrases into hooks, dip breaths between lines, and throw delays on end-words. A few targeted rides often replace extra processors.
- Template once, tweak forever. Save this whole setup as a Mixer state. Keep genre variants (Rap / R&B / Pop) and mic variants (dynamic vs. condenser) so you can switch flavors instantly.
VII. FAQs
What buffer size should I use while recording?
Use an ASIO driver and keep the buffer small while tracking—commonly 64–128 samples on a capable system. Raise the buffer when you mix larger projects.
How do I make a pre-fader reverb send?
FL Studio’s Mixer send switches are post-fader by default. To keep the effect level independent of your vocal fader rides, insert Fruity Send early on the vocal channel and route it to your reverb or delay return.
What’s the simplest way to de-ess with stock tools?
Use Maximus as a band-limited compressor in the 5–8 kHz region so only sibilants are reduced, not the entire top end.
Should I tune with NewTone or Pitcher?
NewTone is surgical and offline—ideal for transparent fixes after comping. Pitcher is real-time—useful for subtle glue during writing or for MIDI-driven harmonies. Many mixers comp → NewTone → optional light Pitcher.
Why did my FX get louder when I rode the vocal fader?
Post-fader sends follow the channel fader. For independent FX levels, create a pre-fader send with Fruity Send or automate the send amount separately.
Do monitor and render levels match?
No. Headphone/monitor volume doesn’t change what you print. Rendered level depends on Mixer gain and processing. Leave clean headroom on the Master for best results.
What if timing feels off after adding certain plugins?
Some processors add latency. FL Studio’s Auto-PDC usually aligns tracks, but if one path drifts, apply Manual PDC on the affected route or print the effect and realign.
Any advice for noisy home recordings?
Cut sub-rumble, use gentle gating on breaths between phrases, and try short early reflections instead of long reverb tails. Dense noise usually hides in 100–300 Hz and 6–8 kHz; treat surgically and don’t over-brighten.
Final thought: Keep it simple. A focused chain, good gain structure, and tasteful space do more than a rack of heavy processors. Save the wins as presets so every session starts strong.


