Studio One can render stems that drop into any mix session and just work. This walkthrough focuses on Studio One-specific details—Arrangement setup, Groups vs. Channels, Event FX, Mix FX, and sidechain—so your files sound like the rough and align bar-for-bar. Build it once, reuse it for every single.
I. Why Studio One stems deserve a blueprint
Clean stems save hours for everyone. In Studio One that means one shared start time, intentional routing, and a conscious decision about whether to bake bus tone and ambience into each file. We’ll set up a repeatable layout, render what mixers expect, and avoid common surprises.
Use this as your house workflow for singles, remixes, live packs, and collaborations. With a few toggles you can also print instrumentals, a cappellas, and show tracks from the same session.
II. Studio One behaviors to lock down
Arrangement first. Export from the Song timeline. Place everything so audio starts at bar 1|1|1. Extend the end a few bars to capture reverb and delay tails.
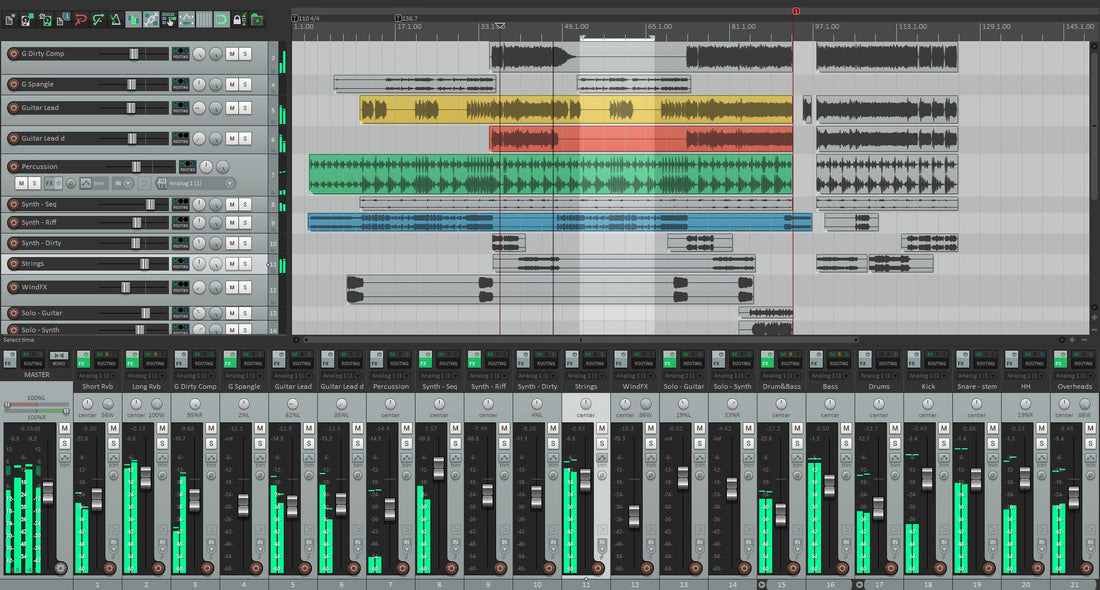
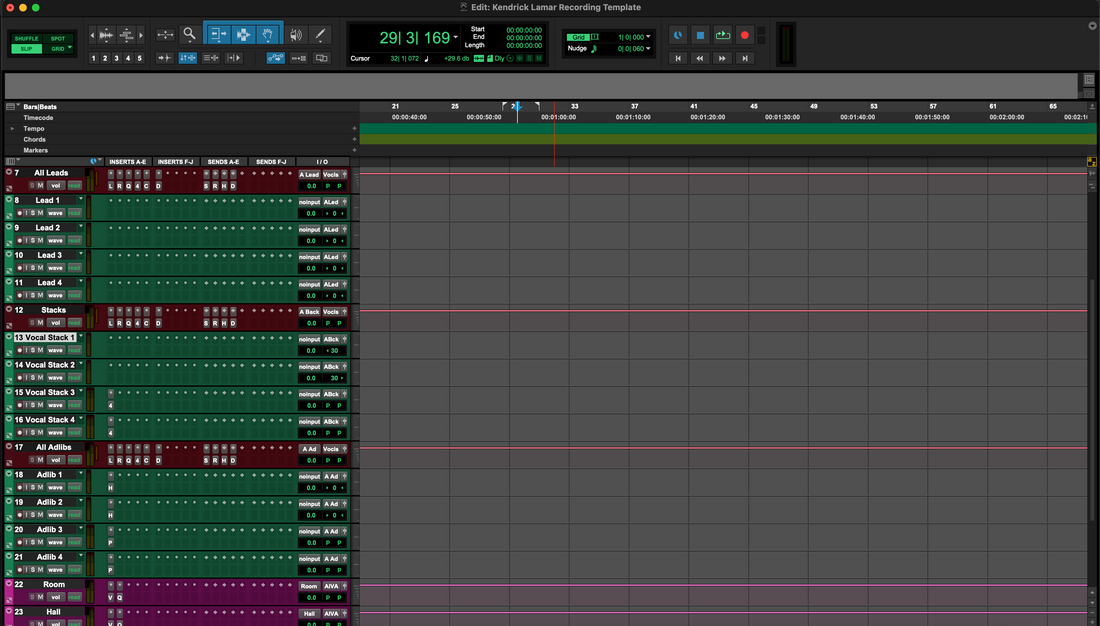
Tracks, Buses, and Channels. Group sources into DRUMS, BASS, MUSIC, LEAD VOX, and BGV. Decide whether you’ll export by tracks (source level) or by channels (post-fader mixer paths). Channels capture bus processing and sends.
Event FX and Track Transform. If you used Event FX on clips or transformed instruments to audio, commit what belongs to the sound design. Name prints clearly so collaborators know what’s “print” vs “raw.”
Mix FX and master color. Console-style Mix FX on buses or the Main can shape transients and crosstalk. Choose to keep that character in stems, or render cleaner files and include a short master reference for intent.
Sidechain choices. A compressor ducking MUSIC from the vocal can be committed (baked into MUSIC) or disabled for flexibility. Label whichever route you take.
Level language. dBFS is digital headroom (0 dBFS clips). LUFS is perceived loudness. True peak (dBTP) estimates inter-sample peaks. Print 24-bit WAV, normalization off.
| Render intent | What you bake into stems | Result |
|---|---|---|
| Match the rough vibe | Bus/insert tone + send ambience | Fast mix start; sounds like your reference |
| Maximum flexibility | Minimal bus tone; no global ambience | Mixer rebuilds space and glue |
| Hybrid control | Clean stems + separate FX stem | Ambience on a fader; easy to balance |
Need an instant vocal chain that fits this layout? Browse the dedicated Studio One vocal presets & templates for stock and premium workflows.
III. Print path: six scene-tested steps
- Group with intent. Create DRUMS, BASS, MUSIC, LEAD VOX, BGV groups. Put tone-defining plugins on the group if you want that character in a single stem.
- Route ambience deliberately. Send vocal reverb/delay to dedicated FX returns. For a separate ambience stem, route those returns to an FX BUS that you can render on its own.
- Fix the timeline. Start at 1|1|1, extend the end locator past tails, and consolidate stray edits. Keep sample rate consistent with the session.
-
Name for sorting. Prefix tracks:
01_Kick,02_Snare,10_Bass,20_LeadVox,21_BGV,30_FX. Files will list in musical order everywhere. - Open Export Stems. Choose whether you’re exporting Tracks or Channels. Select the groups or channels you need. Decide on printing with bus/return processing per the table above.
- Set formats & render. WAV • 24-bit • session rate (44.1 kHz for music, 48 kHz if requested). Dither only when reducing bit depth. Normalize Off. After export, drop stems into a blank Song and verify alignment and feel.
IV. Layouts that translate in mixdown
2-track beat + vocals. Put the stereo beat on a MUSIC bus. Route all vocals to LEAD VOX and BGV buses. If the beat ducks from the lead, decide whether to commit that movement on the MUSIC stem or provide a labeled “MUSIC_ducked” alt.
Pop hook stacks. Your chorus width lives on a BGV group widener and glue comp. Print the BGV group as one stem so the blend survives, and include individual parts only if arrangement edits are likely.
Long throws and transitions. Route risers/throws to the FX BUS so editors can ride space without touching harmonies. Keep DRUMS/BASS/MUSIC clean for punch.
Instrument prints from instruments/Transform. Freeze/Transform heavy instruments to audio before rendering stems. Label the audio 15_PluckSerum_PRINT so collaborators know it’s committed.
V. Quality control & rapid repairs
- Tails got cut. Extend the end locator by 2–4 bars and reprint; don’t rely on auto-tail detection.
- Space vanished. You exported without returns. Re-render with ambience included, or deliver a separate FX stem.
- Sidechain feel disappeared. The key wasn’t present when rendering. Commit the duck on MUSIC, or supply a short “DUCK BUS” stem to blend later.
- Misaligned imports in another DAW. Some clips began before bar one. Consolidate to 1|1|1 and re-export; keep sample rate identical across renders.
- Clicks at region edges. Add 2–10 ms fades on consolidated events before printing.
- Level jumps between passes. Normalize was on. Re-export with Normalize Off so balances remain intact.
If you’re installing preset chains for the first time, here’s a focused walkthrough on how to install Studio One vocal presets step-by-step before you print.
VI. Studio One efficiencies you should steal
Event-level cleanup. Use Event FX for fast clip-specific edits before stems. It keeps track processing lighter.
Two-pass coverage. Run one export for full multitracks, then a second pass for group stems. That pair covers almost every delivery.
Reference, not replacement. If your master color is part of the vibe, include a short “MIXBUS_REF” at a safe ceiling (e.g., −1 dBTP) so mixers hear intent without locking into it.
Archive smart. Save a versioned copy of the Song with audio cache cleaned. Future you will thank present you.
VII. FAQs
Q1. Tracks or Channels for stems?
Use Tracks for source-level prints. Use Channels when you want post-fader processing, sends, and group tone included.
Q2. Do I include returns?
Include them if you want stems to sound like your rough. Otherwise deliver clean stems plus a separate FX stem for control.
Q3. 24-bit or 32-bit float?
24-bit WAV is the standard for delivery. Use 32-bit float only if a client requests it.
Q4. What about tempo changes?
Stems follow the Song’s tempo map automatically. Include BPM and any map notes in a simple README.
Q5. Can I export while Mix FX is on?
Yes, but decide if you want that color in the stems. If not, bypass Mix FX for the render and include a short reference file.
Conclusion
Predictable Studio One stems come from tidy routing and a fixed timeline. Decide what to bake in, lock everything to 1|1|1, and print 24-bit WAV with normalization off. You’ll deliver stems that import cleanly, mix quickly, and keep the song’s character intact.
Template it once and exports become routine. When you need chains and layout ready on day one, check the Studio One vocal presets and start from an organized recording template.