



News
Install Recording Templates in Cubase (Complete, No-Guess Guide)
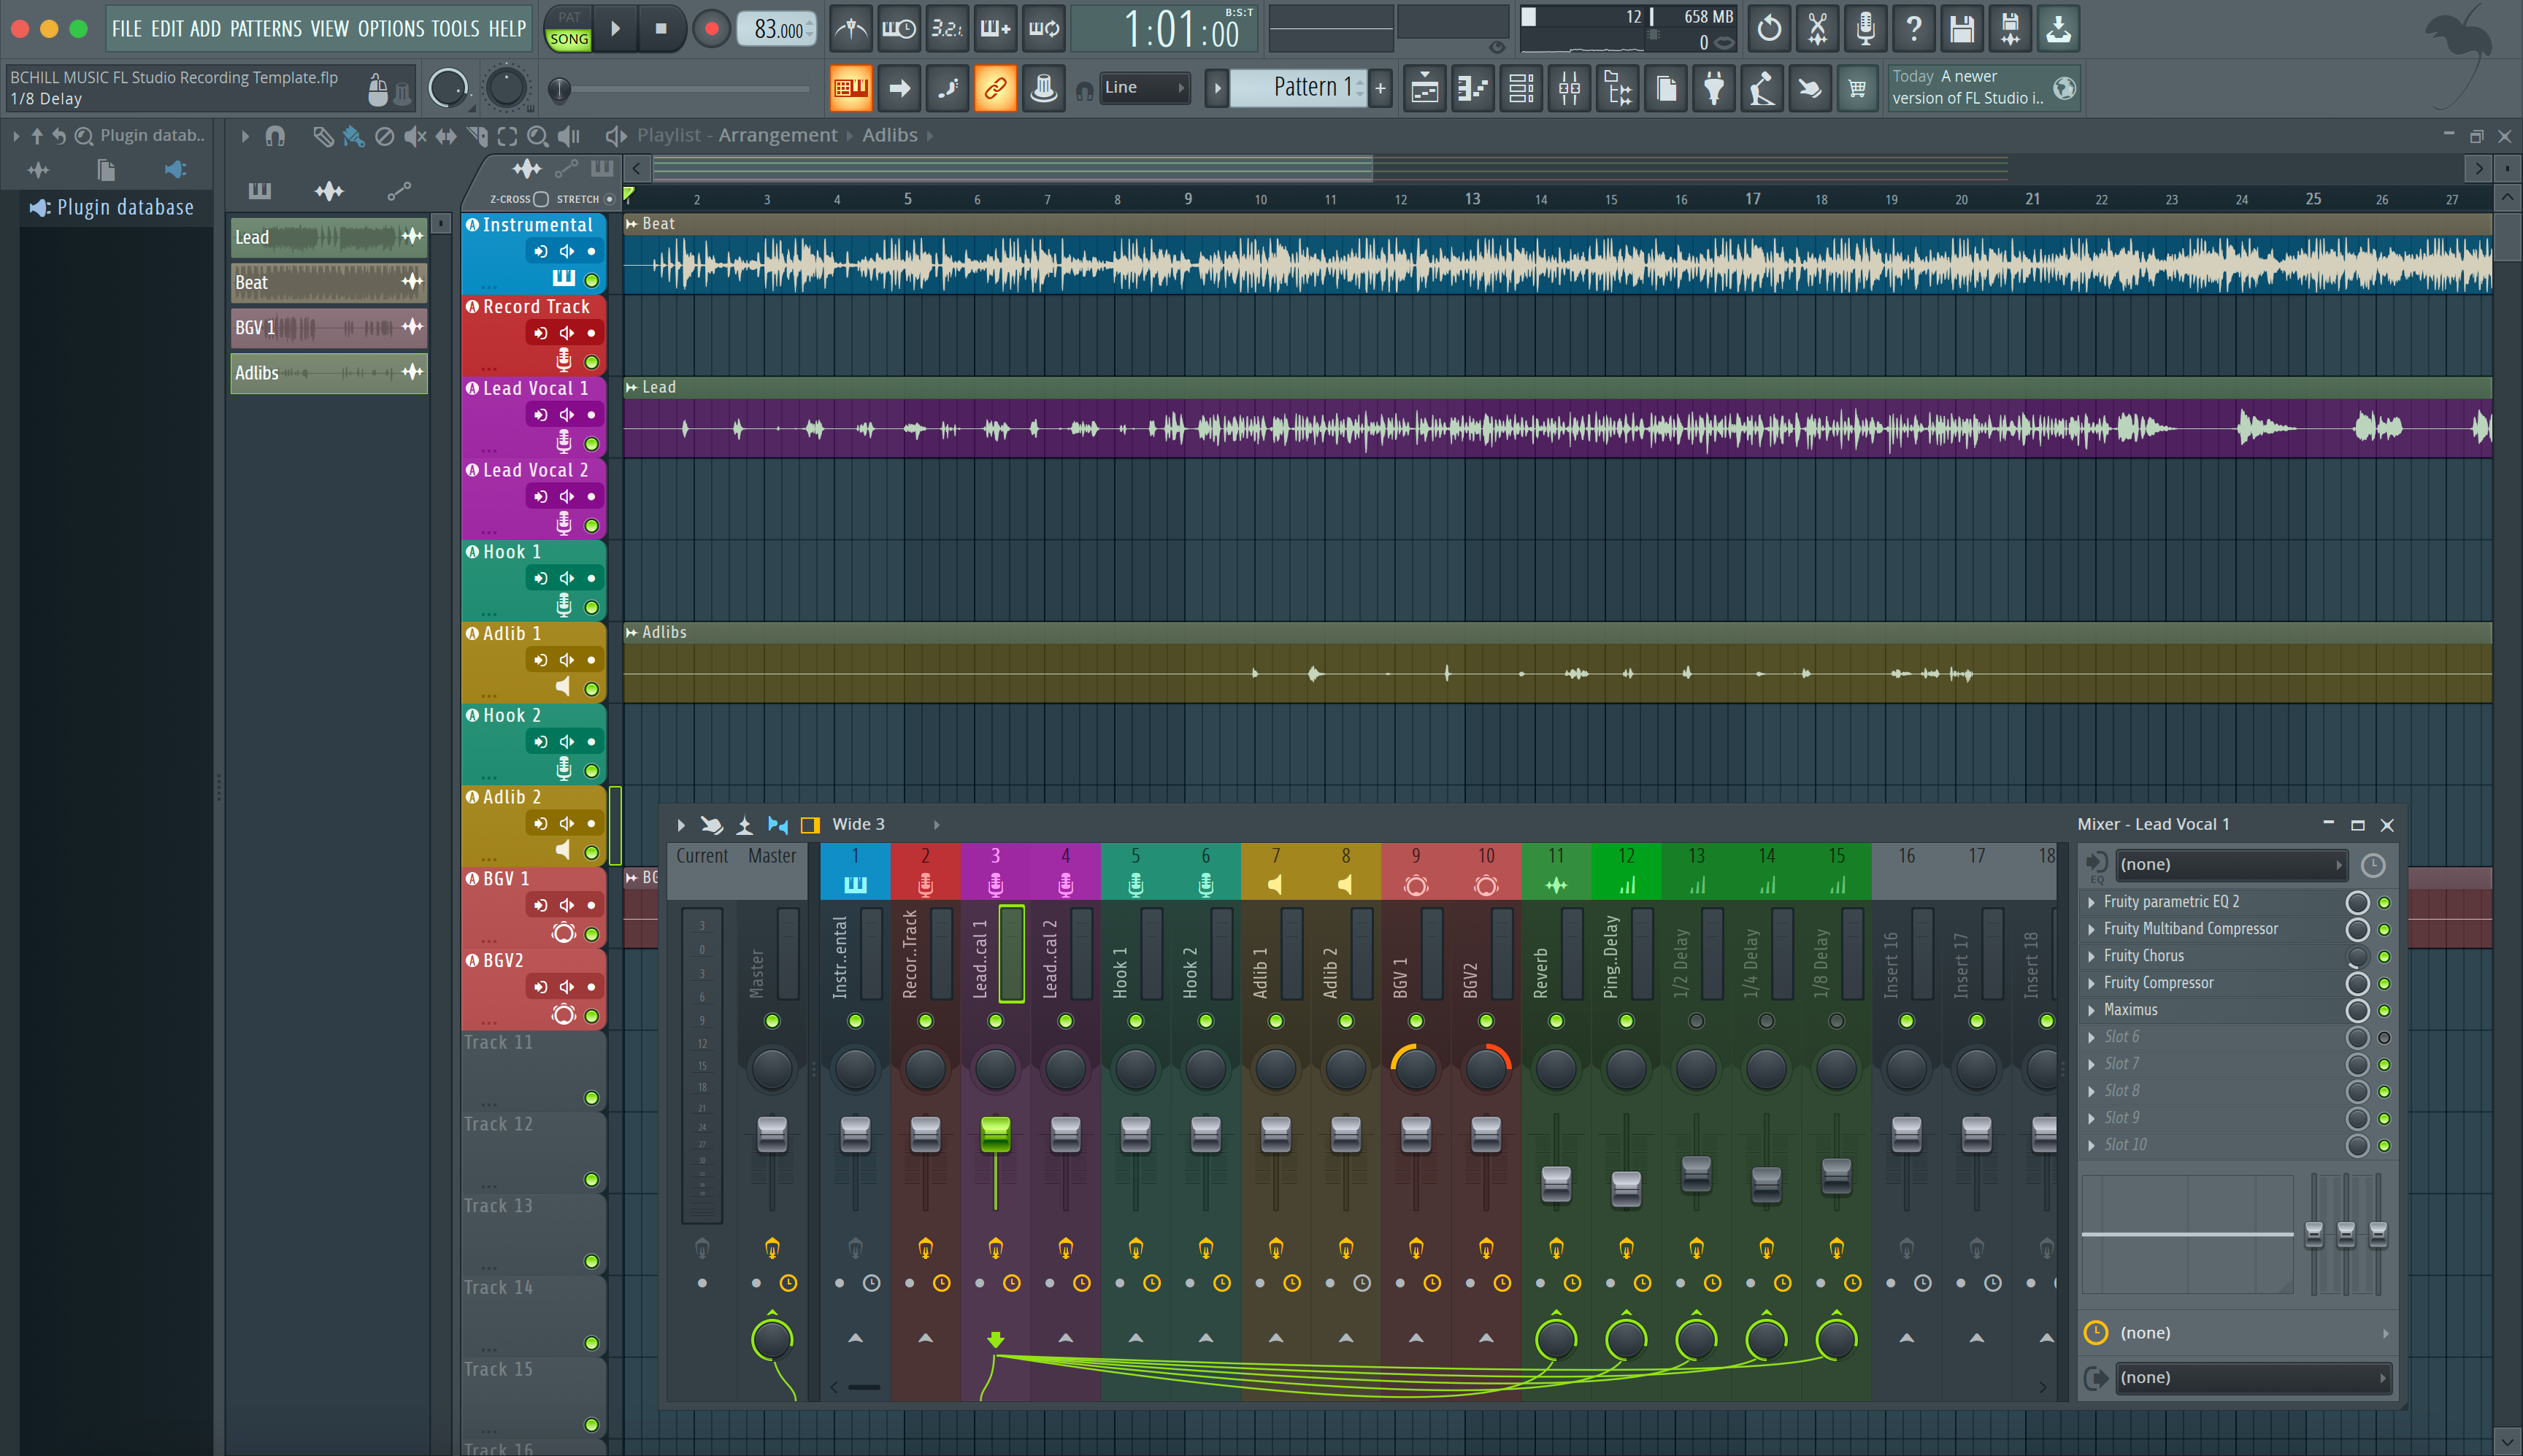
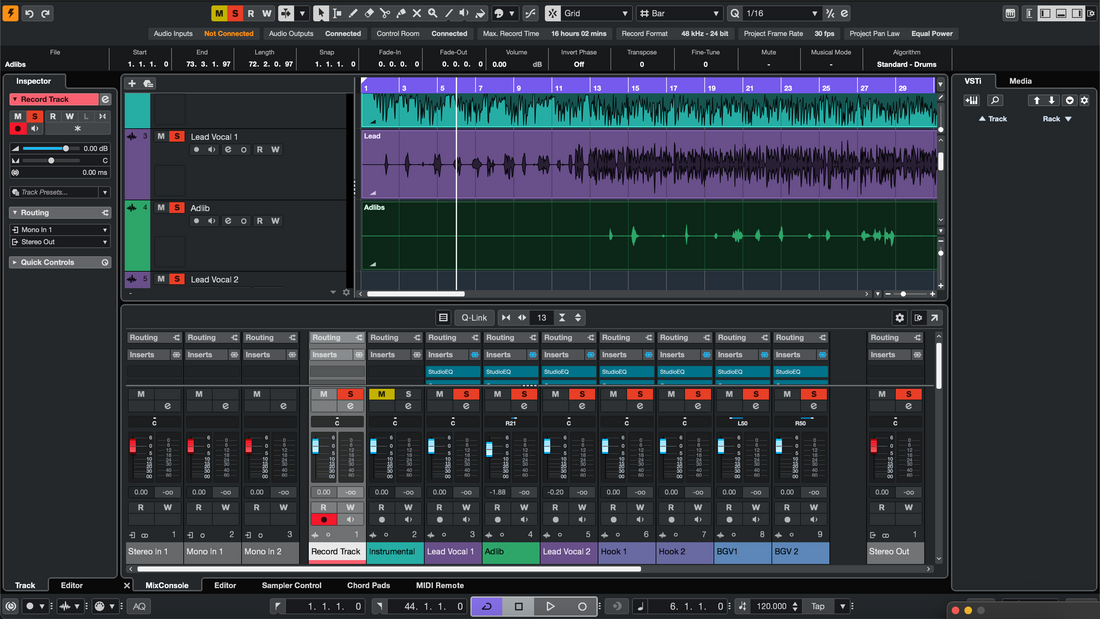
Recording templates let Cubase open straight into a record-ready studio—tracks, routing, FX returns, colors, and markers waiting for you. This guide shows every reliable way to “install” a template (Project Templates, Track Archives, and MediaBay favorites), how to wire a vocal-first session, and how to keep things organized so you never rebuild the same layout twice. If you also want a tone starting point that drops into those lanes, browse purpose-built Cubase vocal presets and tweak thresholds and sends to match your mic and room. 1) Template, Track Archive, or Preset? Read This First In Cubase you’ll encounter three different “reusable” concepts. They complement each other: Project Template (.cpr saved as a Template): a complete project shell that appears when you choose New Project → My Templates. Includes tracks, groups, FX channels, markers, colors, and Control Room choices. Track Archive (Export/Import Selected Tracks): a curated set of tracks you can inject into any existing session. Great for adding a full vocal stack to a song in progress. Track Presets (MediaBay): saved channel settings for a single track (inserts, EQ, sends). These are not full templates, but they’re perfect for loading a “Lead Vox” chain on demand. 2) Zero-Confusion Setup (One-Time Preferences Worth Doing) Templates live or die on predictable I/O and monitoring. Spend five minutes here and save hours later: Audio Connections (F4): label your input buses (e.g., “Vocal In 1”) and outputs. If you use Control Room, enable it and name Cue mixes clearly. Sample rate & bit depth: choose the rate you actually deliver (44.1 kHz for music, 48 kHz for video). Record at 24-bit. Click & pre-roll: set a 1-bar count-in and route the metronome to Control Room/Cue—not the print path. Colors & Track Types: pick a color palette you’ll repeat: Lead (gold), Doubles (orange), Ad-libs (blue), Returns (purple), Groups (teal). 3) Install Path A — Save a Project Template (Shows in the Hub) Open a clean project and build your layout (tracks, groups, FX channels, markers, tempo, Control Room). Go to File → Save as Template…, give it a clear name (e.g., Vocal_Record_48k), and save. Next time choose File → New Project → My Templates and select it. Immediately Save As… a new song folder so you never overwrite the template. Why it’s great: fastest “new song” workflow; your template is one click away in the Hub. 4) Install Path B — Track Archives (Drop a Vocal Stack into Any Song) In your master project, select only the vocal tracks, groups, and FX channels you want to reuse. File → Export → Selected Tracks… (Track Archive). Save the archive in a “Cubase/Archives/Vocals” folder. Open any existing song → File → Import → Track Archive… and pick your archive. Choose options to maintain routing and groups. Why it’s great: inject a complete vocal rig—including sends and groups—into a production that already exists. 5) Install Path C — MediaBay + Track Presets (Favorite Your Chains) On a finished “Lead Vox” channel, right-click the track header → Save Track Preset… Open MediaBay, tag the preset (Genre, Character, “LeadVox_StockDeEss” etc.), and add it to Favorites. Later, on any audio track, load that Track Preset from the Inspector or MediaBay. Your chain and sends return instantly. Why it’s great: one-click chains for Lead, Doubles, Ad-libs—no hunting through plug-ins. 6) Build the Master Once (What to Include for Vocals) Use this checklist to design a reliable vocal-first template: Tracks by role: Lead Vox (mono), Boost Lines (mono for emphasis words), Ad-libs (mono, panned per section), Harmonies (stereo or dual mono). Groups: a Vocal Group bus with gentle glue and a final broad de-ess; a Beat Bus (if you use stems) for music control; keep a clean Master. FX channels: Room (0.4–0.8 s), Slap (90–120 ms mono), and Tempo Echo (1/8 or dotted-eighth). Filter returns: HPF ~150 Hz, LPF ~6–7 kHz. Sidechain ducking: duck Slap/Echo from Lead so repeats bloom in gaps, not on syllables. Markers: Verse/Pre/Hook/Bridge plus a count-in locator. Loop ranges ready for punch-ins. Metering & control: add a Level meter on the Vocal Group; keep loudness decisions for mastering. 7) 10-Minute First-Run (From Blank to Record-Ready) Create buses: Audio Connections—name inputs/outputs; enable Control Room; create one Cue mix. Add tracks: Lead, Boost, Ad-libs, Harmonies; route all to Vocal Group. Add FX channels: Room, Slap, Tempo Echo; set sensible default sends (Lead low Room/Slap; Ad-libs slightly more). Set chains for tracking: Lead HPF → light comp (2–3 dB on phrases) → broad de-ess. Keep it lean while recording. Color & order: apply your palette; store a Visibility Configuration that shows only vocal stuff while tracking. Save: File → Save as Template… named “Vocal_Record_48k”. Done. 8) Two-Track Beat Template (When You Only Have a Stereo Instrumental) Common in rap/pop sessions. Make a dedicated template: Tracks: Beat (stereo), Lead, Boost, Ad-libs, Harmonies, Vocal Group. Beat control: put a simple trim plugin or gain handle on Beat so you can ride intros/hooks without smashing the mix bus. Presence without harshness: keep returns modest; dry-leaning verses read better over dense two-tracks. Hook lift: automate +1 dB on Tempo Echo send for the final bar into each chorus. 9) Names, Colors, and Sorting (So You Grab the Right File) Templates work because they’re easy to find and hard to break. Use strict labels: Templates: Vocal_Record_48k, Dubs_2Track_48k, Podcast_DualMic_48k. Archives: Archive_VocalStack_Rap, Archive_VocalStack_RnB. Presets: LeadVox_Stock_DeEss, AdLib_Bandpass_Slap. When starting a new song, open the Template and immediately Save As… Artist_Song_YYYY-MM. You’ll never overwrite the master. 10) Control Room & Cue Confidence (Monitor Like a Pro) Talkback: assign a talkback input; keep it routed to Cue only, not to the Master. Click routing: metronome to Cue, not to Master, so exports never include the click. Cue mix balancing: singers track better with a little mono slap and a small room—less haze, more pitch confidence. 11) Portable = Reliable (Keep Media Together) Templates and archives travel best when assets live in the project folder: Save new projects with Prepare Archive habits—keep samples and presets local. Versioning: suffix updates with _v1.1, _v1.2. Keep v1 safe for recall, evolve forward in copies. Backups: mirror your “Cubase/Templates” and “Cubase/Archives” folders weekly. 12) Symptom → One-Move Fix (Troubleshooting You’ll Actually Use) Wrong inputs after interface swap: Audio Connections—reassign named buses → re-save Template on that rig. Flam/latency while tracking: disable software monitoring if hardware monitoring is on, or vice versa. Keep tracking chains light. Template prints the click: metronome routed to Cue only; confirm no “Click” channel feeds Master. FX smear clarity: lower Room return; filter returns again (HPF/LPF); use more Slap, less reverb. Hook collapses in mono: keep Lead centered and mostly dry; push width into doubles/ad-libs, not the lead lane. Overbright S’s on earbuds: broaden de-ess band; reduce any air shelf by 0.5 dB; low-pass delay returns ~6–7 kHz. Archive imports with odd routing: import with the “map to existing buses” option, then re-save a corrected archive. 13) Keep a Small Library, Not a Junk Drawer Have a few focused Project Templates by purpose, a handful of Track Archives by genre, and a short list of Track Presets by role. You’ll load faster, make fewer mistakes, and keep your sound consistent across projects. 14) Where Structure Meets Sound (Tie-In with Chains) The template is your room and wiring; the Track Preset is your chain. Use one to load instantly; use the other to shape tone. For detailed install steps and search/tagging in MediaBay, this step-by-step article pairs perfectly with your new template: install Cubase vocal presets. 15) FAQ (Short, Clear Answers) Do I need third-party plug-ins to use templates?No. Build stock and third-party variants. If a collaborator lacks a plug-in, swap to a stock chain and re-save a “stock” template. Is a Track Archive the same as a Template?No. A Template is a full project starting point; an Archive is a modular track package you import into an existing project. Can I keep multiple “default” templates?Yes—store several in My Templates (e.g., 44.1k and 48k, or Vocal vs. Two-Track). Pick the right one at project creation. How do I share with a collaborator?Zip a project created from the Template (so it includes media), or export a Track Archive of the vocal stack. Include a short README with input names and session rate. What’s the fastest path for beginners?Start with one Project Template (Vocal_Record_48k) and one Track Archive (VocalStack_Rap). Add Track Presets later for speed. 16) Closing Thoughts (Build Once, Record Faster Forever) Install a Cubase recording template so a new song opens in seconds. Keep Track Archives to drop a full vocal stack into any session. Favorite your Track Presets in MediaBay so chains load with one click. Label buses, filter returns, and route the metronome to Cue—not print. With that foundation, every session starts calm, focused, and ready to capture a great performance.
Learn more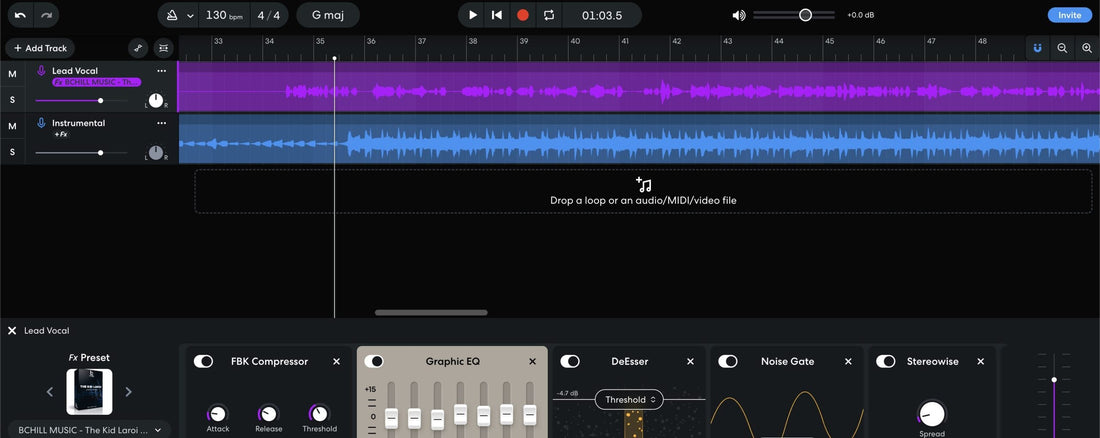
Install Recording Templates in BandLab (Mobile & Web)
How to Install Recording Templates in BandLab (Mobile & Web) BandLab doesn’t use “templates” the same way desktop DAWs do, but you can get the same benefit: open a project that’s already wired for recording and save a copy in seconds. This guide shows exactly how to build, duplicate, and share reusable recording setups on the web and on mobile. We’ll set up inputs, returns, role-based vocal lanes, and low-latency chains, then keep everything organized for fast sessions and clean exports. If you also want a tone starting point that drops into your template, browse the genre-ready BandLab vocal presets and tweak thresholds and sends to your mic and room. I. “Template” in BandLab: what it really means In BandLab, a recording template is simply a project you copy whenever you start a new song. You’ll create one or more “master” projects with your tracks, names, colors, inputs, and FX. When it’s time to record, you open the master and duplicate it—no rebuilding channels, returns, or headphone mixes. Personal copy: keep a private “Template — Vocal Record” project and duplicate it for each song. Forkable link: publish a template project you can fork (or let collaborators fork) to generate a clean working copy. Band workflow: store shared templates inside a BandLab “Band” so your team pulls identical setups. II. Three routes to a reusable template (pick one) Library → Duplicate. Build a master project once. In your Library, choose the project options and make a copy whenever you start a new track. Rename the copy immediately. Fork. Publish a “Template — <Purpose>” project with a clear description and allow forks. Open the public link yourself and fork a fresh copy each session. Band shared project. Inside a Band, create a “Templates” folder. Your vocalist, producer, and engineer all duplicate from the same master files. All three methods achieve the same thing: a clean starting point that stays untouched while you work from copies. III. Web Studio: build the master once 1) Start clean. Create a new project and name it “Template — Vocal Record — 48k” (or your preferred rate). Set BPM and key if you want them pre-loaded. 2) Create role-based vocal lanes. Add tracks and rename: Lead Vox (mono) Boost Lines (mono, for emphasis words) Ad-libs (mono, panned later) Harmonies (stereo or dual mono) Vocal Bus (stereo subgroup routed from all vocal lanes) 3) Returns you’ll reuse. Add two or three FX returns you like: Room (0.4–0.8 s), Slap (90–120 ms), and a Tempo Echo (1/8 or dotted-eighth). High-pass returns around ~150 Hz and low-pass near ~6–7 kHz so monitoring stays clean. 4) Low-latency tracking chain. On Lead Vox, keep it lean while recording: HPF → light compressor (2–3 dB on phrases) → de-ess. Save brightening or heavy FX for mixdown. Duplicate a slightly tighter chain on Boost Lines and a more filtered, band-limited chain on Ad-libs. 5) Sends pre-staged. On Lead, add low sends to Room and Slap. On Boost Lines, a touch more Slap. On Ad-libs, a bit more Room/Phone-style band-pass if you use that effect. 6) Color code and order. Make vocal lanes one color family, returns another, and the Vocal Bus a third. Your eyes will find parts fast when sessions get big. 7) Save and lock the master. Don’t record into this file. Use it only to create copies (duplicate or fork) and keep it pristine. IV. Mobile Studio: a pocket-friendly template 1) Create a project called “Template — Mobile Vox.” Add a Voice/Audio track for Lead, then add tracks for Boost Lines and Ad-libs. Add a stereo Vocal Bus if your device and version support bus routing; otherwise keep track-level FX simple. 2) Tracking chain that won’t lag. Use a gentle compressor and de-ess only. If the device struggles, track dry and enable FX while comping or mixing. 3) Returns. Add a short Reverb and a Slap Delay; keep sends low. Bright FX can mislead while monitoring—trust midrange clarity first. 4) Save a clean master. Immediately duplicate the project for each new song so the master never changes. V. Names, colors, and revision hygiene Templates work because they’re easy to find and hard to break. Use strict naming and simple rules. File names: Template — Vocal Record — 48k, Template — Dubs over 2-Track, Template — Podcast DualMic. Session names: when you duplicate, rename to Artist_Song_YYYY-MM so files sort chronologically. Revisions: BandLab keeps revisions; add notes like “Comp pass v1,” “Ad-libs pass,” “Mix print.” Colors: keep Lead, Boost, Ad-libs, and Returns consistent across all templates. VI. Input sanity and monitoring you can trust Input level. Do a short test line. Keep peaks below clipping; aim around the middle of the meter. If a word is much louder, trim the clip later; don’t slam the compressor to hide it. Monitoring choices. Some devices add latency with heavy chains. Prefer a lean chain while tracking. If you hear a doubled or flanged voice, you’re monitoring through hardware and software at once—mute one path. De-ess before “air.” If you brighten, revisit the de-esser so S’s stay smooth on phones. VII. Two-track beat template (vocals over a stereo instrumental) Many BandLab sessions start with a stereo beat. Build a specific template for this case: Tracks: Beat (stereo), Lead Vox, Boost Lines, Ad-libs, Vocal Bus. Beat management: keep a simple clip gain handle on the Beat track so you can ride intros and hooks without crushing the Maximizer later. Space: smaller rooms and lower FX returns than you’d use with full stems—clarity wins. Hook lift: automate a little extra delay send on the final phrase into a chorus; reset it for verses. VIII. Collaboration without chaos Band shared template. Inside your Band, keep a “Templates” folder. Only admins update the master. Everyone else duplicates for sessions. Public fork template. Publish a clearly labeled template with the word Template in the title and a description that explains what’s inside (tracks, returns, suggested gain staging). Anyone can fork a clean copy. Roles and notes. Add a text note at the top of the Arrangement with mic distance, typical HPF points, and send levels. Your collaborators will move faster and make fewer mistakes. IX. Troubleshooting (symptom → fast move) Project won’t save or sync: check your connection; save again; if stuck, download tracks and start a new project, then re-import. Hearing a doubled voice: disable either hardware monitoring or software monitoring so you don’t hear both paths. FX lag during tracking: simplify the chain (HPF → comp → de-ess). Add polish after takes are captured. Beat is too loud for vocals: lower beat clip gain 1–2 dB and raise Lead +0.5 dB; avoid over-compressing the vocal just to keep up. S’s sound sharp on earbuds: widen de-ess band slightly; back off any air boost; low-pass delay returns to ~6–7 kHz. Hook collapses in mono: center the Lead; keep width in Ad-libs; avoid aggressive stereo FX on the main lane. Template gets overwritten: never record into the master. Duplicate first, then rename. Wrong input after device swap: reselect your interface input in the track settings; save the updated copy, not the master. Bleed or room boom: tighten mic distance and angle slightly off-axis; raise HPF a few Hz in your tracking chain. Too much “verb selfie” in cans: lower reverb send and increase slap delay a touch—energy without haze. Delay repeats step on words: reduce feedback and enable light ducking if available; or automate send down during dense lines. Export includes the click: mute the metronome before mixdown; don’t route it to Master. Clipped print: trim the Beat or Vocal Bus by 1 dB and re-export—don’t just throw a limiter on at the last second. Mobile session sounds different from web: compare FX lists; match the chain order and output trims; small differences add up. X. A 10-minute template you can recreate now Create project: “Template — Vocal Record — 48k”. Add tracks: Lead (mono), Boost (mono), Ad-libs (mono), Harmonies (stereo), Beat (stereo, muted by default), and a stereo Vocal Bus. Route: send all vocal tracks to the Vocal Bus; Master stays clean. Lead chain: HPF ~90 Hz → Comp (2–3 dB on phrases) → De-ess. No air shelf yet. Boost chain: slightly higher HPF; a touch more de-ess; tucked −6 to −9 dB under Lead. Ad-libs chain: band-limit (HPF ~200 Hz, LPF ~8–10 kHz) and a bit more Slap; pan off-center by section. Returns: Room (0.5–0.8 s), Slap (90–110 ms), Tempo Echo (low feedback). Filter all returns. Markers: add Verse/Hook/Bridge locators and a 1-bar count-in. Save master: close without recording. Duplicate this file for every new song. XI. Organize multiple templates without confusion Keep small, focused masters instead of one giant file. Examples: By mic: “SM7B_Vox_48k,” “Condenser_Bright_48k.” By genre: “Rap_Dry_Punch,” “R&B_Airy,” “Pop_Stack_Wide.” By workflow: “Dubs_2-Track,” “Podcast_DualMic,” “Songwriting_ScratchVox.” Each master contains only what you need for that job. Faster loads, fewer mistakes. XII. Where templates meet tone Templates handle routing and speed; tone comes from your chain choices. If you want a proven FX starting point designed for BandLab’s stock tools, explore the curated BandLab presets and save a customized version inside your master project. That way, every duplicate opens with your sound ready to track. XIII. Next read: preset install specifics for BandLab Once your template structure is set, loading and organizing FX presets is your next unlock. This walkthrough shows mobile and web installs, plus quick-fix chains for different voices: install BandLab vocal presets. XIV. Final notes Keep your master files clean. Duplicate before recording. Use lean tracking chains so monitoring stays honest. Document small choices and save variants when a template evolves. With this approach, BandLab becomes a “one-tap studio”—consistent sessions, faster takes, and mixes that translate.
Learn more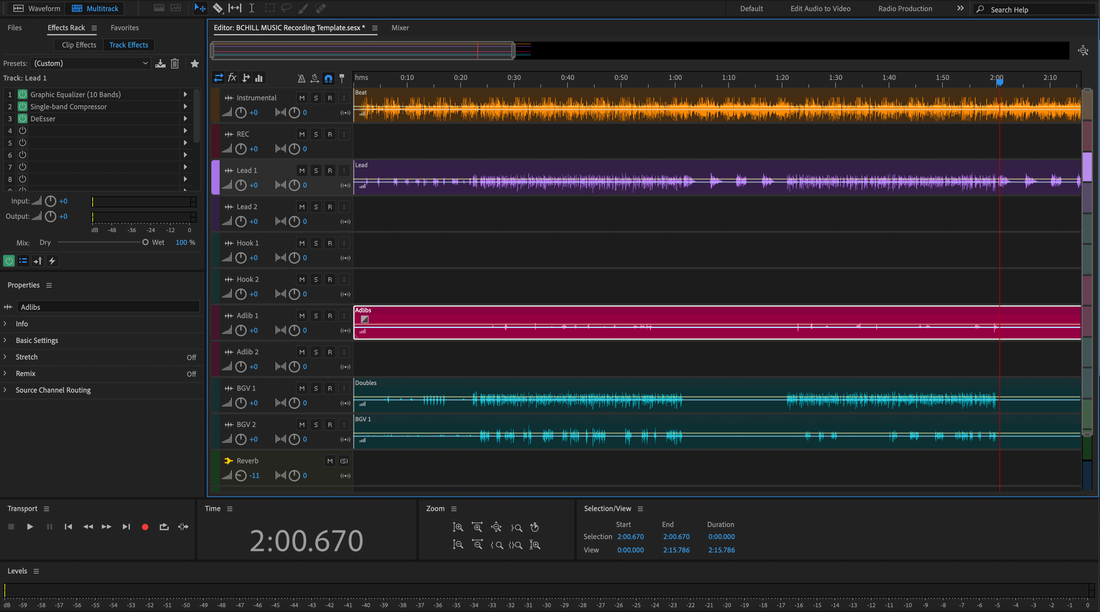
Install Recording Templates in Adobe Audition (Step-by-Step)
Recording templates let you open Adobe Audition into a ready-to-record environment—tracks, colors, returns, routing, and basic chains all pre-loaded. This guide shows how to install template files, organize them for fast access, set a default session, and avoid common pitfalls. You’ll finish with a reliable template library that speeds every session and keeps your deliveries consistent. How to Install Recording Templates in Adobe Audition (Step-by-Step) I. What a “recording template” means in Audition In Adobe Audition, a recording template is simply a Multitrack Session (.sesx) that you’ve set up once and reuse. It can include: Track layout: Lead vocal, doubles, harmonies, ad-libs, talkback, guitars, keys. Busses/returns: Slap delay, short plate, phone band-pass, parallel comp. Routing: Inputs for each track, sends to returns, a Vocal Group bus, and a controlled Master. Markers: Verse, pre, hook, bridge—so punching and looped takes are quick. Visuals: Consistent colors and track order so your eyes find parts instantly. Templates don’t remove decisions; they remove repetition. You’ll still set gain, de-ess, and shape tone to match the voice. But you start at bar 1 with a full studio already patched. II. File types you’ll see (and what to do with them) .sesx — A Multitrack Session file. Double-click to open. If it’s a template you want to reuse, immediately “Save As…” into your Template folder and keep the original as a master copy. .zip (or folder) — A template plus its assets. Unzip to a music projects or “Templates” folder. Open the .sesx inside. If media lives outside the folder, use File → Save As… and enable copying referenced media so the template becomes portable. Preset racks — Effects Rack presets (.fxp/.xml depending on source). These are not templates by themselves but are often included. Load them on the vocal lanes inside your template and resave. III. Pre-install checklist (quick) Update Audition and your audio interface driver. Know your Preferences → Audio Hardware device names (inputs/outputs you plan to route). Ensure third-party plug-ins used by the template are installed and scanned. Decide a home for templates (e.g., Documents/Audio/Templates or a dedicated drive). Keep it backed up. Decide on a default sample rate for music projects (44.1 kHz for most songs; 48 kHz for video workflows). IV. Three reliable ways to “install” a template Audition doesn’t require a special installer. You’re just telling Audition where your .sesx lives and, optionally, promoting it to a default. Choose any method—or mix them. Method A — Open & Save As Template (the universal path) Unzip/download your template to a folder you control. Double-click the .sesx (or File → Open). Immediately choose File → Save As… and place it in your personal “Templates” folder. Enable options to copy referenced media into the session so it’s portable. Close and reopen Audition; confirm you can reach the file in your template folder. Why this is great: You decide exactly where templates live and can version them safely. Method B — Add your Templates folder to Media Browser Favorites Open the Media Browser panel (Window → Media Browser). Navigate to your Templates folder. Right-click and choose Add to Favorites (or drag it into Favorites). Now your templates are one click away in every session—no hunting through system dialogs. Double-click a template to start a new project from it; immediately Save As… a new song so you never overwrite the template. Why this is great: Zero OS navigation and you can keep different folders (e.g., “Rap_Dry_Punch,” “R&B_Airy_Plate,” “Podcast_DualMic”). Method C — Promote a template to your “New Session” workflow Open your preferred template, verify routing, returns, and colors. Save it with a clear name like Vocal_Record_48k.sesx. When starting work, go to File → New → Multitrack Session and choose your template file from your organized folder or Favorites. (If your version of Audition shows a template list, add yours to the same folder you chose for all templates so it appears consistently.) Rename and save immediately into a fresh project folder for the song. Tip: Keep two copies per rate (e.g., 44.1k and 48k) to avoid background resampling surprises. V. What a great vocal recording template includes Steal this checklist when evaluating any template you install: Lead lane: named “Lead Vox,” record-ready, with basic chain placeholders. Role-based lanes: Doubles L/R, Harmonies, Ad-libs—each with appropriate high-pass, de-ess level, and color. Returns: Slap (mono 80–120 ms, filtered), Plate (0.7–1.0 s, 20–50 ms pre-delay), optional “Phone” band-pass. Sidechain ducking: Slap bus keyed from Lead so echoes bloom in gaps, not on syllables. Vocal Group bus: gentle glue and a final broad de-ess; the Master stays clean and headroom-friendly. Markers: Verse, Pre, Hook, Bridge—plus a count-in region for fast punches. Print lane: a Resample/Bus print track for roughs (named clearly so you never bounce by mistake). Notes clip: a text note with mic distance, buffer targets, and send starting points. VI. First-use walkthrough (5-minute setup from zero) Open the template. Immediately Save As… a new project folder (Artist_Song). Audio Hardware. Preferences → Audio Hardware → select your interface; set buffer 64–128 for tracking (raise later for mixing). Inputs. On Lead Vox, choose the correct input channel; set Monitor mode to your preference and confirm you do not hear a doubled signal (hardware + software simultaneously). Level. Aim raw input peaks around −12 to −8 dBFS. Use Clip Gain to calm shouty words before compression later. Headphone mix. Push a touch of Slap and a little Plate. Filter returns (HPF ~150 Hz, LPF ~6–7 kHz) so the singer hears clarity, not haze. Markers & loops. Set loop points around a phrase, test punches, and confirm record-arm logic works. VII. Organize a template portfolio (by mic, genre, and session type) One mega-template is tempting, but a small library stays faster and cleaner. By mic: SM7B vs. bright condenser variants with different high-pass and de-ess starting points. By genre: “Rap_Dry_Punch,” “R&B_Airy_Plate,” “Pop_Stack_Wide.” By vocalist: initials + tag (e.g., “AR_bright_sop,” “JT_dark_bar”). By session type: “Podcast_DualMic_Gate,” “Dubs_2-Track_BeatDuck,” “Songwriting_ScratchVox.” Keep naming strict. Include sample rate in file names (e.g., Vocal_Record_48k.sesx). Future you—and collaborators—will find the right file without opening three wrong ones first. VIII. Using templates with Effects Rack chains Templates are the “room and wiring.” Effects Rack presets are the “gear on the cart.” Pairing both gives repeatable results. You can build chains yourself or start with curated options and adapt by ear. For speed and consistency on music vocals, explore Adobe Audition vocal presets and then fine-tune thresholds, de-ess bands, and send levels to your voice and room. IX. Portable, backed-up, future-proof Templates are only useful if they open everywhere you work. Keep assets close. When saving a template, enable copying referenced media so the session folder is self-contained. Backups. Mirror your Templates folder and your Audition settings to cloud or external storage weekly. Versioning. Suffix updates with a tiny semantic version: Vocal_Record_48k_v1.2 (changelog in your Notes clip). Third-party plug-ins. If a collaborator lacks a plug-in, replace with a stock device, re-save the template as a “stock” variant, and keep both. X. Troubleshooting (symptom → focused move) Template opens with the wrong inputs. Your interface I/O names changed. Reassign inputs, Save As… a new template, and keep that as the default on this rig. Double monitoring (flam/latency). You’re hearing hardware and software at once. Either mute the interface monitor path or set the track to monitor off while tracking. “Plug-in not found.” Rescan plug-ins in Audition’s Audio Plug-In Manager. If still missing, swap to a stock device and re-save the template variant. Record clicks at start. Add a 1-bar count-in; increase buffer slightly for heavy sessions; disable look-ahead analyzers while recording. Export has the click. Route metronome to Cue only; ensure no “Click Print” track feeds the Master. Session opens at the wrong sample rate. Confirm your interface control panel and Audition project rate match the template’s label (44.1k vs. 48k). Media offline after moving drives. Use the Media Browser to relink or resave with copied assets. Keep a “Collected” master of each template. XI. Efficiency add-ons (quality of life) Favorites. Make a Favorite for “Normalize clip to healthy record level,” “Trim start fade 5 ms,” and “Apply band-limit for phone FX.” These can run pre-chain without opening menus. Clip FX vs. Track FX. Repair EQ and de-ess on a problem clip; keep tone/FX on the track for global control. Scene-based takes. In Multitrack, set markers for Verse/Hook/Bridge and loop record for quick comping. Resampling lane. Add a “PRINT” track that records the Master or Vocal Group for instant roughs—no export dialog needed. Talkback management. Route Talkback to Cue only, gated lightly, and exclude it from Master/exports via groups. XII. Build a singer-rapper hybrid template (example you can adapt) Lead Vox (mono) — HPF ~90 Hz; light comp; broad de-ess. Sends to Slap/Plate return tracks. Boost Lines (mono) — slightly higher HPF; more de-ess; tucked −6 to −9 dB under; occasional width. Ad-libs (mono) — band-limited (HPF ~200 Hz, LPF ~8–10 kHz); panned off-center; short throws at transitions. Harmonies (stereo or dual mono) — darker EQ; wider pan; light modulation optional. Vocal Group bus — gentle glue; final de-ess; limiter off during tracking. Beat Bus — optional dynamic EQ duck at 2–4 kHz keyed from Vocal Group so consonants read without thinning the beat. Returns — Room/Slap/Plate/Phone; all filtered; Slap ducked from Lead. Print — records Master or Vocal Group for reference mixes. XIII. Template hygiene (how to keep things clean over time) One job per lane. Lead, Doubles, Harmonies, Ad-libs each get their own FX and de-ess levels. You’ll mix faster and avoid over-processing the center. Filter returns. HPF ~150 Hz and LPF ~6–7 kHz on Slap/Plate so reverb never turns into hiss on earbuds. Small moves first. Fix boxiness and sibilance with tiny, wide shapes before adding “air.” Air after de-ess keeps brightness friendly. Print dry, hear wet. Monitor through the Rack but record clean input. If someone needs vibe, print a safety “Lead_Wet” on a separate track. Save variants. When a template evolves, save a new version, don’t overwrite. Keep v1 for recall; v2+ for improvements. XIV. FAQs Do I need the exact plug-ins a template mentions?No. Swap third-party devices for stock tools, then re-save a “stock” variant. The structure (lanes, routing, returns) is the real value. Where should templates live?Anywhere you control and back up. Add that folder to Media Browser Favorites so it’s one click away. Many users keep a “Templates” root with subfolders by DAW, sample rate, and genre. Can I keep multiple “default” sessions?Yes—store them in your Templates folder and pick the one you need via Favorites or the New Multitrack dialog. Label clearly by rate and purpose. How do I share a template?Zip the session folder after using Save As… with media copied. The recipient unzips, adds the folder to Favorites, opens the .sesx, and re-saves locally. How do templates interact with my vocal chains?Templates carry the lanes and routing; the chain shapes tone. Start from curated chains that are easy to adjust, like the Adobe Audition vocal presets mentioned above, then store personalized rack presets per lane inside your template. XV. Keep learning (next logical step) If you’ve installed templates and want a focused walkthrough on loading, gain-staging, and adapting chain decisions inside the Rack, this step-by-step primer is a helpful follow-up: Use Vocal Presets in Adobe Audition. Read it next to finalize your lane presets and save role-based versions that match your new template. XVI. Wrap-up Installing an Adobe audition recording template is about three things: a clean folder you trust, a Favorites shortcut for speed, and a few focused template variants for the voices and genres you record most. Once your lanes, returns, and routing are set, sessions start fast, artists stay comfortable, and mixes translate more consistently. Pair your templates with reliable Adobe audition vocal presets, keep moves small and musical, and your sessions will feel organized before you hit record.
Learn more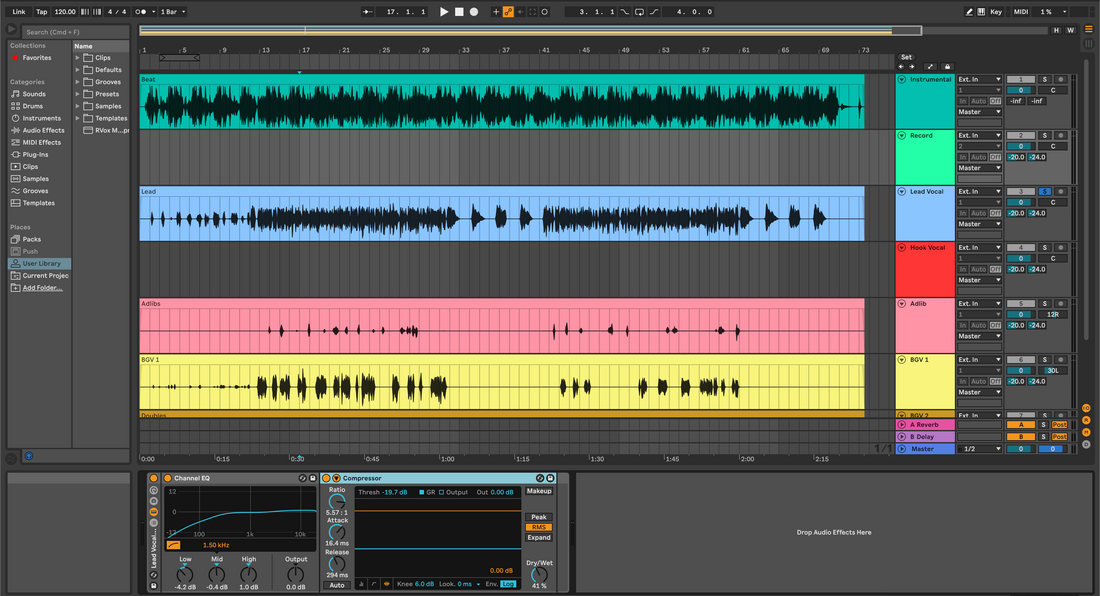
Install Recording Templates in Ableton Live (Step-by-Step)
Recording templates speed up sessions by loading tracks, routing, colors, returns, and basic chains in one move. This guide shows how to install template files, organize them for fast access, set a default set, and avoid common errors. You’ll finish with a clean browser, reliable inputs, and a template portfolio that fits any session. I. What a recording template is (and why it matters) A recording template is a saved Ableton Live Set (.als) or a packaged project (.alp) that opens with ready-to-record tracks. It can include input routing, track groups, return effects, click preferences, and helpful devices like de-essers or cue filters. Templates remove repetitive setup and protect your headspace when artists are ready to record. Consistency: every session starts with the same routing and gain staging. Speed: no re-building headphone mixes or record-arm logic. Quality: fewer mistakes with sample rate, latency, or missing FX. II. File types and where they live .als is a Live Set. It opens like any normal project. If you save as a Template, it appears in the Templates area of the Browser (Live 11/12). .alp is a Live Pack. When you double-click, Live unpacks it into a folder. Inside you’ll usually find an .als and Assets (Samples, Presets, etc.). User Library is your personal content location. You can place custom Templates, presets, and clips there and browse them from the sidebar. Places is the Browser section where you can add folders from any drive, then access their contents without moving files. III. Pre-install checklist (quick) Live 11 or Live 12 installed and updated. Enough disk space to unzip packs. Audio interface selected and working (Preferences → Audio). If a template references plug-ins, ensure they’re installed and enabled (Preferences → Plug-Ins; Rescan). Know your User Library location (Preferences → Library). IV. Three ways to install templates (choose what fits) Use any of the methods below. They are safe to mix and match. Method A — Add the folder to Places (non-destructive) Open Live. In the Browser, find Places → click Add Folder…. Select the folder that contains your template set (.als) or pack (.alp). Your folder appears in the sidebar. Click to browse. Double-click the .als to open; or double-click the .alp to unpack first. Optional: right-click the set and choose Save Live Set as Template to put it into your Templates area. Why this is great: keeps your original download intact; quick to update or re-download without moving files. Method B — Store inside User Library (portable) Locate your User Library path (Preferences → Library). In Finder/Explorer, create a folder: User Library/Templates/Recording. Copy the .als template there. Back in Live, open the Browser and drill into User Library → Templates → Recording. Right-click the set → Save Live Set as Template (Live 11/12) to promote it to the Templates list if desired. Why this is great: you can back up one directory and keep custom content together. Method C — Unpack a Live Pack (.alp) Double-click the .alp. Live asks where to unpack; choose a music projects folder or your User Library. After unpacking, open the .als inside the new folder. Review inputs, devices, and returns. If you like it, File → Save Live Set as Template to add it to Templates. Why this is great: packs can include samples, racks, and macros that travel with the set. V. Make it your default Set (two options) You can open Live straight into a record-ready layout. Option 1: Templates (Live 11/12). Open your finished .als, then choose File → Save Live Set as Template. Name it “Vocal Record – 48k” or similar. In the Browser → Templates, right-click and set as default if available, or simply select it when starting a session. Option 2: Legacy default Set. Some builds offer File → Save Current Set as Default. This creates a default template behind the scenes. Use only when you want the same layout every time. VI. What a good vocal recording template includes Templates differ, but great ones share structure. Use this as a blueprint when customizing. Inputs labeled: Lead Mic (mono), Talkback (mono), Guitar DI, Keys, etc. Record-armed logic: Lead lane pre-armed; talkback muted on export via a dedicated routing path. Return tracks: Short Room, Slap Delay, Tempo Echo, “Phone” band-pass. All filtered (HPF/LPF) and gain-staged. Groups: Lead, Doubles, Ad-libs; plus a Vocal Group bus with gentle glue and a final de-ess. Click/Count-in: Pre-roll enabled; click only to Cue, not Master, to keep bounces clean. Markers or Locators: Verse/Hook sections labeled for quick punches and looped takes. Color coding: same palette across projects so eyes find parts fast. VII. OS notes and practical file management Paths vary by system and version, so use the User Library path from Preferences as your source of truth. A few habits help sessions stay portable. Keep templates outside crowded cloud folders. If you do use cloud sync, exclude “Samples” from partial sync to avoid missing media. Collect on delivery. Before you archive or share, use File → Collect All and Save so external samples and presets travel with the project. Version labels. Suffix templates with _48k or _44k to avoid resampling surprises. Backups. Mirror your User Library weekly. It holds templates, racks, and user presets. VIII. First-use walkthrough (from blank to recording in 5 minutes) Open the template. Start Live → Templates → choose “Vocal Record – 48k”. Select interface. Preferences → Audio → pick your device; set buffer (128–256 samples for tracking). Route the mic. On Lead track, choose the correct input channel; set Monitor to Auto or In based on your hardware monitoring preference. Check levels. Aim for −18 to −12 dBFS average while speaking; peaks around −8 dBFS when projecting. Headphone mix. Send a touch of Room and Slap; keep the singer confident but not washed. Count-in and tempo. Set project BPM and enable a 1-bar count-in. Verify click goes only to Cue. Loop and punch. Set Locators around a phrase. Use Arrangement punches or Session clips for takes. Save as new project. Immediately Save As… a new song folder so takes don’t pollute your template file. IX. Organize a template portfolio (multiple genres & mics) Keep several focused templates rather than one massive file. Naming helps memory and search. By mic: “U87_Vocal_Record_48k”, “SM7B_Rap_44k”. EQ shelves and HPF points can differ. By genre: “Rap Dry_Quick Punch”, “R&B Airy_Plate+Echo”, “Pop Stack_Hook Wide”. By vocalist: initials plus range tags (e.g., “AR_bright_sop” vs. “JT_dark_bar”). By session type: “Podcast_DualMic_Gate”, “Dubs_2-Track_BeatDuck”. Inside each template, pin a Notes clip in the Arrangement or Session with mic distance, typical HPF, and headphone send amounts. Future you will thank present you. X. Using templates with device chains and racks Templates are strongest when paired with repeatable vocal chains. You can build your own racks or start from curated options and tweak to taste. If you want a fast, proven base that drops directly into Ableton, browse Ableton vocal presets and then fine-tune thresholds, de-ess bands, and FX sends to match your room and mic. Store your favorite racks in the User Library under Presets → Audio Effects Rack. Drag them into new templates so your tone is consistent across projects. XI. Troubleshooting (symptom → quick fix) Template opens but tracks show “Audio From: Ext. In 1/2” when you need 3/4. Save a copy with updated inputs after selecting your interface; set that copy as the Template. “Plug-in not found.” Preferences → Plug-Ins → enable VST3 (and AU on macOS). Click Rescan. If the template uses a third-party plug-in you don’t own, swap for a stock device and re-save. Dry monitoring plus a doubled, late signal. You’re hearing hardware monitoring and software monitoring together. Set Monitor to Off on the track if your interface handles monitoring, or mute the hardware monitor path. Clicks at record-in. Raise buffer slightly (256–512) or disable heavy look-ahead devices while tracking. Print them later. Wrong sample rate after opening. Check your interface panel; set the project rate in Live to match the Template label (e.g., 48 kHz). Export has the click. Make sure the metronome is routed to Cue only and not to Master. Verify no “Click Print” track is armed. Media offline after moving drives. Use File → Manage Files → Locate or re-Collect All and Save to embed the assets. XII. Efficiency add-ons for template power users Return macros. Map a Macro rack on returns for quick “Vox Space,” “Throw,” and “Phone” knobs. Keep singers inspired while tracking. Scene-based takes. In Session View, build scenes for Verse, Hook, Bridge with pre-rolled count-ins. Launch and capture variations quickly. Resampling bounce lane. Create a “Print” audio track with input set to Resampling. This makes instant roughs for feedback without exporting. Talkback management. Route Talkback to Cue only, gated lightly, and exclude it from Master/exports using routing groups. Checklist clip. Keep a MIDI clip named “Pre-Take Checklist” with text notes: buffer, tempo, click to Cue, headphone sends, record folder path. XIII. Example: building a singer-rapper hybrid template Here’s a simple layout you can adapt to different artists: Lead Vox (mono) → HPF ~90 Hz, light comp, broad de-ess; sends to Room and Slap. Boost Lines (mono) → slightly higher HPF; more de-ess; tucked −6 to −9 dB under Lead. Ad-libs (mono, panned by section) → band-limited; occasional phone FX; more Slap than Room. Vocal Group → gentle glue comp; final de-ess; limiter off while tracking. Beat Bus → optional dynamic EQ dip at 2–4 kHz keyed from the Vocal Group. Returns → Room (0.6–0.9 s), Slap (90–110 ms mono), Tempo Echo (dotted-eighth low feedback), Phone (300 Hz–3 kHz). Print track (Resampling) for quick roughs. XIV. Frequently asked questions Do templates require the exact same plug-ins?No. You can substitute stock devices for any third-party processing. Save your customized version as a new Template. Where is the best place to store templates?Either in the User Library (portable and backed up) or as a dedicated folder added to Places. Both are valid; choose one system and stay consistent. Can I keep multiple default sets?Live supports multiple Templates. You can set one as default or simply pick from the Templates browser each time. How do I share a template with a collaborator?Use Collect All and Save, zip the project folder, and share. The recipient adds it to Places or imports it into their User Library. What about installing preset racks for vocals?Preset racks live in the User Library under Presets → Audio Effects Rack. For a guided install process specific to racks, see this step-by-step article on how to install Ableton vocal presets. XV. Wrap-up: build once, record faster forever Templates remove friction so you can stay present with performance. Install them in Places or your User Library, set a default when it helps, and keep a small library tailored to your mics and genres. Pair them with consistent chains—stock or curated—and you can walk into any session, arm the track, and hit record with confidence. If you want a polished starting chain that drops directly into your template and speeds decisions, explore our Ableton recording template, then fine-tune thresholds, de-ess bands, and FX sends to fit your voice and room.
Learn more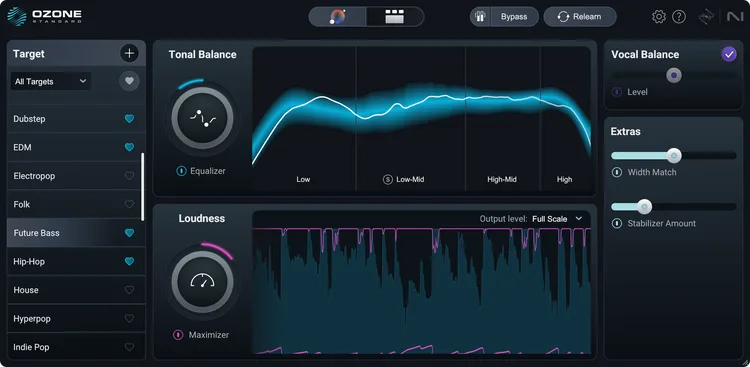
Ozone 12: Complete Guide to Modern Mastering
Ozone 12: The Complete Guide (Workflow, Modules, and Real-World Settings) Ozone 12 is a mastering suite designed to make final mixes translate on every system—phones, earbuds, club rigs, and radio. This guide is a practical, start-to-finish workflow you can reuse: prep the premaster, choose the right modules, shape tone and dynamics with small moves, manage bass, repair over-limited mixes, and print safe release versions. It reads quickly, avoids hype, and gives you settings that are easy to adapt. I. What “finished” means in practice A finished master holds up at low and high playback levels. The tone is balanced, the vocal remains intelligible in a car or on a phone, the sub has weight without mud, and loudness is competitive without grit or pumping. You’ll use Ozone 12 modules to solve problems in this order: prep → hear → fix → enhance → limit → print. The same order works across genres. II. Premaster prep before opening Ozone You’ll master faster if the source arrives clean and organized. Headroom: Print a stereo mix without a brickwall limiter. Aim for mix peaks around −6 to −3 dBFS. Don’t chase LUFS here. Sample rate & bit depth: Use your session rate; export 24-bit WAV. Dither only at the final master export if you reduce bit depth. Noise & clicks: Fix pops at the mix stage. Add 5–20 ms fades to all edits. Alternates: Prepare the instrumental and a cappella if needed. Save all prints from bar 1 with tails. If you want a repeatable capture layout for every song and vocalist, build (or download) DAW templates that route returns, label tracks, and keep print lanes aligned. A curated set of recording templates removes the setup friction so the premaster hits Ozone cleanly every time. III. First listen: references, loudness sanity, and a simple plan Reference tracks: Load one or two songs in a similar style that you trust. Level-match them to your premaster; avoid judging by “louder.” Room reality: Check at a moderate level first, then quietly on the same monitors; finish with earbuds or a small speaker. If diction fails at low level, fix that first. Plan: Write a two-line goal before touching knobs. Example: “Tame 250–350 Hz box, add 0.5 dB presence around 3–4 kHz, clean sub bloom, aim for clean loudness.” Now execute only those moves. IV. The Ozone 12 quick path (12 steps you can reuse) Open Assistant View (Custom flow). Let Ozone analyze a loud section. Choose modules you expect to use. Treat this as a starting point, not a decision. Equalizer (surgical first, then broad). High-pass only if true DC/rumble exists. If a booth or mix adds “box,” consider a wide −1 to −2 dB around 250–350 Hz. If vocal intelligibility hides, a tiny +0.5–1 dB wide lift near 3–4 kHz can help after sibilance is calm. Dynamic EQ (only when needed). Use gentle, keyed dips that trigger only when the problem appears—e.g., a cymbal glare band, a boxy guitar resonance, or an occasional nasal vowel. Bass management. Shape subs so kick and bass share space. Small, bandwidth-aware moves beat a global shelf. Keep 120–180 Hz from booming while preserving sub weight below. Transient vs sustain decisions. If attacks feel dull, restore a touch of transient energy; if tails smear, calm the sustain band. Do less than you think—masters exaggerate small changes. Imaging, carefully. Keep the mid (center) honest. Widen sides only above the vocal intelligibility band. Avoid widening the kick or lead vocal region. Exciter/color (low mix). Add gentle drive where tone feels flat. Keep total added brightness small; over-bright masters fatigue quickly. Sibilance tame. If S’s poke in the master, use a subtle, wide-band de-ess. This complements—not replaces—vocal de-essing done in the mix. Maximizer (final loudness). Target clean loudness. Add gain slowly while monitoring true peak. Stop when groove or low-end punch degrades. Comparisons. Level-match the chain bypass and your references. If the chain only sounds better because it’s louder, back up. Head/tail trims. Tighten starts and ends. Leave a breath of silence up front for players that preload. Export. 24-bit WAV at session rate for distribution masters; MP3/AAC as promo only. Dither if you reduce bit depth. V. Using Ozone 12’s headline tools (where they shine) Custom Assistant flow. Analyze a loud section, pick modules, set target loudness, and choose a starting curve. Accept the draft, then refine by ear. Great for speed, better for recall between songs on an EP. Stem EQ. When the client brings only a stereo bounce, isolate vocal, bass, drums, or instruments and nudge specific problems without wrecking the rest. It’s perfect for leased beats or last-minute vocal clarity—e.g., +0.5–1 dB presence on the vocal stem while slightly calming a harsh cymbal band. Bass Control. Tighten the low-end without global tone shifts. Try small range-limited reductions in the 120–180 Hz area to remove wool while preserving true sub weight below 60–80 Hz. Unlimiter. If a “mastered” mix arrives over-limited, use Unlimiter to gently restore transients and headroom. After recovery, re-limit cleanly (see Maximizer notes below). Keep expectations realistic; severe clipping cannot be fully undone. Maximizer (IRC modes including IRC 5). Use the cleanest mode that keeps punch. Add gain in 0.5 dB steps. Watch true peak and inter-sample safety. If kicks flatten or hats smear, pull back or slow the release. VI. Genre-adapted recipes (starting points, not rules) Use these as gentle ranges and listen for trade-offs. All boosts/cuts assume broad Q unless noted. Rap / Trap EQ: −1 to −2 dB around 250–300 Hz if boxy; +0.5–1 dB near 3–3.5 kHz if diction hides; tiny air shelf only after de-ess. Bass Control: trim 120–160 Hz by a hair if the 808 masks words; leave true sub below 60 Hz alive. Stem EQ: nudge the vocal stem +0.5 dB in presence; tame drum stem around 9–10 kHz if hashy. Maximizer: push until the groove dulls, then return 0.5 dB. Prioritize punch over meter numbers. R&B / Soul EQ: keep the midrange warm; avoid over-bright top. If mix is veiled, a tiny 5 kHz lift (not 10–12 kHz) often sounds more natural. Exciter: add gentle harmonics to upper mids, not just treble. Keep sibilance in check before any air moves. Stem EQ: smooth cymbal bands; a 0.5–1 dB dip around 7–9 kHz can ease glare. Maximizer: slower releases keep flow natural on legato phrases. Pop EQ: aim for a clean mid window and controlled 80–120 Hz. Use wide shapes; small moves. Imaging: widen only high-frequency sides; protect mono low end and center vocals. Maximizer: add loudness until snare snap or vocal presence dulls. Back off 0.3–0.5 dB. Afrobeat / Afro-fusion EQ: keep groove elements clear; calm 2–3 kHz only if guitars/keys fight the lead. Bass Control: manage 120–180 Hz overlap; avoid over-tightening the feel of the log drum or bass guitar. Throws and air: protect natural top; long bright shelves can fatigue the groove. VII. When you only have a stereo bounce (no stems) This is where Ozone 12 earns its keep. Use Stem EQ to lift vocal clarity without increasing cymbal sharpness. If the 2-track’s hats are bright, consider a side-only dip around 9–10 kHz so the center vocal keeps its air. For 808 collisions, keep the vocal intelligibility band clear by slightly reducing 2–4 kHz in the music while the vocal speaks. Make tiny, dynamic moves—your goal is subtle separation, not a remix. VIII. Unlimiter rescue (do’s and don’ts) Do use Unlimiter on over-limited prints where transients are flattened but not obliterated. Don’t expect miracles with clipped, distorted mixes; restoration is limited by what’s gone. Do re-limit cleanly afterward; aim for punch plus safety, not maximum LUFS. Don’t stack aggressive transient enhancers after recovery; they can exaggerate artifacts. IX. Maximizer discipline (clean loudness without grit) Add gain in small steps while watching true peak. If kick impact softens or the stereo image collapses, you’re past the sweet spot. Use a slower release or a less aggressive character before giving up headroom. Loudness that feels effortless always beats loudness that sounds “pushed.” X. Common pitfalls and fast fixes Harsh S’s on small speakers. Ease any air shelf by 0.5 dB; broaden de-ess range; low-pass delay returns around 6–7 kHz. Boxy center. Try a wide −1 dB near 250–300 Hz or a dynamic EQ keyed by vocal peaks; avoid hollowing the mix. Sub fog. Trim 120–180 Hz slightly (Bass Control) and keep true sub intact; check kicks in mono. Wide but weak. Return some mid/center energy; widen only above the vocal presence band. Assistant sounds “generic.” Keep the curve, but re-voice with 0.5 dB moves; swap module order; update release times. XI. Mastering with AI—how to stay in charge Assistant features are helpful for speed and recall, but the best results come when a human decides the goal and makes the last 10% of choices. For real-world scenarios where you should lean algorithmic or call an engineer, this practical read compares both paths: AI vs human mastering. Keep this mindset in Ozone 12: let the analysis propose; let your ears choose. XII. Check your work (quiet tests beat meters) Low-level check: turn monitors very low. If the vocal and kick relationship still feels right and consonants read, you’re close. Earbuds & phone: listen for brittle top and sub vanish. Adjust the mid window first; top and bottom often follow. Mono: collapse and confirm lyric clarity; fix center conflicts before restoring width. XIII. Export specs and file naming (save future you) Masters: WAV, 24-bit at the session sample rate. True-peak safe. Leave clean head/tail. Alternates: Instrumental, A Cappella, and Clean/Radio if needed—aligned with identical starts and tails. Dither: apply only when reducing bit depth (e.g., 24-bit to 16-bit for CD). Names that sort: Artist_Song_Main.wav, Artist_Song_Instrumental.wav, Artist_Song_Acapella.wav, Artist_Song_Clean.wav. XIV. A reusable mastering checklist (print or save) Premaster peaks at −6 to −3 dBFS; no master limiter. Two references level-matched; quiet monitor check planned. Assistant pass for a starting curve; refine by ear. Surgical EQ → broad EQ → dynamic EQ (only if needed). Bass Control to tidy 120–180 Hz overlap; keep true sub. Stem EQ for vocal clarity or cymbal comfort when needed. Exciter/color small; imaging cautious; center protected. De-ess wide-band if S’s poke; then tiny air polish. Maximizer for clean loudness; watch true peak; stop before punch dies. Final trims; export 24-bit WAV; print aligned alternates. XV. Building a personal starting library Save small, focused presets for common problems: “Box Relief −1 dB @ 280 Hz,” “Vocal Presence +0.5 dB @ 3.2 kHz,” “Side De-Hash @ 9.5 kHz.” Make variants per genre. Label by intent, not just by module. Over time, you’ll arrive faster because every move has a clear job. XVI. For faster vocal-forward masters Clean source chains make mastering easy. If you want a proven base for recording that pairs well with this guide, explore studio-built vocal presets for your DAW and style, then fine-tune thresholds, de-ess bands, and send levels to your voice and room. Consistent capture means fewer fixes at the end—and more time for creative tone. XVII. Final angle: do less, hear more Ozone 12 gives you precise tools. Use them gently. A wide −1 dB can change a record more musically than a narrow −3 dB. Restore headroom before chasing loudness. If a move makes you reach for three more, undo it and listen again. The best masters feel inevitable—like the mix always wanted to sound that way.
Learn more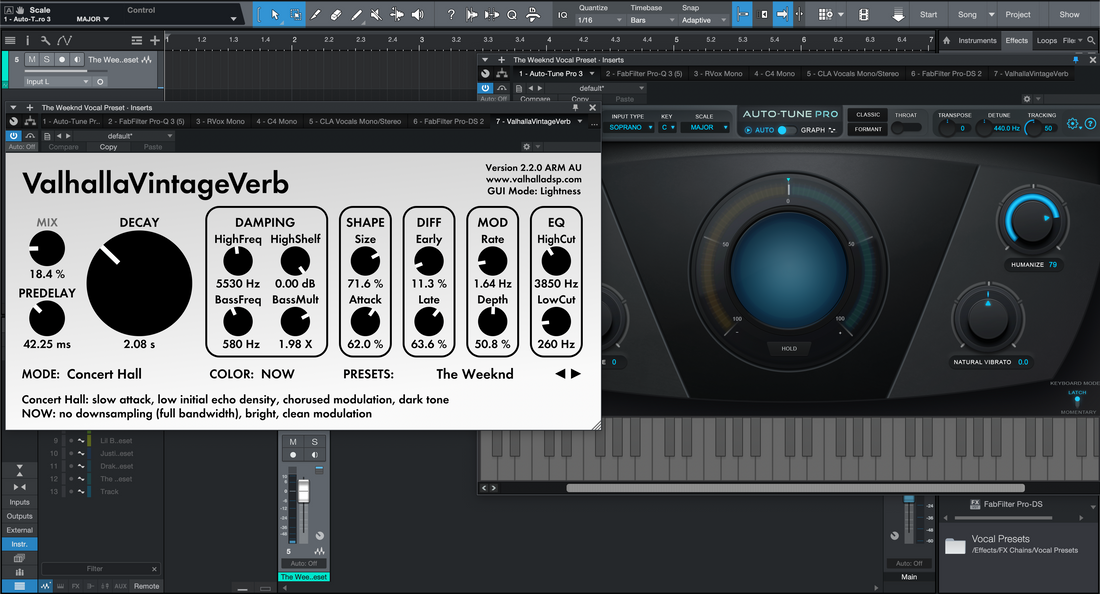
How to Use Vocal Presets in Studio One
In Studio One, a “vocal preset” is a reusable channel chain—EQ, compression, de-essing, tone color, delay, and reverb—that you can load in one move. This guide shows how to choose and load presets (FX Chains and Track Presets), set healthy gain, adapt tone to your mic, route sends, automate scenes, and save role-based versions for lead, doubles, harmonies, and ad-libs. If you want a tuned springboard, browse purpose-built Studio One vocal presets and then fine-tune thresholds and sends for your voice and room. I. What a “vocal preset” is in Studio One Studio One gives you several preset containers that make vocal chains easy to load and reuse: FX Chain preset — a saved insert stack with Macro controls (one-click channel strip). Track Preset — recalls inserts, order, I/O, color, and sends for a track (Studio One 6+). Song Template — opens a whole session “studio-ready” (lanes + FX channels prewired). Device presets — per-plug-in settings (Pro EQ³/Pro EQ², Compressor, De-Esser, Analog Delay, Room Reverb/OpenAIR, etc.). Loading a preset is step one. Step two is adapting input level, de-ess amount, presence, air, and FX balance to your voice and the song. II. Pre-flight (so presets behave) Pre-flight checklist Audio device & buffer: smaller buffer (64–128) while tracking; raise later for mixing. Session rate: 44.1 kHz for music (48 kHz if delivering to video). Input target: sing at performance level; aim raw peaks around −12 to −8 dBFS before any inserts. Track layout: one audio track named Lead Vox and two FX channels (A = Slap, B = Plate). Pop filter & distance: 10–20 cm from mic; stay consistent to stabilize tone. III. Load a vocal preset (four reliable routes) 1) FX Chain preset (fastest, macro-ready) Open the Browser (F5) → Effects → FX Chains → drag your chain onto the Lead Vox channel. Click the Macro panel (wrench icon) to expose Trim, De-Ess, Body, Presence, Air, and FX controls. Save your working copy (right-click channel header → Store FX Chain) as Lead — Clean (YourName). 2) Track Preset (lane + sends in one move) Right-click a track header → Apply Track Preset… (or drag from Browser → Track Presets). Set input, arm, and monitor. Your inserts and sends load together. 3) Song Template (start ready) New Song → pick your “Vocal Starter” template with Lead/Doubles/Harmonies/Ad-libs and Slap/Plate FX channels. Set inputs and record; everything else is prewired. 4) Drag-drop device presets In the Browser, drag device presets (Pro EQ³, Compressor, De-Esser, etc.) into empty insert slots to build a chain, then Store FX Chain. IV. Gain staging: make or break Interface pre first: set the mic pre so unprocessed peaks land −12 to −8 dBFS. Clip Gain / Event Gain: nudge loud/soft phrases (±2–3 dB) before compression; add short fades at edit points. Comp A target: aim ~3–5 dB gain reduction on phrases (ratio 2:1–3:1; attack 10–30 ms; release 80–160 ms). Don’t slam 10–12 dB constantly. Post-chain peak: keep track peaks around −6 to −3 dBFS; leave loudness for mastering. Level-match A/B: keep a final Gain/Trim at chain end so comparing presets isn’t skewed by “louder wins.” V. Five controls you’ll touch on every song De-Ess (6–8 kHz): turn until earbuds stop complaining; stop before consonants blur. Body (120–200 Hz): add warmth if thin; if the booth is boxy, reduce 250–350 Hz instead. Presence (3–4 kHz): tiny, wide lift only if diction hides. If hats/claps are bright, carve the beat rather than boosting the voice. Air (10–12 kHz): micro shelf only after sibilance is calm. FX blend: slapback 90–120 ms + short plate 0.7–1.0 s (pre-delay 20–50 ms). Verses drier; hooks open. VI. Lead vs. stacks: build a “family,” not clones Lead: mono-true center; minimal wideners; ride volume to keep the story forward. Doubles L/R: higher HPF than Lead; a touch more de-ess; tuck −6 to −9 dB under; micro-pan L/R; avoid chorus wideners that collapse in mono. Harmonies: darker EQ; wider than doubles; optional +0.5–1 dB near 5 kHz for shimmer only if needed. Ad-libs: narrow bandwidth (HPF ~200 Hz, LPF ~8–10 kHz); side-panned; short throw echoes on transitions. Save one FX Chain or Track Preset per role—Lead — Clean, Double — Tight, Harmony — Wide, Ad-Lib — Phone—so recall is instant and consistent. VII. Time & space: FX channels do the heavy lifting Create two FX channels: A = Slap (Analog Delay or Beat Delay), B = Plate (Room Reverb/OpenAIR plate IR). Filter returns: insert Pro EQ³ on each FX channel; HPF ~150 Hz, LPF ~6–7 kHz so tails never hiss on earbuds. Ducking trick: insert Compressor on the Slap FX channel; sidechain from Lead; fast attack/release; ~1–2 dB GR so echoes bloom in the gaps. Send automation: +1–2 dB into hooks; lower in dense verses; keep tails filtered. VIII. Macro Controls (FX Chains = your channel strip) Open the FX Chain editor → Macro Controls. Create knobs: Trim, De-Ess, Body, Presence, Air, FX. Map each knob to the key parameter (e.g., De-Esser amount, Pro EQ shelves, Delay/Reverb sends). Set useful ranges so a quarter-turn does something musical, not extreme. Store the FX Chain so every session loads with your “channel strip” in one click. IX. Stock “safe chain” (rebuildable anywhere) Pro EQ³/Pro EQ² (first): HPF 80–100 Hz; wide −1 to −2 dB at 250–350 Hz if boxy; tight notch near 1 kHz if nasal. Compressor (Comp A, shape): ratio 2:1–3:1; attack 10–30 ms; release 80–160 ms; ~3–5 dB GR on phrases. De-Esser: center ~6–8 kHz; reduce until S/T/SH are comfortable on earbuds. Compressor (Comp B, catcher): faster, 1–2 dB GR to stabilize send levels and peaks. Color (optional): Softube-style Saturation Knob (if installed) or stock Saturation; very low mix; output matched. Pro EQ (polish): +0.5–1 dB broad at 3–4 kHz only if diction hides; tiny 10–12 kHz shelf last. Sends: Analog/Beat Delay for slap; Room Reverb/OpenAIR plate; filter returns. Wrap as an FX Chain; add Macro controls; save as Lead — Stock Clean (S1); branch lighter/heavier variants per song. X. Fast audition (without fooling your ears) Loop a 10–20 s phrase with quiet and loud words. Keep a final Gain at chain end to level-match; flip FX Chains or Track Presets from the Browser. Pick what translates on earbuds/phone, not just the brightest option. XI. Two-track beat survival (bright hats, heavy subs) When the instrumental is a stereo file, reduce collisions instead of “more bright” on the voice: Mid dip on the beat (dynamic): insert Pro EQ on the instrumental bus; create a gentle bell around 3 kHz; sidechain a Compressor to the vocal and link (or automate) the EQ band for −1–2 dB only while the voice speaks. Splash control: keep the Lead’s Air conservative; LPF returns ~6–7 kHz if hats are icy. Mono check: temporarily sum the monitor path; the story should still land on a phone speaker. XII. Tracking vs. mixing: what to print Record dry, hear wet: monitor through the preset on Lead but print a clean take. If a collaborator needs the “demo vibe,” bus Lead to a PRINT track and record a wet safety (Lead_Wet). Commit late: render/freeze heavy FX near the end; keep an _FXPRINT audio track for recall. XIII. Automation that sells the line (micro, not macro) Volume rides: +0.5–1 dB into downbeats; −0.5 dB on tongue-twisters. De-ess threshold: slightly tighter on bright syllables; looser on dark phrases. FX choreography: lift Slap/Plate into hooks; lower in verses; keep tails filtered. XIV. Organization & recall (minutes now, hours later) Names that sort: Lead — Clean, Lead — Air+, Rap — Punch, Harmony — Wide, Ad-Lib — Phone. One per role: separate FX Chains/Track Presets for Lead/Doubles/Harmonies prevent over-de-essing stacks or over-brightening the center. Template: keep a “Starter — Vocals (Studio One)” Song Template with lanes and FX channels; start every song from it. XV. Troubleshooting (problem → focused move) Harsh S’s after adding Air: raise De-Esser slightly; reduce Air ~0.5 dB; LPF returns to ~6–7 kHz. Vocal sinks under 808: keep verses drier; add a tiny Presence lift; apply a subtle 2–4 kHz dip on the beat during lines. Clicks or crackles: raise buffer while mixing; disable heavy oversampling until render; close background apps. Preset sounds different at export: verify quality/oversampling modes; avoid master clipping; render at session rate. Chain feels “dead” on your mic: ease de-ess; reduce low-mid cuts; a tiny 150–180 Hz lift can restore chest without mud. Levels jump in A/B tests: match outputs with a final Gain; louder wins the ear unfairly. XVI. Learn more (next best step) Hand-offs are smoother when stems are clean and consistent. This walkthrough on how to export stems from Studio One step by step shows naming, starts, and tails that open cleanly anywhere. XVII. Quick action plan (copyable) Load an FX Chain or Track Preset; set input so raw peaks land −12 to −8 dBFS; Comp A kisses 3–5 dB. De-ess to “soft-bright,” add tiny Presence only if diction hides; keep Air conservative. Route Slap/Plate on FX channels; filter returns; duck Slap from the Lead; automate sends into hooks. Save role-based versions (Lead, Doubles, Harmonies, Ad-libs); keep a Song Template. Render roughs with headroom; keep the master unclipped; leave loudness for mastering. Used well, vocal presets are reliable shortcuts—not crutches. Keep headroom healthy, make small moves, automate what matters, and your voice will sit forward without harshness—song after song. For a fast start tuned to this DAW, grab the curated Studio One vocal presets and lock in your own “best-fit” versions for consistent, repeatable results.
Learn more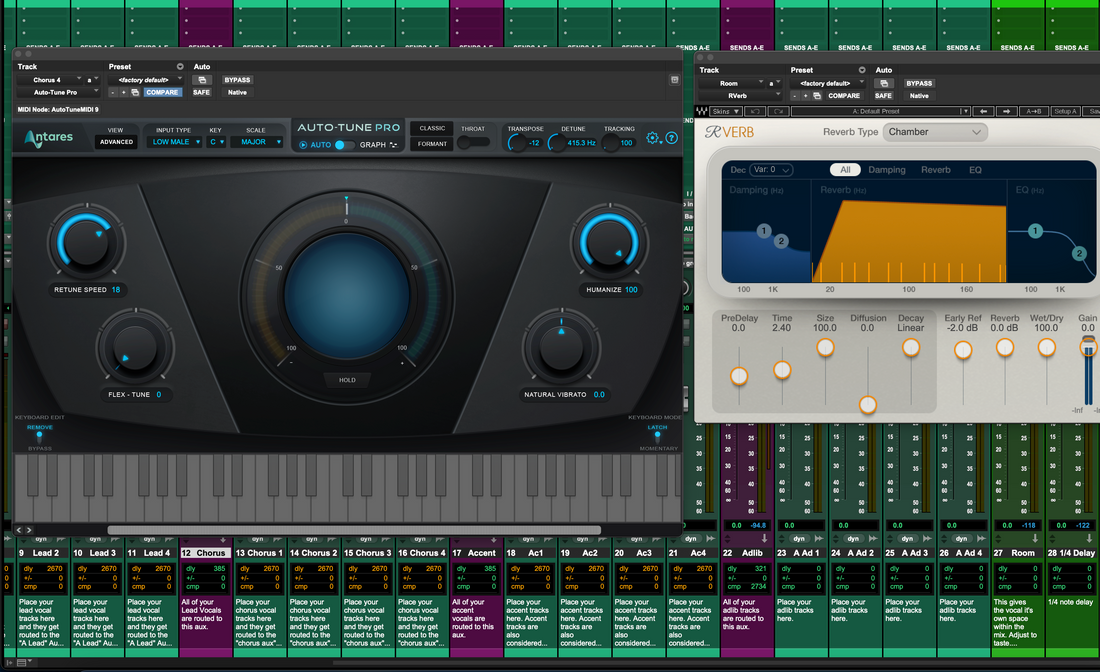
Use Vocal Presets in Pro Tools: Full Guide
In Pro Tools, a vocal preset is a ready-to-load signal path—EQ, compression, de-essing, color, delay, and reverb—saved as a Track Preset, plug-in preset, or full session template. This guide walks you through pulling those presets into a session, calibrating input, shaping tone with a few decisive moves, routing effects the modern way, and keeping separate recipes for lead, doubles, harmonies, and ad-libs. If you’d like a jump start designed for this DAW, try the curated Pro Tools vocal presets and then tailor thresholds and sends to your voice. I. Presets in Pro Tools: what you can actually save Pro Tools gives you a few building blocks that cover most workflows: Track Presets — store inserts, their order, I/O, sends, and even color. Recall from the track nameplate or when creating a new track. Plug-in presets — AAX device states (EQs, compressors, de-essers, delays, reverbs) that you can mix and match inside any chain. Session Templates — open directly into a vocal-ready environment (lanes + FX returns) with one click. Import Session Data — cherry-pick a tuned vocal track (and its buses) from another session and drop it into your current one. Loading is step one. Step two—often skipped—is adapting gain, sibilance control, presence, and ambience to the singer and the song. II. Set the stage (short checklist) Before you hit record Playback Engine: choose your interface; 64–128 samples while tracking, then raise for mixing. Sample rate: 44.1 kHz for most releases (use 48 kHz when the project is headed to video). Healthy input: sing at performance level and target −12 to −8 dBFS on the raw input meter. Starter layout: one audio track named Lead Vox plus two aux returns: A = Slap, B = Plate. Meters: if you want to see gain before automation or sends, switch the track meter to pre-fader. III. Bringing a preset into the session (four dependable paths) 1) Track Presets (speed option) From the New Track dialog, choose Track Preset and select your vocal chain; or Right-click the track nameplate → Recall Track Preset…; or Open Workspace (Option+I) and drag a Track Preset onto the Edit/Mix window. Immediately store your version (e.g., Lead — Clean • YourName) so later tweaks do not overwrite the original. 2) Import Session Data (pull a lane with its plumbing) File → Import → Session Data… and choose a donor session with a vocal you trust. Enable the tuned Lead and its FX returns; if replacing a temp track, use “Match Tracks by Name.” 3) Session Template (open ready-to-record) Create from Template → pick your “Vocal Starter” (Lead, Doubles L/R, Harmonies, Ad-libs, Slap/Plate). Set the Lead input, arm, and you’re rolling—the buses are already patched. 4) Plug-in presets (surgical swaps) On the vocal track, load stock AAX tools (EQ3 7-Band, Dyn3 Comp/Lim, Dyn3 De-Esser, Mod Delay III, D-Verb/Space) or your third-party favorites. Save device presets that work; later, bundle them into a Track Preset for one-click recall. IV. Calibrate the signal (why your preset suddenly works) Preamp, then inserts: set the interface so unprocessed peaks land between −12 and −8 dBFS. Clip Gain first aid: tame shouty words and lift whispers before compression (±2–3 dB usually does it). Add short fades so edits are invisible. Compressor A sweet-spot: aim for roughly 3–5 dB gain reduction on phrases (2:1–3:1, 10–30 ms attack, 80–160 ms release). Heavy constant squeeze makes de-essing harder. After the chain: keep post-FX peaks around −6 to −3 dBFS. Loudness is a mastering decision, not a tracking one. Fair comparisons: add a Trim/Gain at the end of the chain so A/B tests aren’t won by “louder.” V. Five moves that shape 90% of a vocal Sibilance: set the de-esser band near 6–8 kHz; dial just enough that earbuds relax but consonants still read. Low-mid weight: add a touch at 120–200 Hz if the singer feels thin; if booth bloom shows up, shave 250–350 Hz instead. Presence lane: a wide, tiny lift around 3–4 kHz only when words hide. If cymbals are already bright, carve the beat rather than forcing the vocal. Air: small shelf at 10–12 kHz after sibilance is under control. Space: slapback around 90–120 ms and a short plate (0.7–1.0 s, 20–50 ms pre-delay). Keep verses drier; let choruses bloom. VI. One singer, many lanes: keep each job on its own rails Lead: mono-solid and stable in the center; width lives elsewhere. Ride phrases so the story never dips. Doubles L/R: higher high-pass than the Lead, slightly stronger de-ess, tucked 6–9 dB under; micro-pan left/right; avoid chorus wideners that collapse in mono. Harmonies: darker than doubles and spread wider; if they disappear, a tiny 5 kHz polish is enough. Ad-libs: narrowed bandwidth (HPF ~200 Hz, LPF 8–10 kHz), panned off-center, with short throws on transitions. Save a Track Preset per role (Lead — Clean, Double — Tight, Harmony — Wide, Ad-Lib — Phone) so recall is instant and consistent. VII. Ambience the modern way: two auxes, lots of control Create Aux A = Slap (Mod Delay III) and Aux B = Plate (D-Verb or Space). Filter both returns with EQ: HPF ~150 Hz, LPF ~6–7 kHz so tails never hiss on small speakers. Add a compressor on the Slap aux keyed from the Lead (fast attack/release, about 1–2 dB gain reduction). Echo appears in the gaps instead of stacking on words. Write simple send rides: +1–2 dB in hooks, pull back in dense verses. VIII. Stock toolkit that travels anywhere EQ3 7-Band (first): high-pass 80–100 Hz; gentle, wide cut at 250–350 Hz if boxy; tiny notch near 1 kHz only if needed. Dyn3 Comp/Lim (Comp A): 2:1–3:1, 10–30 ms attack, 80–160 ms release; kiss 3–5 dB on phrases. Dyn3 or Avid De-Esser: focus around 6–8 kHz; use ears, not meters. Dyn3 Comp/Lim (Comp B): faster “catcher” for 1–2 dB on peaks; stabilizes send level. Color (taste): AIR Lo-Fi or Distortion at very low mix for density; match output so “louder” doesn’t trick you. EQ3 (polish): broad +0.5–1 dB near 3–4 kHz if diction still hides; small air shelf last. Wrap the above as a Track Preset labeled clearly—Lead — Stock Clean (PT)—and spin lighter/heavier variants for different songs. IX. Evaluate presets quickly without fooling yourself Loop a 10–20 s section with soft words and loud ones. Keep a Trim/Gain at the end for level-match; flip Track Presets or plug-in stacks. Pick what translates on earbuds and a phone, not just the brightest option in the control room. X. If the beat is a single stereo file (tight hats, big subs) Let the vocal borrow space: on the instrumental bus, tie a gentle 2–4 kHz dip to a sidechained compressor keyed by the vocal—only 1–2 dB while the singer speaks. Top-end comfort: keep the Lead’s air move modest; low-pass the effects returns if cymbals already sizzle. Mono sanity check: collapse monitors briefly; the lyric should remain intelligible on a phone speaker. XI. Edit first, mix less: comping & Clip Gain Playlists: build a clean composite that favors diction and emotion. Pre-shape dynamics: quick Clip Gain nudges (±1–2 dB) smooth the ride so compressors do less heavy lifting. Breaths: reduce obvious gasps; keep the natural ones—they mark phrasing. XII. What to print (and when) Record dry while monitoring wet. Capture the clean Lead; if someone needs the “demo vibe,” route the Lead to a PRINT track and record a wet safety as well (Lead_Wet). Freeze or Commit heavy effects close to the finish line, and keep an _FXPRINT track for recall. XIII. Small automation, big payoff Level rides: +0.5–1 dB into downbeats; tiny dips on tongue-twisters. De-esser threshold: slightly tighter for bright syllables, looser for dark phrases. FX choreography: push Slap/Plate in the chorus; pull back for dense verses; keep returns filtered. XIV. Keep your library tidy (future-you will thank you) Names that sort: Lead — Clean, Lead — Air+, Rap — Punch, Harmony — Wide, Ad-Lib — Phone. One preset per lane: Lead/Doubles/Harmonies each get a dedicated Track Preset so you don’t over-de-ess stacks or brighten the center by accident. Session Template: keep a “Vocal Starter (PT)” with lanes and Slap/Plate auxes; start every song from it. XV. Troubleshooting: targeted fixes Air adds harshness: back off the shelf ~0.5 dB, lift the de-esser slightly, and low-pass the returns around 6–7 kHz. Vocal buried by 808: dry the sends in verses, add a hair of presence, and automate a subtle mid dip on the beat during lines. Clicks/crackles: increase buffer for mixing; disable look-ahead/heavy analyzers until bounce; close background apps. Preset sounds different on bounce: check quality/oversampling toggles, avoid master clipping, and bounce at the session rate. Chain feels flat on your mic: reduce low-mid cuts, ease the de-ess, and try a tiny 150–180 Hz lift for chest without mud. A/B bias: use the final Trim/Gain so loudness doesn’t decide the winner. XVI. One-page game plan Recall a Track Preset and calibrate input so raw peaks sit at −12 to −8 dBFS; Comp A glides at ~3–5 dB GR. Shape sibilance → body → presence → air with small, wide moves; keep FX tasteful in verses. Send to Slap/Plate auxes, filter returns, and sidechain-duck the Slap from the Lead. Store role-specific Track Presets (Lead, Doubles, Harmonies, Ad-libs) and use a session template. Print clean, keep headroom, and leave loudness for mastering. Used with intention, presets are a laser-cut shortcut—not a crutch. Keep headroom generous, make restrained moves, automate the few moments that matter, and the vocal will sit forward without grit or glare. When you want chains built for this exact ecosystem, start with the Pro Tools templates and lock in your own best-fit versions for repeatable results.
Learn more
How to Use Vocal Presets in Mixcraft
In Mixcraft, a “vocal preset” is a reusable effects chain—EQ, compression, de-essing, tone color, delay, and reverb—that you can load on a track in one move. This guide shows how to pick and load the right preset, set healthy gain, shape tone, route sends, automate scenes, and save role-based versions for lead, doubles, harmonies, and ad-libs. Want a quick head start? I. What a “vocal preset” is in Mixcraft Mixcraft supports several preset containers that make vocal chains easy to load and reuse: Effects Chain preset — a saved insert stack (order + settings) you can apply to any audio track. Track Template — an audio track saved with its chain, routing, color, and sends (e.g., Slap/Plate). Great when you want a full lane in one click. Project Template — a starter session with lanes (Lead, Doubles, Harmonies, Ad-libs) and Send tracks already set up. Using a preset is more than loading it—you’ll adapt input level, de-ess, presence, air, and FX balance to your voice and song. II. Pre-flight (so presets behave) Pre-flight checklist Audio device & buffer: select your interface; 64–128 samples to track, raise later for mixing. Session rate: 44.1 kHz for music (48 kHz if delivering to video). Input target: sing at performance volume; aim raw peaks around −12 to −8 dBFS before any FX. Track layout: start with one audio track named Lead Vox plus two Send tracks (A = Slap, B = Plate). Pop filter & distance: 10–20 cm from mic; keep stance consistent to stabilize tone. III. Load a vocal preset (four reliable routes) 1) Effects Chain preset (fastest) Select your Lead Vox track → open the FX window. Load an Effects Chain from the preset menu (or drag it from the Browser onto the FX area). Confirm the order: EQ → Comp A → De-Ess → (Color/Sat) → Comp B (catcher) → Utility. Immediately save your working copy with a clear name (e.g., Lead — Clean (YourName)). 2) Track Template (lane + sends in one move) Right-click in the track list → Insert Track From Template → choose your vocal template. Set the track input to your mic channel; arm and monitor. 3) Project Template (start ready every time) File → New Project → pick your “Vocal Starter” template (Lead/Doubles/Harmonies/Ad-libs + Slap/Plate sends). Set inputs and record; everything else is pre-wired. 4) Drag-drop from Browser Keep a _Presets/Vocals folder in the Browser; drag a chain onto the track when needed. IV. Gain staging: make or break Mic pre first: set the interface so unprocessed peaks hit −12 to −8 dBFS. Trim into Comp A: use the chain’s input/trim to hit ~3–5 dB gain reduction on phrases (ratio 2:1–3:1; attack 10–30 ms; release 80–160 ms). Don’t slam 10–12 dB constantly. After the rack: keep track peaks around −6 to −3 dBFS; loudness happens later in mastering. Level-match A/B: add a final trim/utility so preset comparisons aren’t biased by “louder wins.” V. Five controls you’ll touch on every song De-Ess (6–8 kHz): turn until earbuds stop complaining; stop before consonants blur. Body (120–200 Hz): add warmth if thin; if the booth sounds “boxy,” reduce 250–350 Hz instead. Presence (3–4 kHz): tiny, wide lift only if diction hides. If hats/claps are bright, carve the beat rather than boosting the voice. Air (10–12 kHz): micro shelf only after sibilance is calm. FX balance: slapback 90–120 ms and short plate 0.7–1.0 s (20–50 ms pre-delay). Verses drier; hooks open. VI. Lead vs. stacks: build a “family,” not clones Lead: mono-true center; minimal widening; automate volume to keep the story forward. Doubles L/R: higher HPF than Lead; a touch more de-ess; tuck −6 to −9 dB under; micro-pan left/right; avoid chorus wideners that collapse in mono. Harmonies: darker EQ; wider than doubles; optional +0.5–1 dB near 5 kHz for shimmer only if needed. Ad-libs: narrow bandwidth (HPF ~200 Hz, LPF ~8–10 kHz), side-panned, short throws on transitions. Save one preset per role—Lead — Clean, Double — Tight, Harmony — Wide, Ad-Lib — Phone—so recall is instant and consistent. VII. Time & space: Send tracks do the heavy lifting Create two Send tracks: A = Slap and B = Plate. Color them for quick spotting. On track A, add a short delay (≈90–110 ms), filter 150 Hz–6 kHz, low feedback. On track B, add a bright plate (0.7–1.0 s) with 20–50 ms pre-delay; HPF/LPF the return. Duck the Slap: place a compressor on A, sidechain from the Lead; fast attack/release so echoes bloom in the gaps. Automate sends: +1–2 dB into hooks; lower in dense verses; keep returns filtered for phone translation. VIII. Stock “safe chain” (rebuildable anywhere) EQ (first): HPF 80–100 Hz; wide −1 to −2 dB at 250–350 Hz if boxy; tight notch near 1 kHz if nasal. Compressor A (shape): ratio 2:1–3:1; attack 10–30 ms; release 80–160 ms; ~3–5 dB GR on phrases. De-Esser: center ~6–8 kHz; reduce until S/T/SH are comfortable on earbuds. Compressor B (catcher): faster 1–2 dB GR to stabilize sends and peaks. Color (optional): light saturation/tape; output matched so “louder” doesn’t fool you. EQ (polish): +0.5–1 dB broad at 3–4 kHz only if diction hides; tiny air shelf last. Delay & Reverb (sends): slap on A; plate on B; filter returns. Wrap it as an Effects Chain; save as Lead — Stock Clean (MX) and branch lighter/heavier versions per song. IX. Fast audition (without fooling your ears) Loop a 10–20 s phrase that includes quiet and loud words. Keep a final trim at the end of the chain; level-match before judging. Toggle chain presets; choose what translates on earbuds/phone, not just the brightest option. X. Two-track beat survival (bright hats, heavy subs) Carve, don’t fight: if the instrumental is a stereo file, cut small overlaps instead of “more bright” on vocals. A gentle dip around 2–4 kHz on the beat during vocal lines (via automation) lets consonants pop. Splash control: keep the Lead’s Air conservative; LPF returns ~6–7 kHz if hats are icy. Mono check: temporary mono on the master; the story should still land on a phone speaker. XI. Tracking vs. mixing: what to print Record dry, hear wet: monitor through the preset on the track but print a clean take. If a collaborator needs “demo vibe,” route Lead to a PRINT track and record a wet safety (Lead_Wet). Commit late: Freeze or render heavy FX near the end; keep an _FXPRINT audio track for recall. XII. Automation that sells the line (micro, not macro) Volume rides: +0.5–1 dB into downbeats; −0.5 dB on tongue-twisters. De-ess threshold: slightly tighter on bright syllables; looser on dark phrases. FX choreography: lift Slap/Plate into hooks; lower in verses; keep tails filtered. XIII. Organization & recall (minutes now, hours later) Names that sort: Lead — Clean, Lead — Air+, Rap — Punch, Harmony — Wide, Ad-Lib — Phone. One per role: separate chains for Lead/Doubles/Harmonies prevent over-de-essing stacks or over-brightening the center. Template: keep a “Starter — Vocals (Mixcraft)” project with lanes and two Send tracks. Duplicate for each new song. XIV. Troubleshooting (problem → focused move) Harsh S’s after adding Air: raise de-ess slightly; reduce Air by ~0.5 dB; LPF returns to ~6–7 kHz. Vocal sinks under 808: keep verses drier; add a tiny Presence lift; reduce delay feedback; consider a small 2–4 kHz dip on the beat during lines. Preset sounds different at export: check plug-in quality/latency modes; avoid master clipping; render at session rate. Clicks or crackles: raise buffer for mixing; disable heavy oversampling until render; close background apps. Chain feels “dead” on your mic: ease de-ess; reduce low-mid cuts; a tiny 150–180 Hz lift can restore chest without mud. Levels jump in A/B tests: match outputs with a final trim; louder wins the ear unfairly. XV. Quick action plan (copyable) Load an Effects Chain or Track Template; set input so raw peaks land −12 to −8 dBFS; Comp A kisses 3–5 dB. De-Ess to “soft-bright,” add tiny Presence only if diction hides; keep Air conservative. Route Slap/Plate on Send tracks; filter returns; duck Slap from the Lead; automate sends into hooks. Save role-based versions (Lead, Doubles, Harmonies, Ad-libs); keep a project template. Render roughs with headroom; keep the master unclipped; leave loudness for mastering. Used well, vocal presets are reliable shortcuts—not crutches. Keep headroom healthy, make small moves, automate what matters, and your voice will sit forward without harshness—song after song. When you want to start from chains already tuned for modern pop, rap, and R&B , explore vocal presets and lock in your own “best-fit” versions for fast, consistent sessions.
Learn more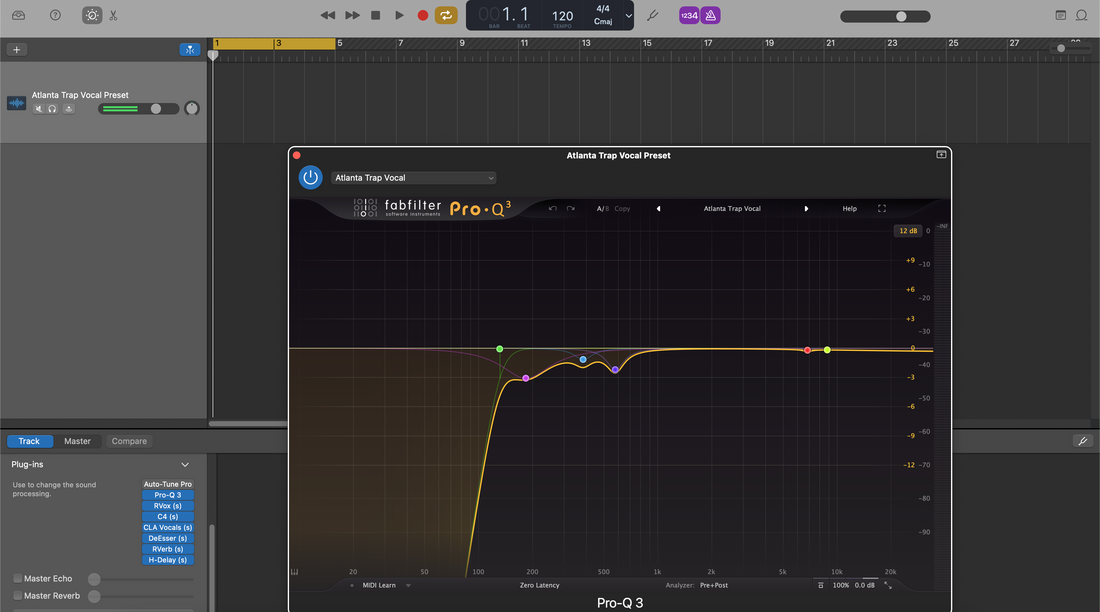
How to use Vocal Presets in GarageBand: Complete Guide
In GarageBand, a vocal preset is a saved Patch that loads EQ, compression, de-essing, tone color, and space in one move. This guide shows how to load and customize patches, set healthy gain, route echo/reverb like sends, automate scenes, and save role-based versions for lead, doubles, harmonies, and ad-libs—so your vocals translate on phones, earbuds, and big speakers. I. What a “vocal preset” is in GarageBand GarageBand organizes sounds as Patches. A vocal patch is simply your track’s FX chain (Channel EQ, Compressor, DeEsser, Noise Gate, Modulation, Delay, Reverb, plus AU plug-ins when enabled) saved for instant recall under User Patches. Using a preset is more than loading it—you’ll adapt gain, de-ess, presence, Air, and FX balance to your voice and song. II. Pre-flight (so the preset behaves) Pre-flight checklist Device/latency: Preferences → Audio/MIDI → pick your interface; use a smaller buffer while tracking and raise it later for mixing. Enable Audio Units (Mac): Preferences → Audio/MIDI → check Enable Audio Units if your preset uses AU plug-ins. Session rate: 44.1 kHz for music (48 kHz if delivering to video). Input level: sing at performance volume; aim raw peaks around −12 to −8 dBFS before any FX. Track layout: one Lead Vox audio track to start; keep the beat quieter while dialing tone. III. Load a preset (three reliable routes) 1) From User Patches (fastest) Create/select an Audio track → press Y to open the Library. Choose User Patches → Audio → pick your vocal patch. Record-arm and speak. The chain (EQ → Comp → DeEsser → FX) is live. 2) Promote a “starter project” chain to a User Patch Open a .band starter with a tuned vocal track (or a vendor demo session). Select the vocal track → in the Library pane, click Save (bottom) → name it clearly, e.g., Lead — Clean Pop (GB). It now lives in User Patches for all projects. 3) AU plug-in presets → then save a Patch Load AU plug-ins (e.g., a favorite compressor or de-esser) on the track. Choose each plug-in’s preset from its internal menu; tweak lightly. Click Save in the Library to store the whole chain as a User Patch. Where are patches on disk? GarageBand shares Logic’s user library: ~/Music/Audio Music Apps/Patches/Audio/. Any patch there appears under User Patches. IV. Gain staging: the make-or-break step Presets assume healthy headroom. Keep it simple: Mic pre first: set your interface so unprocessed peaks land −12 to −8 dBFS. Compressor A target: in the preset, aim ~3–5 dB gain reduction on phrases (ratio 2:1–3:1; attack 10–30 ms; release 80–160 ms). Don’t slam 10–12 dB constantly. After the rack: track peaks near −6 to −3 dBFS; leave loudness for mastering. Level-match when A/B’ing: match output trims before choosing between patches—louder wins unfairly. V. Smart Controls: the “channel strip” knobs Smart Controls map the important bits so you don’t open every plug-in window. Typical roles: De-Ess (6–8 kHz): turn until earbuds stop complaining; stop before consonants blur. Body (120–200 Hz): add warmth if thin; if booth “box” appears, subtract 250–350 Hz instead. Presence (3–4 kHz): tiny, wide boost only if diction hides. If hats are bright, carve the beat rather than over-boosting the voice. Air (10–12 kHz): micro shelf only after sibilance is calm. Echo & Reverb: these act like sends to the Master Echo/Reverb; keep verses drier and open the chorus. VI. Build a “family,” not clones (Lead, Doubles, Harmonies, Ad-libs) Copying one patch to every lane blurs the mix. Use role-tuned versions: Lead: mono-solid center; minimal wideners; volume rides keep the story forward. Doubles L/R: higher HPF than the lead; a touch more de-ess; tuck −6 to −9 dB under; micro-pan L/R; avoid chorus wideners that collapse in mono. Harmonies: darker than doubles; wider; optional +0.5–1 dB at 5 kHz for shimmer if needed. Ad-libs: narrow bandwidth (HPF ~200 Hz, LPF 8–10 kHz), side-panned, short throw echoes on transitions. Save each as its own User Patch: Lead — Clean, Double — Tight, Harmony — Wide, Ad-Lib — Phone. VII. Time & space: echo/reverb like sends GarageBand’s Library patches often use Master Echo and Master Reverb. Treat the track’s Echo/Reverb knobs as send levels: Master FX set-up: pick a bright short plate for Master Reverb and a slap or 1/8 delay for Master Echo; filter returns inside their plug-ins (HPF ~150 Hz, LPF ~6–7 kHz). Track FX alternative: prefer per-track Echo/Verb plug-ins when you want unique spaces. Keep mix amounts low—translation > “big.” Automate sends: boost Echo/Reverb 1–2 dB into hooks; lower them for tongue-twisters. VIII. Stock “safe chain” (rebuildable anywhere) Channel EQ (first): HPF 80–100 Hz; wide −1 to −2 dB at 250–350 Hz if boxy; tight notch near 1 kHz if nasal. Compressor A (shape): ratio 2:1–3:1; attack 10–30 ms; release 80–160 ms; target ~3–5 dB on phrases. DeEsser: center ~6–8 kHz; reduce until S/T/SH are comfortable on earbuds. Compressor B (catcher): faster 1–2 dB GR to stabilize send levels and peaks. Color (optional): subtle tube/analog stage for density; output matched so “louder” doesn’t fool you. Channel EQ (polish): +0.5–1 dB broad at 3–4 kHz only if diction hides; tiny air shelf last. Delay & Reverb: slapback 90–110 ms; bright short plate 0.7–1.0 s; filter returns to avoid hiss. Save as Lead — Stock Clean (GB), then create lighter/heavier variants per song. IX. iOS workflow (iPhone/iPad) On mobile, GarageBand lacks a central User Patch browser like Mac. Use a starter song with your favored chain: Create a song with your tuned vocal track (and FX choices) and name it “Starter — Vocals (iOS)”. For each new project, Duplicate the starter in My Songs and record. Optional: use AUv3 plug-ins where helpful; tweak Smart Controls lightly and re-save the starter if the new settings translate better. Tip: Track with a leaner chain if latency grows. Add polish after takes are in. X. Two-track beat survival (bright hats, heavy subs) When the instrumental is a stereo file, reduce collisions instead of “more bright” on the voice: Splash control: keep the Air shelf conservative; low-pass Echo/Reverb returns ~6–7 kHz if hats are icy. Sub coexistence: if syllables vanish under 808 tails, keep verses drier and prefer a small Presence lift over heavy compression. Mono check: your lead should survive on a phone speaker; put width into doubles and returns, not the center insert. XI. Automation that sells the line (micro, not macro) Volume rides: +0.5–1 dB into downbeats; −0.5 dB in dense consonants. De-ess threshold: write a slightly tighter value on bright phrases; loosen on dark passages. FX choreography: lift Echo/Plate into hooks; pull back in verses; keep tails filtered for clarity. XII. Fast audition of multiple patches Bookmark 2–4 favorites in User Patches and name them clearly (e.g., Lead — Clean, Lead — Air+, Lead — Warm). Level-match with a final gain stage before judging; “louder wins” is a trap. Delete patches you never use—fewer choices = faster work. XIII. Troubleshooting (problem → focused move) Harsh S’s after adding Air: raise DeEsser slightly; reduce Air by ~0.5 dB; low-pass returns to ~6–7 kHz. Vocal sinks under 808: keep verses drier; add a tiny Presence lift; reduce delay feedback; check that you didn’t stack two reverbs. Preset sounds different at export: verify plug-in quality/latency modes; keep the master unclipped; render at the session rate. Latency while tracking: shorten reverbs; bypass heavy analyzers; lower buffer; enable direct monitoring on your interface if available. Patch feels “dead” on your mic: ease the de-ess; reduce low-mid cuts; a tiny 150–180 Hz lift can restore chest without mud. Mobile vs. Mac mismatch: confirm input gain and headphone volume; avoid enabling system-level processing on iOS. XIV. Organization & recall (minutes now, hours saved later) Names that sort: Lead — Clean, Lead — Air+, Rap — Punch, Harmony — Wide, Ad-Lib — Phone. One per role: separate patches for Lead/Doubles/Harmonies prevent over-de-essing stacks or over-brightening the center. Backups: copy ~/Music/Audio Music Apps/Patches/ to cloud/external storage so rigs travel with you. XV. FAQ (quick answers) Where should pitch correction go?First or near the top (after any input trim) so downstream compression and de-ess see a stable signal. One compressor or two?Two is smoother: Comp A shapes phrases (3–5 dB GR); Comp B catches peaks (1–2 dB GR). It beats one heavy compressor. How loud should the vocal be while mixing?Keep post-FX peaks around −6 to −3 dBFS; leave true-peak safety and loudness for mastering. Do I need the mic mentioned in a preset?No. Presets are starting points. Adapt Trim, De-Ess, Body, Presence, and FX to your voice and microphone. XVI. Quick action plan (copyable) Load a User Patch; set input so raw peaks land −12 to −8 dBFS; Comp A kisses 3–5 dB. De-Ess to “soft-bright,” add tiny Presence only if diction hides; keep Air conservative. Treat Echo/Reverb like sends; filter returns; automate them up in the hook. Save role-based patches (Lead, Doubles, Harmonies, Ad-libs) and keep a Mac/iOS starter. Render roughs with headroom; keep the master unclipped; leave loudness for mastering. Used well, vocal presets are reliable shortcuts—not crutches. Keep headroom healthy, make small moves, automate what matters, and your voice will sit forward without harshness—song after song. If you want to start from patches already tuned for modern pop, rap, and R&B inside GarageBand, grab the curated GarageBand vocal presets and lock in your own “best-fit” versions for fast, consistent sessions.
Learn more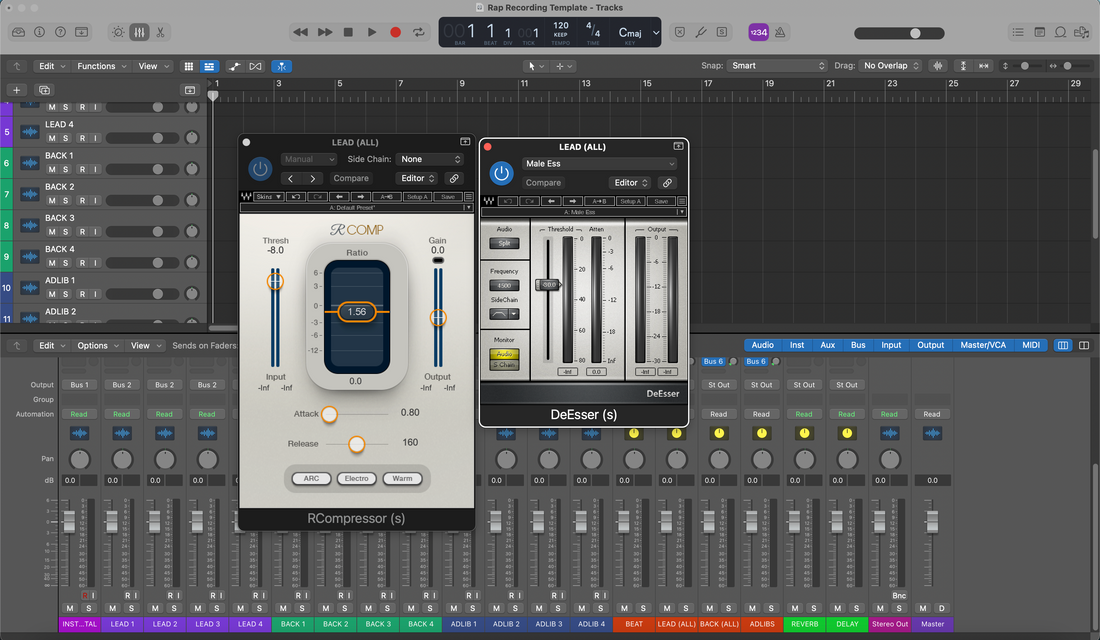
Use Vocal Presets in Logic Pro: Comprehensive Guide
In Logic Pro, a “vocal preset” is a reusable channel chain—EQ, compression, de-essing, tone color, delay, and reverb—that you can load in one move. This guide shows how to pick and load the right preset, set healthy gain, shape tone with Smart Controls, route sends, automate scenes, and save role-based versions for lead, doubles, harmonies, and ad-libs. I. What a vocal preset is in Logic Pro Logic uses a few interchangeable formats for “presets” on audio tracks: Channel Strip Setting (.cst) — recalls the entire insert chain, order, and I/O for a single audio track. Patch — a Library entry that can include Channel Strip + Smart Controls + routing and MIDI FX for instruments (for audio vocals, it behaves like a smarter .cst). Track Stack — a Summing or Folder Stack that groups lanes (Lead, Doubles, Harmonies) with shared FX returns. Using a preset is more than loading it—you will still adapt input level, de-ess, presence, air, and FX balance to your voice and song. II. Pre-flight (so presets behave) Pre-flight checklist Audio device & buffer: smaller buffer (64–128) while tracking; raise later for mixing. Session rate: 44.1 kHz for music (48 kHz if delivering to video). Input target: sing at performance level; aim raw peaks around −12 to −8 dBFS before any processing. Track layout: start with one audio track named Lead Vox and two auxes for Delay (Slap) and Reverb (Plate). Smart Help: toggle Quick Help (⌘⇧?) if you’re learning devices; it speeds up tweaks. III. Load a vocal preset (four reliable routes) 1) Library Patch (fastest) Select your audio track → open the Library (Y). Navigate to Patches > Audio > Voice or User Patches and pick a vocal patch. Record-arm and talk; the chain (EQ → Comp → De-Ess → FX) is live. Save your version in the Library sidebar when you like it. 2) Channel Strip Setting (.cst) On the channel strip, click the Setting slot at the very top. Choose a factory/user .cst from the menu, or click Load Channel Strip Setting…. Immediately Save Channel Strip Setting As… (e.g., Lead — Clean (YourName)) so tweaks don’t overwrite the original. 3) Track Stack template (complete vocal rig) Select Lead, Doubles, and Harmony tracks → Create Track Stack… → Summing. Insert shared FX (Slap/Plate) on the Stack aux, or keep them on dedicated auxes fed by all lanes. Save as a Patch or Project Template for one-click recall next time. 4) Drag-drop from Finder Drag a .cst or Patch from ~/Music/Audio Music Apps/Channel Strip Settings/Audio/ or ~/Music/Audio Music Apps/Patches/Audio/ onto the track header. IV. Gain staging: the make-or-break step Mic pre first: set the interface so unprocessed peaks land −12 to −8 dBFS. Trim into Comp A: use the Input slot or a Gain/Utility plug-in first in chain so Comp A “kisses” ~3–5 dB on phrases (ratio 2:1–3:1; attack 10–30 ms; release 80–160 ms). After the rack: keep track peaks around −6 to −3 dBFS; loudness comes later in mastering. Level-match A/B: place a Gain at the end of the chain so comparing presets isn’t biased by “louder wins.” V. Smart Controls: one panel, the right knobs Patches expose key parameters as Smart Controls—a fast “channel strip” view so you don’t open five plug-ins. Typical roles: De-Ess (6–8 kHz): turn until earbuds stop complaining; stop before consonants blur. Body (120–200 Hz): add warmth if thin; if the booth sounds “boxy,” subtract 250–350 Hz instead. Presence (3–4 kHz): tiny, wide lift only if diction hides. If hats/claps are bright, carve the beat rather than boosting the voice. Air (10–12 kHz): micro shelf only after sibilance is calm. FX blend: Slap ~90–120 ms and Plate 0.7–1.0 s with 20–50 ms pre-delay; verses drier, hooks open. VI. Lead vs. stacks: build a “family,” not clones Lead: mono-true center; minimal widening; automate volume to keep the story forward. Doubles L/R: higher HPF than Lead; a touch more de-ess; tuck −6 to −9 dB under; micro-pan L/R; avoid chorus wideners that collapse in mono. Harmonies: darker EQ; wider than doubles; optional +0.5–1 dB at 5 kHz for shimmer only if needed. Ad-libs: narrow bandwidth (HPF ~200 Hz, LPF 8–10 kHz), side-panned, short throw echoes at transitions. Save one Patch or Channel Strip per role (Lead — Clean, Double — Tight, Harmony — Wide) so recall is instant and consistent. VII. Time & space: aux sends do the heavy lifting Create Aux A = Slap: Tape Delay (or Echo) at 90–110 ms; HPF 150 Hz; LPF ~6 kHz; low feedback. Create Aux B = Plate: ChromaVerb/Space Designer short plate 0.7–1.0 s; pre-delay 20–50 ms; filter the return. Ducking trick: Compressor on Aux A keyed from Lead so echoes bloom in the gaps (fast attack/release; −1 to −2 dB GR). Send automation: +1–2 dB into hooks; lower in dense verses; keep tails filtered for clarity on earbuds. VIII. A safe stock-only chain (rebuildable anywhere) Channel EQ (first): HPF 80–100 Hz; wide −1 to −2 dB at 250–350 Hz if boxy; tight notch near 1 kHz if nasal. Compressor A (shape): Logic Compressor (Platinum or Studio VCA) ratio 2:1–3:1; attack 10–30 ms; release 80–160 ms; ~3–5 dB GR on phrases. DeEsser 2: target ~6–8 kHz; reduce until S/T/SH are comfortable on earbuds. Compressor B (catcher): faster, 1–2 dB GR on peaks; stabilizes send levels. Color (optional): Soft Saturation or Tape (Phat FX/Tape Delay saturation path) at low mix; output matched. Channel EQ (polish): +0.5–1 dB broad at 3–4 kHz only if diction hides; tiny 10–12 kHz shelf last. Wrap it as a Channel Strip Setting; add Smart Controls for Trim/De-Ess/Body/Presence/Air/FX; save as Lead — Stock Clean (LP). IX. Fast audition (without fooling your ears) Loop a 10–20 s phrase that includes quiet and loud words. Keep a Gain at the end for level-match; swap patches from the Library or Setting menu. Choose what translates on earbuds/phone, not just the brightest option. X. Two-track beat survival (bright hats, heavy subs) Carve, don’t fight: on the instrumental bus, try a dynamic mid dip at 2–4 kHz keyed by the vocal (Multipressor/EQ with sidechain) so consonants pop only while the voice speaks. Splash control: keep the Lead’s Air conservative; LPF returns ~6–7 kHz if hats are icy. Mono check: temporarily sum to mono in the Master or Control Room; the story should still land on a phone speaker. XI. Tracking vs. mixing: what to print Record dry, hear wet: monitor through the preset but record the clean input on the Lead track. If a collaborator needs the “demo vibe,” bus Lead to a PRINT track and record a wet safety (Lead_Wet). Commit late: Freeze/Track Stack render near the end; keep an “_FXPRINT” audio track for recall. XII. Automation that sells the line (micro, not macro) Volume rides: +0.5–1 dB into downbeats; −0.5 dB on tongue-twisters. De-ess threshold: slightly tighter on bright syllables; looser on dark phrases. FX choreography: lift Slap/Plate into hooks; lower in verses; keep tails filtered. XIII. Organization & recall (minutes now, hours later) Names that sort: Lead — Clean, Lead — Air+, Rap — Punch, Harmony — Wide, Ad-Lib — Phone. One per role: separate Channel Strips for Lead/Doubles/Harmonies prevent over-de-essing stacks or over-brightening the center lane. Backups: patches/channels live under ~/Music/Audio Music Apps/; zip this folder for cloud backup so rigs travel with you. XIV. Troubleshooting (problem → focused move) Harsh S’s after adding Air: raise DeEsser 2 slightly; reduce Air by ~0.5 dB; LPF returns to ~6–7 kHz. Vocal sinks under 808: keep verses drier; add a tiny Presence lift; use a subtle mid dip on the beat bus keyed by the vocal. Preset sounds different at bounce: check oversampling/quality modes; avoid master clipping; bounce at session rate. Latency while tracking: shorten verbs; bypass analyzers/look-ahead processors; lower buffer; use direct monitoring if your interface supports it. Patch feels “dead” on your mic: ease de-ess; reduce low-mid cuts; a tiny 150–180 Hz lift can restore chest without mud. Levels jump in A/B tests: match with a final Gain; louder wins the ear unfairly. XV. Learn more (next best step) When you’re ready to hand off sessions or prep for mixing elsewhere, keep files consistent. This walkthrough on how to export stems from Logic Pro shows names, starts, and tails that open cleanly anywhere. XVI. Quick action plan (copyable) Load a Patch or Channel Strip; set input so raw peaks land −12 to −8 dBFS; Comp A kisses 3–5 dB. De-Ess to “soft-bright,” add tiny Presence only if diction hides; keep Air conservative. Route Slap/Plate on auxes; filter returns; duck Slap from the Lead; automate sends into the hook. Save role-based versions (Lead, Doubles, Harmonies) as Patches or Channel Strips; build a Track Stack or template. Bounce roughs with headroom; keep the master unclipped; leave loudness for mastering. Used well, vocal presets are reliable shortcuts—not crutches. Keep headroom healthy, make small moves, automate what matters, and your voice will sit forward without harshness—song after song. For a quick springboard that already follows these rules, try the purpose-built Logic Pro vocal presets and lock in your own “best-fit” versions for fast, consistent sessions.
Learn more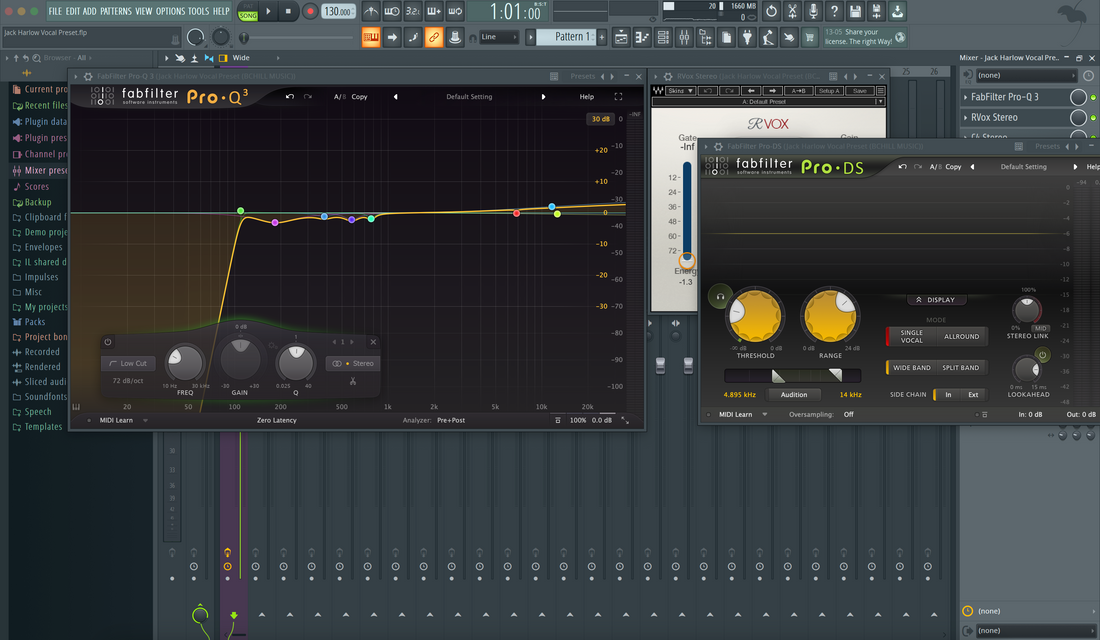
Use Vocal Presets in FL Studio: Comprehensive Guide
In FL Studio, a “vocal preset” is a reusable Mixer chain—EQ, compression, de-essing, color, and space—that you can drop on a track in one move. This guide shows how to load presets, set healthy gain, adapt tone to your mic, route sends, automate scenes, and save lane-specific versions for lead, doubles, harmonies, and ad-libs. If you want proven starting points that already follow these practices, explore purpose-built FL Studio vocal presets and then fine-tune thresholds and sends to your voice. I. What a vocal preset is in FL Studio FL Studio supports several preset “containers” that make vocal chains easy to load and reuse: Mixer Track State (.fst) — saves the entire insert: plugin order, settings, and mixer parameters for one track. Patcher preset — wraps your whole chain in a single device, with macro controls for quick tweaks. Individual plugin presets — EQ/Comp/Delay/Reverb settings you can mix-and-match inside a chain. Using a preset is more than loading it. You’ll adapt gain, de-ess, presence, FX balance, and bus routing to the song and the voice. The steps below keep that adaptation fast and predictable. II. Pre-flight (so the preset behaves) Pre-flight checklist Audio device set; buffer 64–128 samples for tracking (raise later for mixing). Project rate: 44.1 kHz for music (48 kHz if delivering to video). Create a Mixer track named Lead Vox; set its fader at 0 dB (unity). Sing at real performance volume and aim raw input peaks around −12 to −8 dBFS before any FX. Use a pop filter; keep the mic distance consistent (10–20 cm) to stabilize tone. III. Where presets live (and quick ways to load them) Drop a Mixer State: drag a .fst file from the Browser onto your target Mixer insert (or right-click the insert → File icon → Open state…). Load Patcher: insert Patcher in Slot 1 → click the preset name at the top → choose your saved rack. Save for reuse: Mixer insert menu (arrow) → Save mixer track state as… (name it clearly, e.g., Lead — Clean (FL)). For Patcher, click the disk icon → save under Effects so it appears in the Browser. Pro tip: Keep a “_Presets/Vocals” folder in the Browser. Drag your favorite Mixer states or Patcher racks there for one-drag recall. IV. Fast audition (without fooling your ears) Loop a 10–20 s phrase with both quiet and loud words. Level-match before judging: add a final Fruity Balance at the end of the chain and match outputs so “louder” doesn’t win unfairly. Toggle presets and listen on earbuds and small speakers. Choose the one that translates, not just the brightest one. V. Gain staging: the make-or-break step Presets assume healthy headroom. Keep it simple: Trim first: add Fruity Balance in Slot 1 (pre-processing) or use the track’s Pre Gain knob (in newer FL builds). Set it so Comp A “kisses” 3–5 dB GR on phrases, not constant 10–12 dB. Unity discipline: leave the Mixer fader near 0 dB while you shape dynamics; adjust chain gain inside the preset. After the rack: peaks around −6 to −3 dBFS are plenty. Leave loudness for mastering. VI. A reliable stock chain (you can build this in minutes) Fruity Parametric EQ 2 (first): HPF 80–100 Hz; wide −1 to −2 dB at 250–350 Hz if boxy; optional tight notch near 1 kHz if nasal. Fruity Compressor (Comp A, shape): ratio 2:1–3:1; attack 10–30 ms; release 80–160 ms; aim ~3–5 dB on phrases so consonants breathe. De-Esser (two stock options): Maximus as de-esser: solo the High band, set threshold for gentle GR on S’s (6–8 kHz), then unsolo; keep output unity. Fruity Limiter in COMP mode: sidechain a narrow EQ band (see Section XI for Peak Controller method) or use a high-shelf into gentle compression. Fruity Limiter (Comp B, catcher): very fast attack to catch 1–2 dB peaks only; ceiling high (not limiting), just stabilizing sends. Saturation (optional): Fruity Blood Overdrive at very low preamp/mix or Fruity Waveshaper with a gentle curve; match output so “louder” doesn’t fool you. Fruity Parametric EQ 2 (polish): +0.5–1 dB broad at 3–4 kHz only if diction hides; tiny 10–12 kHz shelf last, after de-ess. Wrap the chain in Patcher if you want one-device recall and macro knobs for Trim/De-Ess/Body/Presence/Air/FX. VII. Lead vs. stacks: build a “family,” not clones Lead: mono-solid center; minimal wideners; ride volume to keep the story forward. Doubles (L/R): higher HPF than lead; a touch more de-ess; tuck −6 to −9 dB under; micro-pan left/right; avoid chorus wideners that collapse in mono. Harmonies: darker EQ; wider than doubles; optional +0.5–1 dB at 5 kHz for shimmer if needed. Ad-libs: narrow bandwidth (HPF ~200 Hz, LPF ~8–10 kHz); side-panned; short throw echoes on transitions. Save one preset per role—Lead — Clean, Double — Tight, Harmony — Wide—so recall is instant and consistent. VIII. Time & space: set up FX sends once Create two Mixer tracks: FX A = Slap and FX B = Plate. Color them. Route Lead to A and B (right-click the little routing arrow at the bottom of the Lead track → Route to this track only for groups, or keep Master routing plus sends). Fruity Delay 3 on FX A: time ~90–110 ms; HP/LP filter the feedback path ~150 Hz–6 kHz; low feedback. Fruity Reeverb 2 (or Fruity Convolver) on FX B: 0.7–1.0 s decay; pre-delay 20–50 ms; HP/LP the return. Duck the Slap: put Fruity Limiter in COMP mode on FX A; sidechain from Lead; fast attack/release so echoes bloom between syllables. Automate send levels: +1–2 dB into the hook, lower in dense verses. Filter returns so tails never add hiss on earbuds. IX. Patcher macros (turn a chain into a “channel strip”) Insert Patcher in Slot 1; drag your devices inside on the Map tab. Add a Control Surface; create knobs labeled Trim, De-Ess, Body, Presence, Air, FX. Link each knob to the key parameter (right-click parameter → Link to controller… → pick the Control Surface control). Save the Patcher preset (disk icon) so the whole strip is one device next time. Patcher keeps your lane tidy and makes laptop sessions faster—no opening 6 windows to tweak 6 parameters. X. Fast audition of multiple presets Drop several Mixer states in the Browser under _Presets/Vocals. Keep a final Fruity Balance in Slot 10 to match output while A/B’ing. Drag a state onto the insert, speak 5 seconds, decide, undo (Ctrl+Z), try the next. Save your top 2–3; delete clutter. XI. Two-track beat survival (bright hats, heavy subs) If the instrumental is a stereo file, create space rather than “more bright” on the vocal. Presence dip (dynamic): Place Fruity Parametric EQ 2 on the beat buss with a gentle bell at ~3 kHz. Add Fruity Peak Controller on the Lead. Link the EQ band’s gain to the Peak Controller (inverted). Now the beat dips 1–2 dB only while the voice speaks. Splash control: keep the vocal’s Air conservative; low-pass your returns ~6–7 kHz if hats are icy. Mono check: briefly toggle mono on the Master; the story should still land on a phone. XII. Tracking vs. mixing: what to print Record dry, hear wet: monitor through the preset on the insert, but arm disk recording on the track so the raw take is captured. If a collaborator needs the “demo vibe,” route the Lead to a PRINT track and record a wet safety too (Lead_Wet). Commit late: Freeze or render heavy FX near the end; keep an _FXPRINT version for recall. XIII. Troubleshooting (problem → focused move) Harsh S’s after adding Air: raise de-ess slightly; reduce the Air shelf ~0.5 dB; filter returns to ~6–7 kHz. Vocal sinks under 808: keep verses drier; add a tiny Presence lift; use the Peak Controller duck on the beat at 2–4 kHz. Clicks or crackles: raise buffer while mixing; disable HQ/oversampling until render; close background apps. Preset sounds different on export: confirm oversampling/quality modes and linear-phase toggles; avoid clip-gain boosts on the Master. Latency while tracking: bypass long verbs and look-ahead processors; use direct monitoring if your interface supports it. Levels jump when A/B’ing: keep a final Trim (Fruity Balance) for level-match; louder wins unfairly. XIV. Organization & recall (minutes today, hours saved later) Names that sort: Lead — Clean, Lead — Air+, Rap — Punch, Harmony — Wide, Ad-Lib — Phone. Color code lanes: lead one color, stacks another, returns a third; navigation gets faster instantly. Template project: keep a “Starter — Vocals (FL)” with lanes and two FX tracks (Slap/Plate). Duplicate for each new song. XV. FAQ (quick answers) Where should pitch correction go?First or near the top (after Trim), so downstream compression and de-essing see a stable signal. One compressor or two?Two is smoother: Comp A shapes phrases (3–5 dB GR); Comp B catches peaks (1–2 dB). It sounds more natural than one heavy compressor. How loud should the vocal be while mixing?Post-FX peaks around −6 to −3 dBFS. Leave true-peak safety and loudness for mastering. Do I need the exact mic a preset mentions?No. Presets are starting points. Adapt Trim, De-Ess, Body, Presence, and FX to your voice and microphone. XVI. Learn more (next best step) If you need additional steps for setting up your session, you can also learn how to install fl studio vocal presets XVII. Quick action plan (copyable) Load a Mixer state or Patcher rack; set Trim so Comp A kisses 3–5 dB. De-Ess to “soft-bright,” not dull; add tiny Presence only if diction hides. Route Slap/Plate sends; filter returns; duck Slap from the Lead. Save lane-specific presets (Lead, Doubles, Harmonies); color-code lanes. Render roughs with headroom; keep Master unclipped. Used well, vocal presets are reliable shortcuts—not crutches. Keep headroom healthy, make small moves, automate what matters, and your voice will sit forward without harshness—song after song. When you want to start from racks tuned for modern rap, pop, and R&B inside this DAW, grab the curated FL Studio vocal presets and FL Studio recording template and lock in your own “best-fit” versions for fast, consistent sessions.
Learn more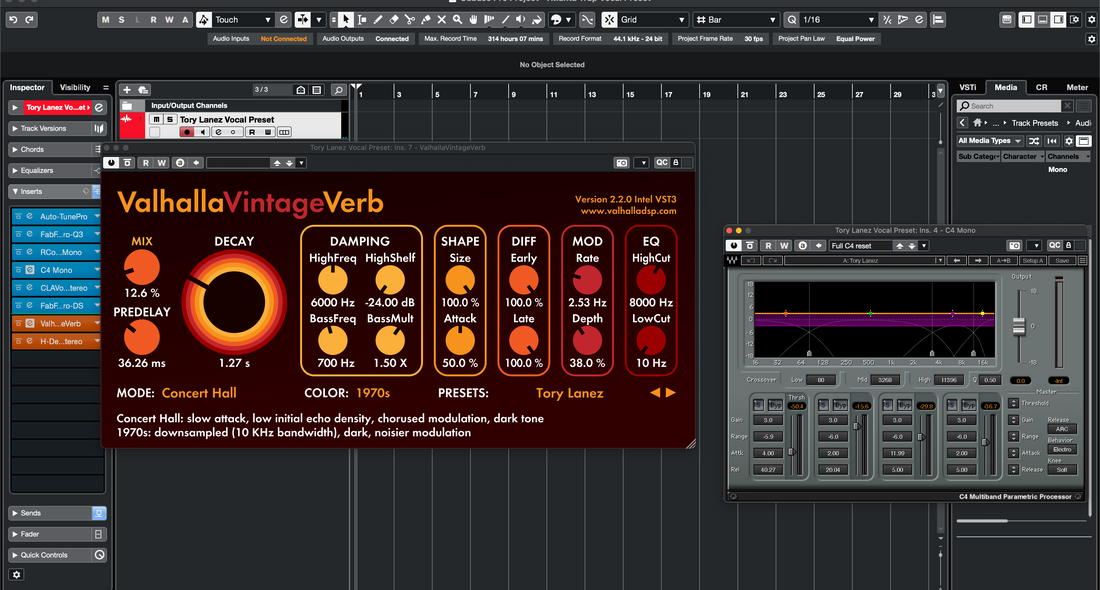
How to Use Vocal Presets in Cubase: A Guide
Vocal presets in Cubase are Track/FX/Strip presets you can load in one move to apply EQ, compression, de-essing, color, and space. This guide shows how to choose the right preset, set healthy gain, map Quick Controls, route FX channels, automate scenes, and save lane-specific versions—so your vocals translate on phones, earbuds, and big speakers. If you want proven starting points tuned for this DAW, audition curated Cubase vocal presets and then fine-tune thresholds and sends to your mic and room. I. What a “vocal preset” is in Cubase In Cubase, “vocal preset” usually means one or more of the following assets: Track Preset (.vstpreset) — recalls inserts, Channel Strip/EQ, and selected routing on a track. FX Chain preset (.vstpreset) — just the insert stack (order + settings) you can apply to any track. Channel Strip/EQ preset — stock strip + EQ only; great for low-CPU, stock-only workflows. Track Archive (.xml) — imports a prewired rig (Lead, Doubles, Harmonies, FX channels) into the current project. Project Template — opens a new session with your lanes, groups, and FX channels ready. Using a preset means adapting gain, de-ess, presence, and FX balance to your voice, not just loading it. The steps below make that adaptation fast and repeatable. II. Pre-flight (so the preset behaves) Pre-flight checklist Driver & latency: ASIO on Windows / Core Audio on macOS; 64–128 samples to track; raise later for mixing. Session rate: 44.1 kHz for music (48 kHz for video delivery). Input peak target: sing at performance volume; aim raw input around −12 to −8 dBFS before processing. Control Room (optional): enable if you want separate cue mixes and talkback. MediaBay open: press F5; you’ll use it to browse, tag, and recall presets quickly. III. Load methods (and when to use them) 1) Track Preset (fastest, full chain) Create/select an audio track named Lead Vox. In the Inspector, click Load Track Preset and choose your vocal preset. Confirm the order: EQ → Comp A → De-Ess → (Color/Sat) → Comp B (catcher) plus your sends. Immediately Save Track Preset under Lead — Clean (YourName) so tweaks don’t overwrite the original. Use when you want a complete lane in one click. 2) FX Chain preset (surgical swap) On your vocal track, open the Insert rack menu. Choose Load FX Chain Preset and select the chain. Tweak, then re-save with your name for fast recall. Use when you already have routing/sends and just want to change tone/dynamics. 3) Track Archive (.xml) (full rig import) File → Import → Track Archive… and pick the .xml. Select which tracks to import (Lead, Doubles L/R, Harmonies, FX: Slap/Plate). Set your mic input on the Lead and record. Use when you want the entire vocal system dropped into your current project. 4) Project Template (start ready) From the Hub, create a project using your vocal template. Tracks, groups, and FX channels are preconfigured; just set input and go. Use when you want every new song to open “studio-ready.” IV. Gain staging: make or break Mic pre first: adjust the interface so raw peaks land around −12 to −8 dBFS. Trim into Comp A: use any Input/Trim stage to hit ~3–5 dB gain reduction on phrases (not constantly slamming). After the chain: keep track peaks around −6 to −3 dBFS; leave mastering for later. Level-match while A/B’ing: add a final Trim to compare fairly; louder often seems “better.” V. Quick Controls = fast hands-on Map the most-touched parameters to Track Quick Controls once and save with the preset: QC1 = Trim/Input QC2 = De-Ess amount QC3 = Body (low shelf) QC4 = Presence (wide bell) QC5 = Air (high shelf) QC6 = Comp A threshold QC7 = Slap send level QC8 = Plate send level Now you can ride tone and space from the Inspector/MixConsole without opening plug-ins—great on a laptop or controller. VI. Lead vs. stacks: build a “family,” not clones Lead: mono-solid center; minimal wideners; automate volume to keep the story forward. Doubles L/R: higher HPF, a touch more de-ess, tucked −6 to −9 dB under; micro-pan left/right; avoid chorus wideners that collapse in mono. Harmonies: darker EQ than Lead, wider than doubles; optional +0.5–1 dB around 5 kHz for shimmer only if needed. Ad-libs: narrow bandwidth (HPF ~200 Hz, LPF ~8–10 kHz), side-panned, short throw echoes at transitions. Save one preset per role—Lead — Clean, Double — Tight, Harmony — Wide—so recall is instant and consistent. VII. Time & space (FX channels do the heavy lifting) Create FX Channel A = Slap: Mono/StereoDelay at ~90–110 ms; HPF 150 Hz, LPF 6 kHz; low feedback. Create FX Channel B = Plate: REVelation or a plate plug-in at 0.7–1.0 s; pre-delay 20–50 ms; filter returns. Send automation: +1–2 dB into the hook; lower in dense verses; keep returns filtered to avoid hiss. Duck the Slap: insert a Compressor on the Slap FX channel; sidechain from Lead; fast attack/release so echoes bloom between syllables. VIII. Two-track beats (bright hats, heavy subs) Carve, don’t fight: on the instrumental buss, a gentle sidechained mid dip (2–4 kHz) during vocal lines lets consonants pop without thinning the beat. Sub coexistence: if words vanish under 808 tails, keep verses drier and add a small Presence lift instead of heavy compression. Mono check: hit the Control Room mono button; if the story survives on a phone, your choices translate. IX. Stock-only “starter chain” (rebuildable anywhere) Channel EQ (first): HPF 80–100 Hz; wide −1 to −2 dB at 250–350 Hz if boxy; optional tight notch near 1 kHz if nasal. Channel Strip → Compressor A: ratio 2:1–3:1; attack 10–30 ms; release 80–160 ms; ~3–5 dB GR on phrases. Channel Strip → De-Esser: target 6–8 kHz; reduce until earbuds relax; avoid dulling consonants. Channel Strip → Compressor B (catcher): faster, 1–2 dB on peaks; stabilizes sends. Magneto II (optional): light saturation for density; output matched so “louder” doesn’t fool you. Channel EQ (polish): +0.5–1 dB broad around 3–4 kHz only if diction hides; tiny Air shelf last. Wrap this as a Track Preset and map Quick Controls (Trim/De-Ess/Body/Presence/Air/Comp/Slap/Plate). Save under Lead — Stock Clean. X. Audition presets quickly (without losing your place) MediaBay Favorites: add your vendor folder as a Favorite; star your top 3; fewer choices = faster work. Level-match A/B: keep a Trim at the end of the chain; toggle presets while holding output steady. MixConsole Snapshots: capture a few states (Clean, Air+, Warm) for rapid comparisons. XI. Recording vs. mixing: what to print Record dry, hear wet: monitor through the preset but record the clean input. If a collaborator needs a “demo vibe,” route Lead to a print group and record a Lead_Wet track. Keep names clear (Lead_Dry, Lead_Wet). Commit late: Freeze heavy FX or render stems near the end; keep a “_FXPRINT” track for recall. XII. Automation that sells the line (micro, not macro) Volume rides: +0.5–1 dB into downbeats; −0.5 dB for tongue-twisters. De-ess threshold: write a slightly tighter value on bright phrases, looser on dark ones. Send rides: push Slap/Plate into the hook; pull back in dense verses; leave tails filtered. XIII. Organization & recall (minutes today, hours saved later) Names that sort: Lead — Clean, Lead — Air+, Rap — Punch, Harmony — Wide, Ad-Lib — Phone. One per role: separate presets for Lead/Doubles/Harmonies prevent over-de-essing stacks or over-brightening the center. MediaBay tags: tag by Use (Lead/Rap/R&B), Vibe (Clean/Airy/Warm), and Mic (SM7B/NT1, etc.). Template: keep a project template with lanes + FX channels; start every song from it. XIV. Troubleshooting (problem → focused move) Harsh S’s after adding Air: raise De-Ess slightly; reduce Air by ~0.5 dB; low-pass FX returns to ~6–7 kHz. Vocal sinks under 808: keep verses drier; lift Presence a hair; add a subtle mid dip on the instrumental during lines. Preset sounds different at export: check quality/oversampling switches and master buss; avoid clipping; keep Control Room settings consistent. Latency while tracking: lower buffer; bypass long verbs; use Control Room cue for direct monitoring if your interface supports it. Macros (QCs) don’t move anything: re-map parameters to QCs and re-save the Track Preset so assignments travel. Levels jump in A/B tests: level-match with a final Trim; louder wins the ear unfairly. XV. Capture matters (your preset will thank you) Presets shine with consistent capture: stable mic distance, pop filter, treated corner, and sensible monitoring. XVI. Fast FAQ Where should pitch correction go?First or near the top (after any input trim) so downstream compression/De-Ess see a stable signal. One compressor or two?Two is smoother: Comp A shapes phrases (3–5 dB GR); Comp B catches peaks (1–2 dB GR). How loud should vocals be while mixing?Keep post-FX peaks around −6 to −3 dBFS; leave true-peak safety and overall loudness for mastering. Do I need the mic mentioned in a preset?No. Presets are starting points. Adapt Trim, De-Ess, Body, Presence, and FX to your voice/microphone. XVII. Quick action plan (copyable) Load a Track/FX preset; set Trim so Comp A kisses 3–5 dB on phrases. De-Ess to “soft-bright,” not dull; add tiny Presence only if diction hides. Route Slap/Plate FX channels; filter returns; automate sends into the hook. Map Quick Controls (Trim/De-Ess/Body/Presence/Air/Comp/Slap/Plate) and save your version. Build role-based presets (Lead, Doubles, Harmonies); start future songs from a template. Used well, vocal presets are reliable shortcuts—not crutches. Keep headroom healthy, make small moves, automate what matters, and your voice will sit forward without harshness—song after song. If you want to start from racks that already follow these rules, try the purpose-built Cubase recording template and lock in your own “best-fit” versions for fast, consistent sessions.
Learn more